2019年11月27日水曜日

v6.1.0 がリリースされました

v6.1.1 がリリースされました
日本時間で(2019.11.4)に v6.1.1 がリリースされました。

Releases 6.1.1 - openlayers/openlayers GitHub
(https://github.com/openlayers/openlayers/releases/tag/v6.1.1)より

6.1.1

Hot on the heels of the 6.x release, this patch release includes a few fixes for existing functionality. There should be nothing special needed to upgrade an application from 6.x to 6.1.1. See the 6.0.0 release notes for details on upgrading from an older version.

6.x リリースのすぐ後に、このパッチリリースは現在の機能のいくつかの修正を含んでいます。6.xから 6.1.1 へアプリケーションを更新するために必要とされるものは特にありません。以前のバージョンからの更新についての詳細は、6.0.0 リリースノートを参照してください。


v6.1.0 がリリースされました
日本時間で(2019.10.29)に v6.1.0 がリリースされました。

Releases 6.1.0 - openlayers/openlayers GitHub
(https://github.com/openlayers/openlayers/releases/tag/v6.1.0)より

6.1.0

With 47 pull requests, this release keeps up the momentum of the v6.x effort and brings several bug fixes, performance improvements and new features. In addition to that, we added some missing documentation to our API docs and gave them some usability improvements.

47 のプルリクエストともに、このリリースは v6.x 効果の推進力を維持し、いくつかのバグフィックスとパフォーマンスの向上、新しい機能をもたらします。それに加え、いくつかの欠落したドキュメントを API docs に追加し、それらにいくつかの利便性の向上を与えました。


□ New features

● A new, performance optimized hit detection API on the layer level, Layer#getFeatures(pixel) has been introduced. At this point it is implemented for vector, vector tile and image vector layers, and is recommended when performance is critical, e.g. for hit detection on mouseover.

新しい Layer#getFeatures(pixel)、レイヤレベル上のパフォーマンスが最高に発揮される hit detection API、が導入されました。この点で、ベクタとベクタタイル、イメージベクタに実行され、パフォーマンスが重要なとき、例えばマウスオーバに関する hit detection、に推奨されます。

● For the WebGLPoints layer, we made several additions to the style expressions system. This includes a case operator, support for array and string types, and type checking.

WebGLPoints レイヤのために、いくつかの追加をスタイルエクスプレッションシステムにしました。ケースオペレータ、配列および文字タイプのサポート、タイプチェックを含みます。

(List of all changes も参照して下さい)

v6.0.0 がリリースされました

v6.0.1 がリリースされました
日本時間で(2019.10.2)に v6.0.1 がリリースされました。

Releases 6.0.1 - openlayers/openlayers GitHub
(https://github.com/openlayers/openlayers/releases/tag/v6.0.1)より

6.0.1

Hot on the heels of the 6.0 release, this patch release includes a few fixes for existing functionality. There should be nothing special needed to upgrade an application from 6.0.0 to 6.0.1. See the 6.0.0 release notes for details on upgrading from an older version.

6.0 リリースのすぐ後に、このパッチリリースは現在の機能のいくつかの修正を含んでいます。6.0.0 から 6.0.1 へアプリケーションを更新するために必要とされるものは特にありません。以前のバージョンからの更新についての詳細は、6.0.0 リリースノートを参照してください。


v6.0.0 がリリースされました
日本時間で(2019.9.27)に v6.0.0 がリリースされました。

Releases 6.0.0 - openlayers/openlayers GitHub
(https://github.com/openlayers/openlayers/releases/tag/v6.0.0)より

6.0.0

Wow. The 6.0 release includes changes from 1780 commits in 544 pull requests since the 5.3 release. Thanks to all who contributed to this effort.

ワォ。6.0 リリースは、5.3 リリース以来の 544 のプルリクエストの 1780 コミットからの変更を含んでいます。この尽力に貢献された全てに感謝します。

A major feature in this release is the ability to compose layers with different renderer types. Previously, the map used a single rendering strategy, and all layers in your map had to implement that strategy. Now it is possible to have a map with layers that use different rendering technologies. This makes it possible, for example, to have Canvas (2D) layer composed together with a WebGL based layer in the same map. It is also possible to create layers with custom renderers. So you could have a map that uses another library (like d3) to render one layer and use OpenLayers to render the other layers. We will continue to take advantage of this new flexibility in future releases.

このリリースの主な機能は異なるレンダラタイプでレイヤを構成する性能です。以前は、マップはシングルレンダリングストラテジを使用し、マップのすべてのレイヤはそのストラテジを実行しなければなりませんでした。現在、異なるレンダリング技術を使用するレイヤのマップを持つことが可能です。これは、例えば、同じマップに WebGL ベースのレイヤと一緒に構成された Canvas (2D) レイヤを持つことを可能にします。同じように、カスタムレンダラとともにレイヤを作成することが可能です。一つのレイヤを描画するためにもう一つのライブラリ(d3)を使い、他のレイヤを描画するために OpenLayers を使うマップを持つことができるでしょう。今後のリリースでこの新しい柔軟性を利用し続けます。

In addition, the 6.0 release includes a number of vector tile rendering improvements and should have a lower memory footprint overall. The release also includes a number of experimental features that are not yet part of the stable API. Take a look through the examples for a new WebGL based renderer and the experimental useGeographic() function. Watch upcoming releases for more detail on these.

加えて、6.0 release は数多くのベクタタイルレンダリングの改善を含み、全体的に少ないメモリの負荷を持つはずです。このリリースは、未だに安定していない API の一部である多くの実験的な機能も含んでいます。新しい
WebGL ベースのレンダラと実験的な  useGeographic() 関数の例を通して見てください。これらについて更に詳しいことは今後のリリースに注目してください。

This release includes a number of backwards incompatible changes. Take a careful look at the notes below when upgrading your application from the 5.3 release.

このリリースは過去に逆上った互換性のない変更を多く含んでいます。アプリケーションを 5.3 リリースからアップグレードするときは、下記の注釈に注視してください。


■Backwards incompatible changes
過去に逆上った互換性のない変更

□Usage of map.forEachLayerAtPixel
map.forEachLayerAtPixel の使い方

Due to performance considerations, the layers in a map will sometimes be rendered into one
single canvas instead of separate elements.
This means map.forEachLayerAtPixel will bring up false positives.

パフォーマンスの検討によって、マップ中のレイヤは別々のエレメントに換えて単一のキャンバスに時々描画されます。これは map.forEachLayerAtPixel が false を有効にすることを意味します。

The easiest solution to avoid that is to assign different className properties to each layer like so:

それを避ける最も簡単な解決策は、それぞれのレイヤに異なる className プロパティをこのように割り当てることです。
new Layer({
   // ...
   className: 'my-layer'
})
Please note that this may incur a significant performance loss when dealing with many layers and/or
targetting mobile devices.

これは、多くのレイヤと対象のモバイルデバイスまたはそのどちらかを処理するときに、重要なパフォーマンス低減を生じることに注意してください。


□Removal of TOUCH constant from ol/has
ol/has からの TOUCH コンスタントの削除

If you were previously using this constant, you can check if 'ontouchstart' is defined in window instead.

以前、このコンスタントを使っていたなら、代わりに window に 'ontouchstart' が定義されているか確認します。
if ('ontouchstart' in window) {
  // ...
}

□Removal of GEOLOCATION constant from ol/has
ol/has からの GEOLOCATION コンスタントの削除

If you were previously using this constant, you can check if 'geolocation' is defined in navigator instead.
以前、このコンスタントを使っていたなら、代わりに navigator に 'geolocation' が定義されているか確認します。
if ('geolocation' in navigator) {
  // ...
}

□Removal of CSS print rules
CSS プリントルール の削除

The CSS media print rules were removed from the ol.css file. To get the previous behavior, use the following CSS:
CSS メディアプリントルールは ol.css ファイルから削除されました。以前の動作を得るには、次の CSS を使ってください:
@media print {
  .ol-control {
    display: none;
  }
}

□Removal of optional this arguments
オプショナル this 引数を削除

The optional this (i.e. opt_this) arguments were removed from the following methods.
Please use closures, the es6 arrow function or the bind method to achieve this effect (Bind is explained here:
https://developer.mozilla.org/en-US/docs/Web/JavaScript/Reference/Global_Objects/Function/bind).

オプショナル this 引数(例えば opt_this)が次のメソッドから削除されました。クロージャやアロー関数、この効果を達成するための bind メソッドで使ってください。(Bind はここに説明があります:https://developer.mozilla.org/en-US/docs/Web/JavaScript/Reference/Global_Objects/Function/bind)

● forEachCorner in ol/extent
● LRUCache#forEach
● RBush#forEach and RBush#forEachInExtent


□The setCenter, setZoom, setResolution and setRotation methods on ol/View do not bypass constraints anymore
ol/View の setCenter、setZoom、setResolution、setRotation メソッドは、もはや、制約をバイパスしません

Previously, these methods allowed setting values that were inconsistent with the given view constraints.
This is no longer the case and all changes to the view state now follow the same logic:
target values are provided and constraints are applied on these to determine the actual values to be used.

以前、これらのメソッドは、与えられた view の制約(訳注:ol6 API ol/View 「The constraints」参照)と一致しない値を設定することを許可しました。
これは事実ではなく、全ては、現在、同じ論理に従う view の状態(訳注:ol6 API ol/View 「The view states」参照)に変更します:
ターゲット値が提供され、制約は、これらについて、使用される実際の値を決定するために適用されます。


□Removal of the constrainResolution option on View.fit, PinchZoom, MouseWheelZoom and ol/interaction.js
View.fit、PinchZoom、MouseWheelZoom、ol/interaction.js の constrainResolution オプションの削除

The constrainResolution option is now only supported by the View class. A View.setConstrainResolution method was added as well.

constrainResolution オプションは、現在、View クラスによってのみサポートされます。その上、View.setConstrainResolution メソッドが追加されました。

Generally, the responsibility of applying center/rotation/resolutions constraints was moved from interactions and controls to the View class.

一般的に、center/rotation/resolutions 制約を提供する責務は、インタラクションとコントロールから View クラスに移行されました。


□The view extent option now applies to the whole viewport
view extent オプションは、現在、すべての viewport に適用します

Previously, this options only constrained the view center. This behaviour can still be obtained by specifying constrainCenterOnly in the view options.

以前、このオプションは view center だけ制約していました。この動作は view オプションの constrainCenterOnly を指定することによって、まだ、得られます。

As a side effect, the view rotate method is gone and has been replaced with adjustRotation which takes a delta as input.

副影響として、view rotate メソッドはなくなり、入力されるデータとしてデルタを受け取る adjustRotation に置き換えられました。


□The view is constrained so only one world is visible
view は一つだけ世界(地図)が表示するように制約されます。

Previously, maps showed multiple worlds at low zoom levels. In addition, it used to be possible to pan off the north or south edge of the world. Now, the view is restricted to show only one world, and you cannot pan off the edge. To get the previous behavior, configure the ol/View with multiWorld: true.

以前、マップは低いズームレベルで複数の世界が(並んで)表示されました。加えて、北または南の縁を離れてパンすることができました。現在、view は一つだけ世界地図を表示するように制限され、縁を離れてパンできません。以前の動作を得るために、ol/View を multiWorld: true に設定します。


□Removal of deprecated methods
非推奨メソッドの削除

The inherits function that was used to inherit the prototype methods from one constructor into another has been removed.
The standard ECMAScript classes should be used instead.

あるコンストラクタからもう一つのものへ prototype メソッドを継承するために使用される inherits 関数は、削除されました。
代わりに、標準 ECMAScript クラスを使用します。

The deprecated getSnapToPixel and setSnapToPixel functions from the ImageStyle class have been removed.

ImageStyle クラスから非推奨 getSnapToPixel と setSnapToPixel が削除されました。


□New internal tile coordinates
新しい内部タイル座標

Previously, the internal tile coordinates used in the library had an unusual row order – the origin of the tile coordinate system was at the top left as expected, but the rows increased upwards. This meant that all tile coordinates within a tile grid's extent had negative y values.

以前、ライブラリで使用されていた内部タイル座標は、一般的でない行順でした - タイル座標システムの原点は予想通り左上にありましたが、行は上方向に増加しました。これは、タイルグリッドの範囲のすべてのタイル座標がマイナスのy値を取ることを意味します。

Now, the internal tile coordinates used in the library have the same row order as standard (e.g. XYZ) tile coordinates. The origin is at the top left (as before), and rows or y values increase downward. So the top left tile of a tile grid is now 0, 0, whereas it was 0, -1 before.

現在、ライブラリで使用されている内部タイル座標は、標準(例えば、XYZ)タイル座標と同じ行順を持っています。原点は(以前と同様に)左上で、行、または、y値は下に向かって増加します。以前は、0, 1 だったタイルグリッドの左上は、現在、0, 0 です。

x, y values for tile coordinates
タイル座標の x, y 値
origin
  *__________________________
  |        |        |        |
  |  0, 0  |  1, 0  |  2, 0  |
  |________|________|________|
  |        |        |        |
  |  0, 1  |  1, 1  |  2, 1  |
  |________|________|________|
  |        |        |        |
  |  0, 2  |  1, 2  |  2, 2  |
  |________|________|________|
This change should only affect you if you were using a custom tileLoadFunction or tileUrlFunction. For example, if you used to have a tileUrlFunction that looked like this:

この変更は、カスタムの tileLoadFunction または tileUrlFunction を使う場合にだけ影響を与えます。例えば、このように tileUrlFunction を用いていたなら:
// before
function tileUrlFunction(tileCoord) {
  const z = tileCoord[0];
  const x = tileCoord[1];
  const y = -tileCoord[2] - 1;
  // do something with z, x, y
}
You would now do something like this:
現在、この様なものにします
// after
function tileUrlFunction(tileCoord) {
  const z = tileCoord[0];
  const x = tileCoord[1];
  const y = tileCoord[2];
  // do something with z, x, y
}
In addition (this should be exceedingly rare), if you previously created a ol/tilegrid/WMTS by hand and you were providing an array of sizes, you no longer have to provide a negative height if your tile origin is the top-left corner (the common case). On the other hand, if you are providing a custom array of sizes and your origin is the bottom of the grid (this is uncommon), your height values must now be negative.

加えて(これはきわめてまれですが)、以前、独自に ol/tilegrid/WMTS を作成して配列サイズを提供していた場合、タイルの原点が(一般の場合の)左上ならマイナスの高さを提供する必要はありません。一方で、カスタムの配列サイズを提供していて原点がグリッドの底(これは一般的でない)の場合、現在、高さの値はマイナスでなければなりません。


□Removal of the "vector" render mode for vector tile layers
ベクタタイルレイヤの "vector" レンダモードの削除

If you were previously using VectorTile layers with renderMode: 'vector', you have to remove this configuration option. That mode was removed. 'hybrid' (default) and 'image' are still available.

以前、VectorTile レイヤを renderMode: 'vector' で使っていた場合、この設定オプションを削除しなければなりません。そのモードは削除されました。'hybrid'(初期値)と 'image' はまだ有効です。


□Removal of the "renderMode" option for vector layers
ベクタレイヤの "renderMode" オプションの削除

If you were previously using Vector layers with renderMode: 'image', you have to remove this configuration option. Instead, use the new ol/layer/VectorImage layer with your ol/source/Vector.

以前、Vector レイヤを renderMode: 'image' で使っていた場合、この設定オプションを削除しなければなりません。代わりに、 ol/source/Vectorと一緒に new ol/layer/VectorImage レイヤを使います。


□New declutter behavior
新しい declutter 動作

If a map has more than one layer with declutter set to true, decluttering now considers all Vector and VectorTile layers, instead of decluttering each layer separately. Only VectorImage layers continue to be decluttered separately. The higher the z-index of a layer, the higher the priority of its decluttered items.

マップに declutter 設定が true のレイヤが一つ以上ある場合、デクラッタ(整頓)は、以前、それぞれのレイヤを個別にデクラッタする換わりに、現在、すべての Vector と VectorTile レイヤを考慮しています。VectorImage レイヤだけが個別にデクラッタされています。レイヤの z-index が高くなると、そのデクラッタ項目のプライオリティが高くなります。

Within a layer, the declutter order has changed. Previously, styles with a lower zIndex were prioritized over those with a higher zIndex. Now the opposite order is used.

レイヤで、デクラッタ順は変わります。以前、低い zIndex の style は高い zIndex を持つものを超えるプライオリティがありました。現在、反対の順序が使用されます。

On vector layers, even if decluttered images or texts have a lower z-Index than polygons or lines, they will now be rendered on top of the polygons or lines. For vector tile layers, this was the case already in previous releases.

ベクタレイヤについて、デクラッタされたイメージとテキストがポリゴン、または、ラインより低い z-Index を持つ場合、現在、ポリゴン、または、ラインの上に描画されます。ベクタタイルレイヤでは、これは以前のリリースですでにこうなっています。


□New prerender and postrender layer events replace old precompose, render and postcompose events
新しい prerender および postrender レイヤイベントは古い precompose および render、postcompose と置き換えます

If you were previously registering for precompose and postcompose events, you should now register for prerender and postrender events on layers. Instead of the previous render event, you should now listen for postrender. Layers are no longer composed to a single Canvas element. Instead, they are added to the map viewport as individual elements.

以前、precompose および postcompose イベントを登録した場合、現在、レイヤの prerender および postrender イベントを登録すべきです。以前の render イベントの換わりに、現在、postrender をリッスンすべきです。レイヤは単一の Canvas エレメントにもう構成されません。代わりに、それらは個別のエレメントとして map の viewport に追加します。


□New getVectorContext function provides access to the immediate vector rendering API
getVectorContext 関数は直近の ベクタレンダリング API の利用を提供します

Previously, render events included a vectorContext property that allowed you to render features or geometries directly to the map. This is still possible, but you now have to explicitly create a vector context with the getVectorContext function. This change makes the immediate rendering API an explicit dependency if your application uses it. If you don't use this API, your application bundle will not include the vector rendering modules (as it did before).

以前、render イベントは、直接マップにフィーチャ(事物)、または、ジオメトリ(幾何学的形状)を描画することを許可する vectorContext プロパティを含んでいます。これはまだ可能ですが、現在、getVectorContext 関数を使用してベクタコンテキストを明示的に作成しなければなりません。この変更は、アプリケーションが使用している場合、直近のレンダリング API を明示的な依存関係にします。この API を使わない場合、アプリケーションのバンドルは(以前と同じように)ベクタレンダリングモジュールを含みません。

Here is an abbreviated example of how to use the getVectorContext function:
これは getVectorContext 関数の使い方の簡易な例です:
import {getVectorContext} from 'ol/render';

// construct your map and layers as usual

layer.on('postrender', function(event) {
  const vectorContext = getVectorContext(event);
  // use any of the drawing methods on the vector context
});

□Layers can only be added to a single map
レイヤは1つのマップにだけ追加されます

Previously, it was possible to render a single layer in two maps. Now, each layer can only belong to a single map (in the same way that a single DOM element can only have one parent).

以前、2つのマップに1つのレイヤを描画することが可能でした。現在、各レイヤは(1つの DOM エレメントが1つの親だけ持てるのと同じ方法で)1つのマップにだけ所属することができます。


□The OverviewMap requires a list of layers.
OverviewMap はレイヤのリストが必要です

Due to the constraint above (layers can only be added to a single map), the overview map needs to be constructed with a list of layers.

上記(レイヤは1つのマップにだけ追加される)の制約に従って、オーバビューマップはレイヤのリストとともに構築される必要があります。


□The ol/Graticule has been replaced by ol/layer/Graticule
ol/Graticule は ol/layer/Graticule によって置き換えられました

Previously, a graticule was not a layer. Now it is. See the graticule example for details on how to add a graticule layer to your map.

以前、経緯度線網(graticule)はレイヤではありませんでした。現在、そうです。マップに経緯度線網レイヤを追加する方法の詳細は graticule example を参照してください。


□ol/format/Feature API change
ol/format/Feature API の変更

The getLastExtent() method, which was required for custom tileLoadFunctions in ol/source/Vector, has been removed because it is no longer needed (see below).

getLastExtent() メソッドは、ol/source/Vector のカスタムの tileLoadFunctions に必要とされましたが、もはや必要とされないので削除されました(下記参照)。


□ol/VectorTile API changes
ol/VectorTile API の変更

● Removal of the getProjection() and setProjection() methods. These were used in custom tileLoadFunctions on ol/source/VectorTile, which work differently now (see below).

getProjection() と setProjection() メソッドの削除。これらは ol/source/VectorTile のカスタムの tileLoadFunctions に使用され、現在動作は困難です(下記参照)。

● Removal of the getExtent() and setExtent() methods. These were used in custom tileLoadFunctions on ol/source/VectorTile, which work differently now (see below).

getExtent() と setExtent() メソッドの削除。これらは  ol/source/VectorTile のカスタムの tileLoadFunctions に使用され、現在動作は困難です(下記参照)。


□Custom tileLoadFunction on a VectorTile source needs changes
VectorTile ソースのカスタムの tileLoadFunctions は変更が必要

Previously, applications needed to call setProjection() and setExtent() on the tile in a custom tileLoadFunction on ol/source/VectorTile. The format's getLastExtent() method was used to get the extent. All this is no longer needed. Instead, the extent (first argument to the loader function) and projection (third argument to the loader function) are simply passed as extent and featureProjection options to the format's readFeatures() method.

以前、アプリケーションは ol/source/VectorTile のカスタムの  tileLoadFunctions でレイヤの setProjection() と setExtent() を呼び出す必要がありました。getLastExtent() メソッドのフォーマットは範囲(extent)を取得するために使用されました。これは全て必要なくなります。代わりに、範囲(loader 関数の第1引数)と投影法(projection)(loader 関数の第3引数)は、extent と featureProjection オプションとして readFeatures() メソッドへ渡されます。

Example for an old tileLoadFunction:
古い tileLoadFunction の例:
function(tile, url) {
 tile.setLoader(function() {
  fetch(url).then(function(response) {
   response.arrayBuffer().then(function(data) {
    var format = tile.getFormat();
    tile.setProjection(format.readProjection(data));
    tile.setFeatures(format.readFeatures(data, {
     // featureProjection is not required for ol/format/MVT
     // featureProjection は ol/format/MVT を必要としません
     featureProjection: map.getView().getProjection()
     }));
     tile.setExtent(format.getLastExtent());
    })
   })
  }
});
This function needs to be changed to:
この関数は次のように変更されることが必要です:/div>
function(tile, url) {
 tile.setLoader(function(extent, resolution, projection) {
  fetch(url).then(function(response) {
   response.arrayBuffer().then(function(data) {
    var format = tile.getFormat();
    tile.setFeatures(format.readFeatures(data, {
     // extent is only required for ol/format/MVT
     // extent は ol/format/MVT だけ必要です
     extent: extent,
     featureProjection: projection
      }));
    })
  })
 }
});

□Drop of support for the experimental WebGL renderer
実験的 WebGL レンダラのサポートを削除します

The WebGL map and layers renderers are gone, replaced by a WebGLHelper function that provides a lightweight,
low-level access to the WebGL API. This is implemented in a new WebGLPointsLayer which does simple rendering of large number of points with custom shaders.

WebGL マップとレイヤレンダラはなくなり、WebGL API への軽量、低レベルアクセスを提供する WebGLHelper 関数によって置き換えられます。これは、カスタム shaders を使用して多数の点(point)を簡単に描画する new WebGLPointsLayer が実行されます。

This is now used in the Heatmap layer.

これは、現在、Heatmap レイヤに使用されます。

The removed classes and components are:
削除されるクラスとコンポーネントは:

● WebGLMap and WebGLMapRenderer
● WebGLLayerRenderer
● WebGLImageLayer and WebGLImageLayerRenderer
● WebGLTileLayer and WebGLTileLayerRenderer
● WebGLVectorLayer and WebGLVectorLayerRenderer
● WebGLReplay and derived classes, along with associated shaders
● WebGLReplayGroup
● WebGLImmediateRenderer
● WebGLMap
● The shader build process using mustache and the Makefile at the root


□Removal of the AtlasManager
AtlasManager の削除

Following the removal of the experimental WebGL renderer, the AtlasManager has been removed as well. The atlas was only used by this renderer.
The non API getChecksum functions of the style is also removed.

実験的 WebGL レンダラの削除の後で、AtlasManager も同様に削除されました。地図はこのレンダラによってのみ使用されました。
API でないスタイルの getChecksum 関数も削除されます。


□Change of the behavior of the vector source's clear() and refresh() methods
ベクタソースの clear() と refresh() メソッドの動作の変更

The ol/source/Vector#clear() method no longer triggers a reload of the data from the server. If you were previously using clear() to refetch from the server, you now have to use refresh().

ol/source/Vector#clear() メッソドはサーバからデータの再読込をもう引き起こしません。以前、サーバから再取得するために clear() を使っていた場合、現在、refresh() を使わなければなりません。

The ol/source/Vector#refresh() method now removes all features from the source and triggers a reload of the data from the server. If you were previously using the refresh() method to re-render a vector layer, you should instead call ol/layer/Vector#changed().

ol/source/Vector#refresh() は、現在、ソースからすべてのフィーチャを削除し、サーバからデータの再読み込みを引き起こします。以前、ベクタレイヤを再描画するために使っていた場合、代わりに、ol/layer/Vector#changed() 呼び出した方がいいでしょう。


□Renaming of getGetFeatureInfoUrl to getFeatureInfoUrl
getGetFeatureInfoUrl を getFeatureInfoUrl に改名

The getGetFeatureInfoUrl of ol/source/ImageWMS and ol/source/TileWMS is now called getFeatureInfoUrl.

ol/source/ImageWMS と ol/source/TileWMS の getGetFeatureInfoUrl は、現在、getFeatureInfoUrl と呼ばれています。


□getFeaturesAtPixel always returns an array
getFeaturesAtPixel は常に配列を返します

getFeaturesAtPixel now returns an empty array instead of null if no features were found.

getFeaturesAtPixel は、現在、フィーチャが見つけられない場合、null の代わりに空の配列を返します。


□Hit detection with unfilled styles
塗りつぶされていないスタイルのヒットデテクション(検知)

Hit detection over styled Circle geometry and Circle and RegularShape styles is now consistent with that for styled Polygon geometry. There is no hit detection over the interior of unfilled shapes. To get the previous behavior, specify a Fill style with transparent color.

スタイルされた Circle ジオメトリと Circle と RegularShape スタイル一面のヒットデテクション(hit detection)は、現在、スタイルされた Polygon ジオメトリのそれと一致します。塗りつぶされていない形状の内側一面のヒットデテクションはありません。以前の動作を取得するために、透明色の Fill スタイルを指定します。


■Other changes
その他の変更

□Allow declutter in image render mode
イメージレンダモードの declutter を許可
(訳注:declutter 片付ける、不要なものを処分する)

It is now possible to configure vector tile layers with declutter: true and renderMode: 'image'. However, note that decluttering will be done per tile, resulting in labels and point symbols getting cut off at tile boundaries.
Until now, using both options forced the render mode to be hybrid.

現在、declutter: true と renderMode: 'image' でベクタタイルレイヤを設定することができます。しかしながら、declutter はタイルごとに実行され、結局タイルの境界でラベルやポイントが切断されることに注意してください。
現在まで、両方のオプションを使うために レンダモード(renderMode)を hybrid にさせます。


□Always load tiles while animating or interacting
アニメーションやインタラクションを動作しながら常にタイルをロードします

ol/PluggableMap and subclasses no longer support the loadTilesWhileAnimating and loadTilesWhileInteracting options. These options were used to enable tile loading during animations and interactions. With the new DOM composition render strategy, it is no longer necessary to postpone tile loading until after animations or interactions.

ol/PluggableMap と subclasses は loadTilesWhileAnimating と loadTilesWhileInteracting オプションをもうサポートしません。これらのオプションは、アニメーションとインタラクションの間、タイルロードが可能でした。新しい DOM コンポジションレンダストラテジ(DOM composition render strategy)で、アニメーションとインタラクションの後まで、タイルロードを延期する必要はもうありません。


(Changes も参照して下さい。)

2019年10月16日水曜日

Debian 10 - 9 GeoServer の設定 2

9-2 GeoServer Getting Started

Documentation ページ
http://docs.geoserver.org/

の 「User Manual」の 「Getting Started」 の「stable」リンクをクリック。

Getting Started ページ
http://docs.geoserver.org/stable/en/user/gettingstarted/index.html

の「Using the web administration interface」をクリックします。

Using the web administration interface ページ
http://docs.geoserver.org/stable/en/user/gettingstarted/web-admin-quickstart/index.html

には、「Web Administration interface」の操作方法が記述されています。
これに沿って GeoServer を使ってみます。

「Logging In」
サーバの設定は、ログインして行います。
初期値のユーザ名とパスワードは、「admin」と「geoserver」です。
ユーザ名とパスワードの変更は、「Security」の「Passwods」をクリックして表示される「Passwods」ページ一番上の master password を変更します。
今回は変更しないで使いました。


ログインすると次のように表示されます。
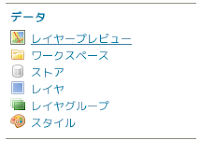
データの下に注意事項が表示されます。


9-3 PostGIS Table の追加
Getting Started ページ
http://docs.geoserver.org/stable/en/user/gettingstarted/index.html

の「Publishing a PostGIS Table」

をクリックします。

Publishing a PostGIS Table ページ
http://docs.geoserver.org/stable/en/user/gettingstarted/postgis-quickstart/index.html

9-3-1 Data preparation
データの準備
このブログの「Debian 10 - 8 PostGIS」で準備した nippon データベースの tokyo_kuiki テーブルを使用するので省略します。

9-3-2 Creating a new workspace
新しい Workspaces の作成

a 左側の欄の「データ」の「ワークスペース」をクリックします。


b 「ワークスペース」画面の「新規ワークスペース追加」をクリックします。


c 「新しいワークスペース」で次のように入力します。

Name: npn (10文字以内)
ネームスペースURI: http://www.myhome.net/npn
(インターネット上の唯一(unique)の空間。実際に存在しなくてもいい。
公開予定がないなら上記のように適当に。)
「既定のワークスペース」にチェックをつけて、「送信」ボタンをクリックします。


9-3-3 Creating a Store
ストアの作成
最初のステップは、PostGIS データベース "nippon" の データストア を作成します。
データストア は GeoServer にデータベースの接続の方法を教えます。

a 左側の欄の「データ」の「ストア」をクリックします。


b 「ストア」画面の「ストア新規追加」をクリックします。


c 「新規データソース」画面の「ベクターデータソース」の「PostGIS」をクリックします。


d 「ワークスペース」の初期設定は変えずに、「ストア基本情報」の「データソース名」と「解説」を入力します。

ワークスペース: npn (変更なし)
データソース名: nlni
解説: National Land Numerical Info. (任意)
有効化: チェックする(変更なし)


e 「パラメーターの接続」を指定します。
host: localhost (変更なし)
port: 5432 (変更なし)
database: nippon
schema: public (変更なし)
user: user(tokyo_kuiki テーブルに接続できるユーザ)
password: ●●●●●●● (user がテーブルに接続するときのパスワード)
Namespace: http://www.myhome.net/npn(固定)
Expose primary keys:(transactional WFS を使用するときに必要 チェックなしのとき読み取り専用)
max connections: 10 (変更なし、任意です)
min connections: 1 (変更なし、任意です)
fetch size: 1000 (変更なし、任意です)
Batch insert size: 1 (変更なし、任意です)
Connection timeout: 20 (変更なし、任意です)
validate connections: チェックする(変更なし)
Test while idle: チェックする(変更なし)
Evictor run periodicity: 300(変更なし、任意です)
Max connection idle time: 300(変更なし、任意です)
Evictor tests per run: 3(変更なし、任意です)
Primary key metadata table: (空、変更なし、任意です)
Session startup SQL:(空、変更なし、任意です)
Session close-up SQL:(空、変更なし、任意です)
Callback factory:(空、変更なし、任意です)
Loose bbox: チェックする(変更なし)
Estimated extends: チェックする(変更なし)
SSL mode: DISABLE(変更なし)
preparedStatements: チェックしない(変更なし)
Max open prepared statements: 50 (変更なし、任意です)
encode functions: チェックしない(変更なし)
Support on the fly geometry simplification: チェックする(変更なし)
create database: チェックしない(変更なし)
create database params:(空、変更なし、任意です)

d 「保存」ボタンをクリックします。
追加されたレイヤ一覧が表示されます。


9-3-3 レイヤの追加
「ストア新規追加」から続けて操作しても OK です。
b 左側の欄の「データ」の「レイヤ」をクリックします。


c 「リソース新規追加」をクリックします。


d 「新規レイヤ」の「新規レイヤを追加」の「レイヤ追加元」ドロップダウンから「npn:nlni」を選択します。


e nlni store のレイヤのリストが表示されます。
「tokyo_kuiki」の「公開」をクリックします。


d 選択したレイヤのリソースと編集したい情報の設定をします。

「リソース基本情報」を入力します。
ユーザ名: tokyo_kuiki (変更なし)
有効化 : チェック(変更なし)
詳細: チェック(変更なし)
タイトル: Tokyo Kuiki (任意)
抜粋: National Land Numerical Info. Tokyo Kuiki (任意)


「キーワード」を入力します。
(「キーワード」に属性が追加できます。「キーワード」と「語彙集」です。)
現在のキーワード: (追加したキーワードが表示されます)
新しいキーワード: 東京, 区域(右欄のリストから「日本語」を選択 任意)
語彙集: area, category(任意)(1つずつ入力して「キーワード追加」ボタンをクリック)

「メタデータ・リンク」と「Data links」は変更しません。

「座標参照系(CRS)」を入力します。
元ファイルSRS: 空(変更なし)
指定中のSRS: EPSG:4326 (「Find」ボタンをクリックして「4326」を検索して表示された「4326」をクリック)


SRSのハンドリング: 上書き適用 (変更しない)

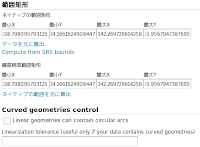
「範囲矩形」を入力します。
ネイティブの範囲矩形: (「データを元に算出」をクリック -以下の値が入力されました)
Min X: 138.798095703125
Min Y: 24.1661624908447
Max X: 142.269729614258
Max Y: 35.9567947387695
緯度経度範囲矩形: (「ネイティブの範囲を元に算出」をクリック -以下の値が入力されました)
Min X: 138.798095703125
Min Y: 24.1661624908447
Max X: 142.269729614258
Max Y: 35.9567947387695

「Curved geometries control」は変更しません。

e ページ上部の「公開」タブをクリックします。

「WMS設定」の「Layer Settings」の「デフォルトスタイル」が「polygon」になっていることを確認します。
(他は変更しません。)


ページ下部の「保存」ボタンをクリックします。


「レイヤ」ページの一番下に「tokyo_kuiki」が追加されます。


「Previewing the Layer」
a 左側の欄の「データ」の「レイヤプレビュー」をクリックし、「tokyo_kuiki」を検索します。


b 「共通フォーマット 」列の「OpenLayers」をクリックします。

c 成功すれば、OpenLayers Map がポリゴンで表示されます。
範囲が諸島部まで入っていました。


Debian 10 - 9 GeoServer の設定1

9-1 GeoServer のインストール
Web achive をインストールします。
Stable(2.16.x)をインストールしますが、

Debian
http://docs.geoserver.org/2.6.x/en/user/installation/linux/debian.html

も参考にします。

GeoServer のホームページ
http://geoserver.org/

の Documentation リンクをクリック。

Documentation ページ
http://docs.geoserver.org/

の 「User Manual」の 「User Manual」 の「stable」リンクをクリック。

GeoServer User Manual ページ
http://docs.geoserver.org/stable/en/user/

の「Introduction」をクリック。

Introduction ページ
http://docs.geoserver.org/stable/en/user/introduction/index.html#introduction

の「Overwiew」をクリックします。
そこに、GeoServer の概要があります。

GeoServer は、Java でかかれたオープンソースソフトウェアサーバです。
主要な地理空間データを OGC に準拠した WFS、WCS、WMS を実装しています。

ライセンスは、GeoServer ホームページ(http://geoserver.org)メニューの「Community」をクリックして表示される GitHub LICENSE.txt にあるように、GeoServerは、以下に説明するように、GNU General Public License の下で配布されています。詳しくはこのページを参照してください。

インストールは、

GeoServer User Manual ページ
http://docs.geoserver.org/stable/en/user/

の「Installation」をクリック。

Installation ページ
http://docs.geoserver.org/stable/en/user/installation/index.html

の「Web archive」をクリックします。

Web archive ページ
http://docs.geoserver.org/stable/en/user/installation/war.html


a Java が動作しているか確認します。
Java 8 環境(Oracle JRE)または OpenJDK。

user@deb10-vmw:~$ java -version
openjdk version "11.0.4" 2019-07-16
OpenJDK Runtime Environment (build 11.0.4+11-post-Debian-1deb10u1)
OpenJDK 64-Bit Server VM (build 11.0.4+11-post-Debian-1deb10u1, mixed mode, sharing)

GeoServer の Web archive は、現在、Java 9 をサポートしていません。
「How to Install Java on Debian 10 Linux(https://linuxize.com/post/install-java-on-debian-10/)」を参考に OpenJDK 8 をインストールします。

1 最初に、パッケージリストを更新し、HTTPS 経由で新しいリポジトリを追加するために必要な依存関係をインストールします。

user@deb10-vmw:~$  su -
パスワード:
root@deb10-vmw:~# apt update
root@deb10-vmw:~# apt install apt-transport-https ca-certificates wget dirmngr gnupg software-properties-common

2 次の wget コマンドを使ってリポジトリの GPG キーをインポートします。

root@deb10-vmw:~# wget -qO - https://adoptopenjdk.jfrog.io/adoptopenjdk/api/gpg/key/public | sudo apt-key add -

3 システムに AdoptOpenJDK APT リポジトリを追加します。

root@deb10-vmw:~# add-apt-repository --yes https://adoptopenjdk.jfrog.io/adoptopenjdk/deb/

4 一度、リポジトリを有効して次のコマンドを使い apt sources を更新し、Java 8 をインストールします。

root@deb10-vmw:~# add-apt-repository --yes https://adoptopenjdk.jfrog.io/adoptopenjdk/deb/
root@deb10-vmw:~# apt update

5 Debian システムに複数の Java version がインストールされている場合、次のコマンドでデフォルトのバージョンが確認できます。

root@deb10-vmw:~# java -version
openjdk version "11.0.4" 2019-07-16
OpenJDK Runtime Environment (build 11.0.4+11-post-Debian-1deb10u1)
OpenJDK 64-Bit Server VM (build 11.0.4+11-post-Debian-1deb10u1, mixed mode, sharing)

6 デフォルトのバージョンを変更するために update-alternatives コマンドを使います。

root@deb10-vmw:~# update-alternatives --config java
alternative java (/usr/bin/java を提供) には 2 個の選択肢があります。

  選択肢   パス                                                 優先度    状態
------------------------------------------------------------
* 0        /usr/lib/jvm/java-11-openjdk-amd64/bin/java          1111      自動モード
  1        /usr/lib/jvm/adoptopenjdk-8-hotspot-amd64/bin/java   1081      手動モード
  2        /usr/lib/jvm/java-11-openjdk-amd64/bin/java          1111      手動モード
現在の選択 [*] を保持するには 、さもなければ選択肢の番号のキーを押してください: 1
update-alternatives: /usr/bin/java (java) を提供するためにマニュアルモードで /usr/lib/jvm/adoptopenjdk-8-hotspot-amd64/bin/java を使います
root@deb10-vmw:~# java -version
openjdk version "1.8.0_222"
OpenJDK Runtime Environment (AdoptOpenJDK)(build 1.8.0_222-b10)
OpenJDK 64-Bit Server VM (AdoptOpenJDK)(build 25.222-b10, mixed mode)


7 デフォルトに adoptopenjdk-8-hotspot-amd64 を使うなら「1」を入力して「Enter」キーを押します。


b Web archive をダウンロードします。
「Download(http://geoserver.org/download/)」ページの「Stable(2019.10.15 現在 バージョン 2.16.0)」をクリックします。

「Stable(http://geoserver.org/release/stable/)」ページの「Packages」の「Web Archive」をクリックしてダウンロードします。
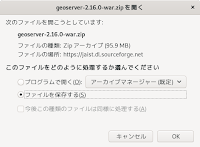
次のようなダイアログが表示されたら「ファイルを保存する」を選択して「OK」ボタンをクリックします。


c Tomcat9 をインストールします。
Synaptic パッケージマネージャで tomcat9 をインストールします。

d ダウンロードしたファイルを解凍します。
(フォルダを作成して解凍すると作業がしやすいです。)

root@deb10-vmw:~# exit
user@deb10-vmw:~$ cd ダウンロード
user@deb10-vmw:~/ダウンロード$ ls
---
geoserver-2.16.0-war.zip
---
user@deb10-vmw:~/ダウンロード$ mkdir geoserver
user@deb10-vmw:~/ダウンロード$ mv geoserver-2.16.0-war.zip geoserver
user@deb10-vmw:~/ダウンロード$ cd geoserver/
user@deb10-vmw:~/ダウンロード/geoserver$ unzip geoserver-2.11.1-war.zip
Archive:  geoserver-2.16.0-war.zip
  inflating: geoserver.war          
  inflating: GPL.txt                
  inflating: LICENSE.txt            
   creating: target/
  inflating: target/VERSION.txt
e root で geoserver.war を /var/lib/tomcat9/webapps にコピーします。

user@deb10-vmw:~/ダウンロード/geoserver$ su
パスワード:
root@deb10-vmw:/home/user/ダウンロード/geoserver# cp geoserver.war /var/lib/tomcat9/webapps/

f GeoServer の動作確認をします。
ブラウザのアドレスバーに http://localhost:8080/geoserver と入力し、Enter キーを押します。

エラーメッセージが表示されたら Apache を再起動します。


root@deb10-vmw:/home/user/ダウンロード/geoserver# systemctl restart apache2


2019年10月9日水曜日

Debian 10 - 8 PostGIS の設定

8-1 PostGIS のインストール
PostGIS は、リレーショナルデータベース管理ソフトPostgreSQLに格納されているデータを空間データとして利用するための拡張機能です。PostGIS を使って地図を表示します。
操作の前に PostgreSQL について調べておくといいでしょう。

Synaptic パッケージマネージャで PostGIS を検索して postgresql-11-postgis-2.5 をインストールすれば、必要なパッケージがすべてインストールされます。

PostgreSQL は postgres ユーザ(PostgreSQL の管理者)で操作します。
Debian は PostgreSQL をインストールすると自動的に postgres ユーザが作成されます。

user@deb10-vmw:~$ cut -d: -f1 /etc/passwd
---
user
---
postgres

postgresユーザにパスワードを設定します。

user@deb10-vmw:~$ su -
パスワード:
root@deb10-vmw:~# passwd postgres
新しいパスワード:
新しいパスワードを再入力してください:
passwd: パスワードは正しく更新されました

PostgreSQL が動作しているテストしてみます。
端末でpostgres ユーザで次のように実行してください。

root@deb10-vmw:~# exit
ログアウト
user@deb10-vmw:~$ su - postgres
パスワード:
postgres@deb10-vmw:~$ psql -l
                                         データベース一覧
   名前    |  所有者  | エンコーディング |  照合順序   | Ctype(変換演算子) |     アクセス権限      
-----------+----------+------------------+-------------+-------------------+-----------------------
 postgres  | postgres | UTF8             | ja_JP.UTF-8 | ja_JP.UTF-8       | 
 template0 | postgres | UTF8             | ja_JP.UTF-8 | ja_JP.UTF-8       | =c/postgres          +
           |          |                  |             |                   | postgres=CTc/postgres
 template1 | postgres | UTF8             | ja_JP.UTF-8 | ja_JP.UTF-8       | =c/postgres          +
           |          |                  |             |                   | postgres=CTc/postgres
(3 行)

(END)
PostgreSQL にユーザを追加します。
ユーザはテストですのでセキュリティをあまり考えず、 Debian のユーザと同じにしました。

postgres@deb10-vmw:~$ createuser user

(user は Debianの一般ユーザと同じ)


8-2 データベースの作成
データベースを作成し、一般ユーザを登録します。
PostGIS ホームページ
http://postgis.net/

の Documentation ボタンをクリックします。

PostGIS - Documentation
http://postgis.net/documentation

の PostGIS 2.5(HTML)をクリックします。

PostGIS 2.5.4dev Manual
http://postgis.net/docs/manual-2.5/


Chapter 2. PostGIS Installation
http://postgis.net/docs/manual-2.5/postgis_installation.html

の 2.5. Creating a spatial database using EXTENSIONS を参考に東京都のデータのデータベースを作成します。

nippon というデータベースを作成します。

postgres@deb10-vmw:~$ createdb nippon
postgres@deb10-vmw:~$ psql -d nippon -c "CREATE EXTENSION postgis;"
CREATE EXTENSION
postgres@deb10-vmw:~$ psql -l
                                         データベース一覧
   名前    |  所有者  | エンコーディング |  照合順序   | Ctype(変換演算子) |     アクセス権限      
-----------+----------+------------------+-------------+-------------------+-----------------------
 nippon    | postgres | UTF8             | ja_JP.UTF-8 | ja_JP.UTF-8       | 
 postgres  | postgres | UTF8             | ja_JP.UTF-8 | ja_JP.UTF-8       | 
 template0 | postgres | UTF8             | ja_JP.UTF-8 | ja_JP.UTF-8       | =c/postgres          +
           |          |                  |             |                   | postgres=CTc/postgres
 template1 | postgres | UTF8             | ja_JP.UTF-8 | ja_JP.UTF-8       | =c/postgres          +
           |          |                  |             |                   | postgres=CTc/postgres
(4 行)

(END)

postgres@deb10-vmw:~$ psql nippon
psql (11.5 (Debian 11.5-1+deb10u1))
"help" でヘルプを表示します.

nippon=# \d
                 リレーション一覧
 スキーマ |       名前        |    型    |  所有者  
----------+-------------------+----------+----------
 public   | geography_columns | ビュー   | postgres
 public   | geometry_columns  | ビュー   | postgres
 public   | raster_columns    | ビュー   | postgres
 public   | raster_overviews  | ビュー   | postgres
 public   | spatial_ref_sys   | テーブル | postgres
(5 行)
geography_columns
ジオグラフィ型のカラム。「緯度/経度」を角度の単位(度)で表す地理座標「WGS 84経度緯度(SRID:4326)」だけサポートします。地球規模の2点間の距離を円弧で計算します。(4.2. PostGIS Geography Type 参照)
geometry_columns
ベクタデータで使用するジオメトリ型のカラム。
raster_columns
ラスタデータ型のカラム。
raster_overviews
基本ラスタテーブルの低解像度版カラム。
spatial_ref_sys
変換/再投影するために必要な空間参照系に関するOGC準拠のデータベーステーブル。

これらのオーナーを user に変更します。

nippon=# ALTER VIEW geography_columns OWNER TO user;
ALTER VIEW
nippon=# ALTER VIEW geometry_columns OWNER TO user;
ALTER VIEW
nippon=# ALTER VIEW raster_columns OWNER TO user;
ALTER VIEW
nippon=# ALTER VIEW raster_overviews OWNER TO user;
ALTER VIEW
nippon=# ALTER TABLE spatial_ref_sys OWNER TO user;
ALTER TABLE
nippon=# \d
                リレーション一覧
 スキーマ |       名前        |    型    | 所有者 
----------+-------------------+----------+--------
 public   | geography_columns | ビュー   | user
 public   | geometry_columns  | ビュー   | user
 public   | raster_columns    | ビュー   | user
 public   | raster_overviews  | ビュー   | user
 public   | spatial_ref_sys   | テーブル | user
(5 行)
続けて東京都のデータを登録します。

nippon=# \q
postgres@deb10-vmw:~$ exit
ログアウト
user@deb10-vmw:~$ cd mapdata/nlni/tokyo/
user@deb10-vmw:~/mapdata/nlni/tokyo$ ls
KS-META-N03-19_13_190101.xml  N03-19_13_190101.geojson  N03-19_13_190101.shx
N03-190101_13_GML.zip         N03-19_13_190101.prj      N03-19_13_190101.xml
N03-19_13_190101.dbf          N03-19_13_190101.shp

user@deb10-vmw:~/mapdata/nlni/tokyo$ shp2pgsql -W sjis N03-19_13_190101.shp tokyo_kuiki > tokyo_kuiki.sql
Shapefile type: Polygon
Postgis type: MULTIPOLYGON[2]

(shp2pgsql オプション -W カラムの属性の文字列を UTF-8 にエンコードします。
もし、「bash: shp2pgsql: コマンドが見つかりません」と表示されたら、Synaptic パッケージマネージャで「postgis」をインストールします。)

user@deb10-vmw:~/mapdata/nlni/tokyo$ psql -d nippon -f tokyo_kuiki.sql
user@deb10-vmw:~/mapdata/nlni/tokyo$ psql nippon
psql (11.5 (Debian 11.5-1+deb10u1))
"help" でヘルプを表示します.

nippon=> \d
                  リレーション一覧
 スキーマ |        名前         |     型     | 所有者 
----------+---------------------+------------+--------
 public   | geography_columns   | ビュー     | user
 public   | geometry_columns    | ビュー     | user
 public   | raster_columns      | ビュー     | user
 public   | raster_overviews    | ビュー     | user
 public   | spatial_ref_sys     | テーブル   | user
 public   | tokyo_kuiki         | テーブル   | user
 public   | tokyo_kuiki_gid_seq | シーケンス | user
(7 行)

nippon=> \d tokyo_kuiki
                                     テーブル "public.tokyo_kuiki"
   列    |           型           | 照合順序 | Null 値を許容 |                デフォルト                
---------+------------------------+----------+---------------+------------------------------------------
 gid     | integer                |          | not null      | nextval('tokyo_kuiki_gid_seq'::regclass)
 n03_001 | character varying(10)  |          |               | 
 n03_002 | character varying(20)  |          |               | 
 n03_003 | character varying(20)  |          |               | 
 n03_004 | character varying(20)  |          |               | 
 n03_007 | character varying(5)   |          |               | 
 geom    | geometry(MultiPolygon) |          |               | 
インデックス:
    "tokyo_kuiki_pkey" PRIMARY KEY, btree (gid)

(END)
一般ユーザ user のパスワードを設定します。

nippon=> ALTER USER user with password 'password(任意)';
ALTER ROLE
nippon=> \q

マップファイル tokyo_pgis.map を作成します。

user@deb10-vmw:~/mapdata/nlni/tokyo$ cd ../../../mapfile/
user@deb10-vmw:~/mapfile$ cp tokyo_shp.map tokyo_pgis.map
user@deb10-vmw:~/mapfile$ vim tokyo_pgis.map
MAP
 NAME tokyo_pgis_map
 STATUS ON
 SIZE 600 300
# EXTENT 136.069482 20.425119 153.986898 35.898424
 EXTENT 138.85 35.4 140 35.975
 UNITS DD
# SHAPEPATH "../mapdata/nlni/tokyo"
 IMAGECOLOR 255 255 255
 FONTSET "fonts.txt"
 WEB
  IMAGEPATH "/home/user/public_html/ms_tmp/"
  IMAGEURL "/~user/ms_tmp/"
 END
 LAYER
  NAME gyoseikuiki
  TYPE POLYGON
  STATUS ON
#  DATA "N03-19_13_190101.shp"
  CONNECTIONTYPE POSTGIS
  CONNECTION "dbname=nippon host=localhost user=user password='password'"
  DATA "geom from tokyo_kuiki"
  LABELITEM "n03_004" #「n」が小文字であることに注意してください
  CLASS
   NAME "City Boundaries"
   STYLE
    OUTLINECOLOR 153 153 153
   END
   LABEL
    MINFEATURESIZE 40
    TYPE TRUETYPE
    FONT vl-gothic
    ENCODING UTF-8
    SIZE 8
   END
  END
 END
END #MAP END
http://localhost/cgi-bin/mapserv?mode=browse&template=openlayers&layer=gyoseikuiki&map=/home/user/mapfile/tokyo_pgis.map


8-3 属性カラム内の検索
データベースの属性カラム内の検索を実行して、地図を表示してみます。
国土数値情報の「4. 交通」の「空港間流通量」をデータベース nippon に登録します。

a 「JPGIS2.1」の「空港間流通量」をクリックします。

b 「データのダウンロード(2.各データ詳細)」で、「全国」のチェックボックスをクリックしてチェックし、「次へ」ボタンをクリックします。

c 「データのダウンロード(3.ファイルの選択)」で、最新のデータのチェックボックスをクリックしてチェックします。(2019-10-7現在 平成26年度)
「次へ」ボタンをクリックします。

d アンケートに回答します。

e データのダウンロード(4.国土数値情報利用約款)の内容を読み、「上記のことを理解しました。」で「はい」ボタンをクリックします。

f データのダウンロード(5.ダウンロード)で「ダウンロード」ボタンをクリックします。
ダイアログボックス---ダウンロードしますか?の「OK」ボタンをクリックします。

user@deb10-vmw:~/mapfile$ cd ../ダウンロード
user@deb10-vmw:~/ダウンロード$ ls
---
S10b-14_GML.zip
---
user@deb10-vmw:~/ダウンロード$ mkdir kotsu
user@deb10-vmw:~/ダウンロード$ mv S10b-14_GML.zip kotsu/
user@deb10-vmw:~/ダウンロード$ cd kotsu/
user@deb10-vmw:~/ダウンロード/kotsu$ ls
S10b-14_GML.zip
user@deb10-vmw:~/ダウンロード/kotsu$ unzip -j S10b-14_GML.zip
Archive:  S10b-14_GML.zip
  inflating: KS-META-S10b-14.xml     
  inflating: KsjAppSchema-S10b-v1_1.xsd  
  inflating: S10b-14.xml             
  inflating: S10b-14_BetAport.dbf    
  inflating: S10b-14_BetAport.shp    
  inflating: S10b-14_BetAport.shx
user@deb10-vmw:~/ダウンロード/kotsu$ ls
KS-META-S10b-14.xml         S10b-14_BetAport.dbf  S10b-14_GML.zip
KsjAppSchema-S10b-v1_1.xsd  S10b-14_BetAport.shp
S10b-14.xml                 S10b-14_BetAport.shx
user@deb10-vmw:~/ダウンロード/kotsu$ cd ../
user@deb10-vmw:~/ダウンロード$ mv kotsu/ ../mapdata/nlni/
user@deb10-vmw:~/ダウンロード$ cd ../mapdata/nlni/kotsu/
user@deb10-vmw:~/mapdata/nlni/kotsu$ shp2pgsql -W sjis S10b-14_BetAport.shp logi_amt_bw_airport > logi_amt_bw_airport.sql
Field s10b_005 is an FTDouble with width 16 and precision 0
Field s10b_006 is an FTDouble with width 16 and precision 0
Field s10b_007 is an FTDouble with width 16 and precision 0
Field s10b_008 is an FTDouble with width 16 and precision 0
Field s10b_009 is an FTDouble with width 16 and precision 0
Shapefile type: Arc
Postgis type: MULTILINESTRING[2]
user@deb10-vmw:~/mapdata/nlni/kotsu$ psql -d nippon -f logi_amt_bw_airport.sql
user@deb10-vmw:~/mapdata/nlni/kotsu$ cd
user@deb10-vmw:~$ psql nippon
psql (11.5 (Debian 11.5-1+deb10u1))
"help" でヘルプを表示します.

nippon=> \dt
                 リレーション一覧
 スキーマ |        名前         |    型    | 所有者 
----------+---------------------+----------+--------
 public   | logi_amt_bw_airport | テーブル | user
 public   | spatial_ref_sys     | テーブル | user
 public   | tokyo_kuiki         | テーブル | user
(3 行)

nippon=> \d logi_amt_bw_airport
                                  テーブル "public.logi_amt_bw_airport"
    列    |            型             | 照合順序 | Null 値を許容 |                    デフォルト                    
----------+---------------------------+----------+---------------+--------------------------------------------------
 gid      | integer                   |          | not null      | nextval('logi_amt_bw_airport_gid_seq'::regclass)
 s10b_001 | character varying(36)     |          |               | 
 s10b_002 | character varying(36)     |          |               | 
 s10b_003 | character varying(36)     |          |               | 
 s10b_004 | character varying(36)     |          |               | 
 s10b_005 | double precision          |          |               | 
 s10b_006 | double precision          |          |               | 
 s10b_007 | double precision          |          |               | 
 s10b_008 | double precision          |          |               | 
 s10b_009 | double precision          |          |               | 
 geom     | geometry(MultiLineString) |          |               | 
インデックス:
    "logi_amt_bw_airport_pkey" PRIMARY KEY, btree (gid)

(END)

nippon=> \q

user@deb10-vmw:~$ cd mapfile/
user@deb10-vmw:~/mapfile$ vim tokyo_pgis.map
---
 LAYER
  NAME kukokanryutsuryo
  TYPE LINE
  STATUS ON
#  DATA "S10b-14_BetAport.shp"
  CONNECTIONTYPE POSTGIS
  CONNECTION "dbname=nippon host=localhost user=user password='password'"
#  DATA "geom from logi_amt_bw_airport"
  DATA "geom from (select * from logi_amt_bw_airport where s10b_001 = '東京') as myquery using unique geom using srid = -1"
  OPACITY 80
  LABELITEM "s10b_004"
  CLASS
   NAME "Kuko Ryutsu"
   STYLE
    COLOR 0 255 0
   END
   LABEL
    MINFEATURESIZE 5
    POSITION lc
    TYPE TRUETYPE
    FONT vl-gothic
    ENCODING UTF-8
    SIZE 8
   END
  END
 END
---

http://localhost/cgi-bin/mapserv?mode=browse&template=openlayers&layer=gyoseikuiki&layer=kukokanryutsuryo&map=/home/user/mapfile/tokyo_pgis.map


8-4 pgAdminIII
pgAdminIII を使ってデータベースに接続します。

Introduction to PostGIS
http://workshops.boundlessgeo.com/postgis-intro/

の「4. Creating a Spatial Database(http://workshops.boundlessgeo.com/postgis-intro/creating_db.html)」を参考にします。
(次のように開きます。
PostGIS ホームページ
http://postgis.net/

の Documentation ボタンをクリックします。

PostGIS - Documentation
http://postgis.net/documentation

「Tutorial: Introduction to PostGIS」をクリックします。

Introduction to PostGIS
https://postgis.net/workshops/postgis-intro/

の「Workshop Modules」の「4. Creating a Spatial Database」をクリックします。)

Synaptic パッケージマネージャで pgAdminIII(pgadmin3)をインストールします。

a アクティビティ -> アプリケーションを表示する(左側の一番下のアイコン) -> pgAdminIII
をクリックして起動します。


b 「サーバに接続の追加ボタン」
をクリックします。


c 「新しいサーバ登録」の「プロパティ」タブに次のように入力して「OK」ボタンをクリックします。

名前: PostGIS(任意)
ホスト: localhost
Port: 5432
サービス: (空欄)
DBメンテナンス: postgres
ユーザ名: user(postgres ユーザ)
パスワード: ●●●●●●●●(postgres ユーザのパスワード)
(その他はそのままで)

「指導的ヒント・パスワード保存」ウィンドウが表示されたら「OK」ボタンをクリックします。


d ツリーを開いていくと次のようになります。


次のようなエラーが表示されたら「OK」ボタンをクリックします。


e テーブルtokyo_kuiki をクリックして選択し、「選択オブジェクトでデータをビュー」ボタン
をクリックすると属性が表示されます。


2019年10月7日月曜日

Debian 10 - 7 MapServer でマップファイルのテスト2

7-4 東京都の地図を表示7-4-1 ダウンロード
国土交通相は地理空間情報を推進するための一貫として、国土数値情報のダウンロードサービスをしてます。
このうちのJPGIS準拠データのダウンロードサービスから東京のデータをダウンロードして地図を表示してみます。「4. 交通」の「空港間流通量」もダウンロードします。

国土交通省
http://www.mlit.go.jp/index.html

の「政策情報・分野別一覧」の「国土政策」をクリックします。

国土政策
http://www.mlit.go.jp/kokudoseisaku/index.html

の「データ・情報コーナー」の「国土数値情報ダウンロードサービス」をクリックします。

国土数値情報ダウンロードサービス
http://nlftp.mlit.go.jp/ksj/index.html

で、東京の行政区域のデータをダウンロードします。
a 「JPGIS2.1」の「行政区域」をクリックします。
b 「データのダウンロード(2.各データ詳細)」で、「東京」のチェックボックスをクリックしてチェックし、「次へ」ボタンをクリックします。

c 「データのダウンロード(3.ファイルの選択)」で、最新のデータのチェックボックスをクリックしてチェックします。(2019-9-30現在 平成31年度)
「次へ」ボタンをクリックします。

d アンケートに回答します。

e データのダウンロード(4.国土数値情報利用約款)の内容を読み、「上記のことを理解しました。」で「はい」ボタンをクリックします。

f データのダウンロード(5.ダウンロード)で「ダウンロード」ボタンをクリックします。
ダイアログボックス---ダウンロードしますか?の「OK」ボタンをクリックします。


7-4-2 データの確認
ダウンロードしたファイルを解凍します。
nlni/tokyo というフォルダを作成し、そこにファイルを移動して解凍します。

user@deb10-vmw:~$ cd ダウンロード
user@deb10-vmw:~/ダウンロード$ ls
---
N03-190101_13_GML.zip
---
user@deb10-vmw:~/ダウンロード$ mkdir nlni
user@deb10-vmw:~/ダウンロード$ mkdir nlni/tokyo
user@deb10-vmw:~/ダウンロード$ mv N03-190101_13_GML.zip nlni/tokyo/
user@deb10-vmw:~/ダウンロード$ cd nlni/tokyo/
user@deb10-vmw:~/ダウンロード/nlni/tokyo$ ls
N03-190101_13_GML.zip
user@deb10-vmw:~/ダウンロード/nlni/tokyo$ unzip -j N03-190101_13_GML.zip
Archive:  N03-190101_13_GML.zip
  inflating: KS-META-N03-19_13_170101.xml  
  inflating: N03-19_13_190101.dbf    
  inflating: N03-19_13_190101.geojson  
  inflating: N03-19_13_190101.prj    
  inflating: N03-19_13_190101.shp    
  inflating: N03-19_13_190101.shx    
  inflating: N03-19_13_190101.xml

user@deb10-vmw:~/ダウンロード/nlni/tokyo$ ls
KS-META-N03-19_13_190101.xml  N03-19_13_190101.geojson  N03-19_13_190101.shx
N03-190101_13_GML.zip         N03-19_13_190101.prj      N03-19_13_190101.xml
N03-19_13_190101.dbf          N03-19_13_190101.shp
データがどのようになっているか、N03-19_13_190101.dbf を LibreOffice Calc で開きます。
(データ量が多いと開かない場合があります。)
アクティビティ -> アプリケーションを表示する(左側の一番下のアイコン) -> LibreOffice Calc


「開く」ボタン
をクリックします。


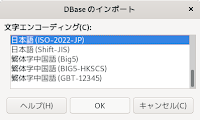
文字列は日本語(Shift-JIS)にします。


「一般的な I/O エラー。」と表示されました。
エラーの理由はわかりませんでした。
Windows の LibreOffice で開いてみました。


確かめたら LibreOffice を閉じます。


7-4-3 地図の表示
 最初に、マップデータ N03-19_13_190101 の情報を知るために管理ツール gdal-bin を使います。
ないときは、Synaptic パッケージマネージャでインストールします。
nlni/tokyo フォルダを mapdata フォルダへ移動し、利用可能なレイヤ名を表示します。

user@deb10-vmw:~/ダウンロード/nlni/tokyo$ cd ../../
user@deb10-vmw:~/ダウンロード$ ls
---
nlni
---
user@deb10-vmw:~/ダウンロード$ mv nlni/ ../mapdata/
user@deb10-vmw:~/ダウンロード$ cd ../mapdata/
user@deb10-vmw:~/mapdata$ ls
110m_cultural  land_ocean_ice_2048.jpg  land_ocean_ice_2048.jpgw  nlni
user@deb10-vmw:~/mapdata$ cd nlni/
user@deb10-vmw:~/mapdata/nlni$
user@deb10-vmw:~/mapdata/nlni$ ls
tokyo
user@deb10-vmw:~/mapdata/nlni$ ogrinfo tokyo
INFO: Open of `tokyo'
      using driver `ESRI Shapefile' successful.
1: N03-19_13_190101 (Polygon)
次に、N03-19_13_190101 レイヤのデータを表示します。

user@deb10-vmw:~/mapdata/nlni$ ogrinfo -summary tokyo N03-19_13_190101
INFO: Open of `tokyo'
      using driver `ESRI Shapefile' successful.

Layer name: N03-19_13_190101
Metadata:
  DBF_DATE_LAST_UPDATE=2019-02-08
Geometry: Polygon
Feature Count: 6187
Extent: (136.065309, 20.422746) - (153.986844, 35.898424)
Layer SRS WKT:
GEOGCS["GCS_JGD_2011",
    DATUM["JGD_2011",
        SPHEROID["GRS_1980",6378137.0,298.257222101]],
    PRIMEM["Greenwich",0.0],
    UNIT["Degree",0.0174532925199433],
    AUTHORITY["Esri","6668"]]
N03_001: String (10.0) -> 都道府県名
N03_002: String (20.0) -> 支庁・振興局名
N03_003: String (20.0) -> 郡・政令市名
N03_004: String (20.0) -> 市区町村名
N03_007: String (5.0) -> 行政区域コード
属性名は、

データのダウンロード(2.各データの詳細)国土数値情報 行政区域データ
http://nlftp.mlit.go.jp/ksj/gml/datalist/KsjTmplt-N03.html

にあります。
このレイヤは、Geometry: Polygon からポリゴンデータであることが分かります。
また、Extent: (136.065309, 20.422746) - (153.986844, 35.898424)は座標で緯度経度を表し、レイヤの範囲が分かります。

これをもとに、マップファイルを作成します。

user@deb10-vmw:~/mapdata/nlni$ cd ../../mapfile/
user@deb10-vmw:~/mapfile$ vim tokyo_shp.map
MAP
 NAME tokyo_shp_map #任意の名前
 STATUS ON
 SIZE 600 300
 EXTENT 136.065309 20.422746 153.986844 35.898424 #ogrinfoで得た情報から
 UNITS DD
 SHAPEPATH "../mapdata/nlni/tokyo" #シェイプファイルの相対位置
 IMAGECOLOR 255 255 255
  WEB
  IMAGEPATH "/home/user/public_html/ms_tmp/"
  IMAGEURL "/~user/ms_tmp/"
 END
 LAYER
  NAME gyoseikuiki #任意の名前
  TYPE POLYGON #ogrinfoで得た情報から
  STATUS ON
  DATA "N03-19_13_190101.shp"
  CLASS
   NAME "City Boundaries" #任意の名前
   STYLE
    OUTLINECOLOR 153 153 153 #面の外周の色(灰色)
   END
  END
 END
END #MAP END
shp2imgで地図を確認します。

user@deb10-vmw:~/mapfile$ shp2img -m tokyo_shp.map -o tokyo_shp.png


画像ビューワで確認すると、範囲が広すぎるのが分かります。
今回は、諸島部分を除いた範囲にします。

---
EXTENT 138.85 35.4 140 35.975
---

全体は次の様になります。

user@deb10-vmw:~/mapfile$ vim tokyo_shp.map
MAP
 NAME tokyo_shp_map
 STATUS ON
 SIZE 600 300
 EXTENT 138.85 35.4 140 35.975 #修正
 UNITS DD
 SHAPEPATH "../mapdata/nlni/tokyo"
 IMAGECOLOR 255 255 255
 WEB
  IMAGEPATH "/home/user/public_html/ms_tmp/"
  IMAGEURL "/~user/ms_tmp/"
 END
 LAYER
  NAME gyoseikuiki
  TYPE POLYGON
  STATUS ON
  DATA "N03-19_13_190401.shp"
  CLASS
   NAME "City Boundaries"
   STYLE
    OUTLINECOLOR 153 153 153
   END
  END
 END
END #MAP END
shp2imgで地図を確認します。

user@deb10-vmw:~/mapfile$ shp2img -m tokyo_shp.map -o tokyo_shp.png


Web ブラウザのアドレスバーに次のように入力して Enter キーを押します。

http://localhost/cgi-bin/mapserv?mode=browse&template=openlayers&layer=gyoseikuiki&map=/home/user/mapfile/tokyo_shp.map


7-4-4 LABELの日本語表示
地図に市区町村名を表示します。
地図に市区町村名(ラベル)を表示するには、マップファイルに次のように追加します。

user@deb10-vmw:~/mapfile$ vim tokyo_shp.map
---
 LAYER
  NAME gyoseikuiki
  TYPE POLYGON
  STATUS ON
  DATA "N03-19_13_190101.shp"
  LABELITEM "N03_004" #LABELを使うときのフィールドの属性値の指定
  CLASS
   NAME "City Boundaries"
   STYLE
    OUTLINECOLOR 153 153 153
   END
   LABEL #追加
    MINFEATURESIZE 40 #フィーチャがラベルを表示する最小サイズ
   END #LABEL
  END
 END
---
Web ブラウザのアドレスバーに次のように入力して Enter キーを押します。

http://localhost/cgi-bin/mapserv?mode=browse&template=openlayers&layer=gyoseikuiki&map=/home/user/mapfile/tokyo_shp.map

次のようにエラーが表示されました。


エラーログを見てみます。

user@deb10-vmw:~/mapfile$ su -
パスワード:
root@deb10-vmw:~# vim /var/log/apache2/error.log
---
[Wed Oct 02 11:23:35.141330 2019] [cgid:error] [pid 1173:tid 140487826528000] [client ::1:55018] End of script output before headers: mapserv

「End of script output before headers: mapserv」でネット検索すると cgi で文字コードが違うことでエラーが表示されることがあるとありました。属性 N03_004 の文字コードが shift-jis のためと思われます。

日本語を表示できるように次のようにします。
次の内容の fonts.txt というファイルを作成します。
マップファイルと同じフォルダに保存します。

root@deb10-vmw:~# exit
user@deb10-vmw:~/mapfile$ vim fonts.txt
vl-gothic /usr/share/fonts/truetype/vlgothic/VL-Gothic-Regular.ttf
vl-pgothic /usr/share/fonts/truetype/vlgothic/VL-PGothic-Regular.ttf
ipafont-gothic /usr/share/fonts/opentype/ipafont-gothic/ipag.ttf
ipafont-pgothic /usr/share/fonts/opentype/ipafont-gothic/ipagp.ttf

(それぞれパッケージ名は、fonts-vlgothic、 fonts-ipafont-gothicです。)

どれか1行でOKです。
[フォント名] [フォントがある場所の絶対パス] という内容になっています。
フォント名は任意のわかりやすい名前をつけてください。
パスは Synaptic パッケージマネージャで、例えば gothic で検索するとパッケージ一覧が表示されます。
インストールされているパッケージを選択し、プロパティをクリックしてインストール済みファイルタブをクリックすると、パスが表示されます。
インストールされていないときは、Synaptic パッケージマネージャでインストールしてください。(上記以外にも日本語フォントがあります。)

マップファイル全体は次のようになります。

user@deb10-vmw:~/mapfile$ vim tokyo_shp.map
MAP
 NAME tokyo_shp_map
 STATUS ON
 SIZE 600 300
 EXTENT 138.85 35.4 140 35.975
 UNITS DD
 SHAPEPATH "../mapdata/nlni/tokyo"
 IMAGECOLOR 255 255 255
 FONTSET "fonts.txt" #追加
 WEB
  IMAGEPATH "/home/user/public_html/ms_tmp/"
  IMAGEURL "/~user/ms_tmp/"
 END
 LAYER
  NAME gyoseikuiki
  TYPE POLYGON
  STATUS ON
  DATA "N03-17_13_170101.shp"
  LABELITEM "N03_004"
  CLASS
   NAME "City Boundaries"
   STYLE
    OUTLINECOLOR 153 153 153
   END
   LABEL
    MINFEATURESIZE 40
    TYPE TRUETYPE #フォントのタイプ
    FONT vl-gothic #fonts.txt で指定したフォント名
    ENCODING SJIS #マップデータのエンコード
    SIZE 8 #フォントサイズ
   END
  END
 END
END #MAP END

Web ブラウザのアドレスバーに次のように入力して Enter キーを押します。

http://localhost/cgi-bin/mapserv?mode=browse&template=openlayers&layer=gyoseikuiki&map=/home/user/mapfile/tokyo_shp.map