
日本時間で(2015.3.27)に v3.4.0 がリリースされました。
Releases v3.4.0 - openlayers/ol3 GitHub
(https://github.com/openlayers/ol3/releases/tag/v3.4.0)より
v3.4.0
Summary
The 3.4.0 release includes more than 40 merged pull requests since the 3.3.0 version. New features include dateline wrapping for tile based sources. See for instance the tiled WMS example and the WMTS example.
Also the draw interaction can be used to draw circles see the updated Draw features example which now has a Circle option.
3.4.0 リリースは、3.3.0 以降のマージされたプルリクエスト(訳注:Git でリクエストを出す機能)が40個以上含まれています。新機能には、タイルベースソースの日付変更線のラッピングを含んでいます。tiled WMS example と WMTS example を参照してください。
また、円を描画するために使用できる draw interaction は、現在 Circle オプションを有している更新された Draw features example を参照してください。
(Overview of all changes リストはサイトをみてください。)
v3.4.0 の examples を試してみます
OpenLayers 3 のホームページ(http://openlayers.org/)の「LATEST」の文中の「v3.4.0」をクリックします。
開いたページ「Release v3.4.0 - openlayers/ol3 GitHub(https://github.com/openlayers/ol3/releases/tag/v3.4.0)」の「v3.4.0.zip」ボタンをクリックしてダウンロードします。
展開したフォルダを Eclipse の ol3proj にコピーします。
ディレクトリは次のようににしました。
ol3proj
|-v3.0.0/
|-v3.1.1/
|-v3.2.0/
|-v3.2.1/
|-v3.3.0/
|-v3.4.0/
|-2xx-ol3ex.html
|-2xx-ol3ex.js
|-2xx-ol3ex-require.js
|-loader.js
|-loader-v3.0.0.js
|-loader-v3.1.1.js
|-loader-v3.2.0.js
|-loader-v3.2.1.js
v.3.3.0 の loader.js の名前を loader-v3.3.0.js に変更し、v3.4.0/examples/loader.js を ol3proj 直下にコピーします。
ol3proj
|-v3.0.0/
|-v3.1.1/
|-v3.2.0/
|-v3.2.1/
|-v3.3.0/
|-v3.4.0/
|-2xx-ol3ex.html
|-2xx-ol3ex.js
|-2xx-ol3ex-require.js
|-loader.js
|-loader-v3.0.0.js
|-loader-v3.1.1.js
|-loader-v3.2.0.js
|-loader-v3.2.1.js
|-loader-v3.3.0.js
loader.js の内容を次のように修正します。
---
if (!raw) {
// document.write('<scr' + 'ipt type="text/javascript" src="../build/ol.js"></scr' + 'ipt>');
// ディレクトリ修正
document.write('<scr' + 'ipt type="text/javascript" src="v3.4.0/build/ol.js"></scr' + 'ipt>');
} else {
window.CLOSURE_NO_DEPS = true; // we've got our own deps file
// document.write('<scr' + 'ipt type="text/javascript" src="../closure-library/closure/goog/base.js"></scr' + 'ipt>');
// document.write('<scr' + 'ipt type="text/javascript" src="../build/ol-deps.js"></scr' + 'ipt>');
// ディレクトリ修正
document.write('<scr' + 'ipt type="text/javascript" src="v3.4.0/closure-library/closure/goog/base.js"></scr' + 'ipt>');
document.write('<scr' + 'ipt type="text/javascript" src="v3.4.0/build/ol-deps.js"></scr' + 'ipt>');
document.write('<scr' + 'ipt type="text/javascript" src="' + scriptId + '-require.js"></scr' + 'ipt>');
}
document.write('<scr' + 'ipt type="text/javascript" src="' + scriptId + '.js"></scr' + 'ipt>');
}());
2015年3月29日日曜日
2015年3月26日木曜日
2 - ol3.3ex 97b - Layer Swipe example 2
「layer-swipe.js(297-ol3ex.js)」は、マップを表示するための JavaScript ファイルです。
「297-ol3ex.js」

「297-ol3ex.js」
var osm = new ol.layer.Tile({,
 source: new ol.source.OSM()
 /** ol.source.OSM
  * Layer source for the OpenStreetMap tile server.
  * OpenStreetMap タイルサーバのレイヤソース。(ol3 API)
  */
});
var bing = new ol.layer.Tile({
 source: new ol.source.BingMaps({
 /** ol.source.BingMaps
  * Layer source for Bing Maps tile data.
  * Bing Maps タイルデータのレイヤソース。(ol3 API)
  */
  key: 'Ak-dzM...(省略)',
  imagerySet: 'Aerial'
 })
});
var map = new ol.Map({
 layers: [osm, bing],
 target: 'map',
 controls: ol.control.defaults({
 /** controls
  * Controls initially added to the map.
  * If not specified, ol.control.defaults() is used.
  * 初期設定で、マップに追加されたコントロール。
  * 明示されていなければ、ol.control.defaults() が使用されま
  * す。(ol3 API)
  */
 /** ol.control.defaults()
  * デフォルトでは、マップに含まコントロールのセット。
  * 特に設定しない限り、これは、以下の各コントロールの
  * インスタンスを含むコレクションを返します。(ol3 API)
  * ol.control.Zoom, ol.control.Rotate, ol.control.Attribution
  */
  attributionOptions: /** @type {olx.control.AttributionOptions} */ ({
  /** @type
   * 値のタイプ(型)の説明 - 式などで表示
   * (@use JSDoc[http://usejsdoc.org/]より)
   */
   collapsible: false // 折りたたみ
  })
 }),
 view: new ol.View({
  center: [0, 0],
  zoom: 2
 })
});
var swipe = document.getElementById('swipe');
bing.on('precompose', function(event) {
/** on()
 * Listen for a certain type of event.
 * Returns: Unique key for the listener.(ol3 API)
 */
/** precompose イベント
 * レイヤを描画する前に発生するイベント。
 * (「Layer spy example」参照)
 */
 var ctx = event.context;
 /** context{CanvasRenderingContext2D}
  * Canvas context. Only available when a Canvas
  * renderer is used, null otherwise.
  * canvas context。キャンバスレンダラを使用する場合に
  * だけ利用でき、そうでない場合は、null。
  * (ol3 API[説明は Stable Only のチェックを外すと表示])
  */
 var width = ctx.canvas.width * (swipe.value / 100);
 /** HTMLCanvasElement.width
  * The HTMLCanvasElement.width property is a positive
  * integer reflecting the width HTML attribute of
  * the <canvas> element interpreted in CSS pixels.
  * When the attribute is not specified, or if it is
  * set to an invalid value, like a negative, the
  * default value of 300 is used.
  * HTMLCanvasElement.width プロパティは CSS ピクセル
  * で解釈された <canvas> 要素の幅 HTML 属性を反映
  * する正の整数です。属性が指定されていない場合、または、
  * 負の値のように無効な値に設定されている場合、デフォルト
  * 値 300 が使用されます。
  * (MDN[https://developer.mozilla.org/en-US/docs/Web/
  * API/HTMLCanvasElement/width])
  */
 ctx.save();
 /** CanvasRenderingContext2D.save()
  * The CanvasRenderingContext2D.save() method of the
  * Canvas 2D API saves the entire state of the canvas
  * by pushing the current state onto a stack.
  * Canvas 2D API の CanvasRenderingContext2D.save()
  * メソッドは、スタック上に現在の状態を最後に追加するこ
  * とにより、キャンバスの状態全体を保存します。
  * (MDN[https://developer.mozilla.org/en-US/docs/Web/
  * API/CanvasRenderingContext2D/save])
  */
 ctx.beginPath();
 /** CanvasRenderingContext2D.beginPath()
  * The CanvasRenderingContext2D.beginPath() method of
  * the Canvas 2D API starts a new path by emptying the
  * list of sub-paths. Call this method when you want
  * to create a new path.
  * Canvas 2D API の CanvasRenderingContext2D.beginPath()
  * メソッドは、サブパスのリストを空にすることによって新しいパ
  * スを開始します。新しいパスを作成する場合、このメソッドを呼
  * び出します。
  * (MDN[https://developer.mozilla.org/en-US/docs/Web/
  * API/CanvasRenderingContext2D/beginPath])
  */
 ctx.rect(width, 0, ctx.canvas.width - width, ctx.canvas.height);
 /** CanvasRenderingContext2D.rect()
  * The CanvasRenderingContext2D.rect() method of the
  * Canvas 2D API creates a path for a rectangle at
  * position (x, y) with a size that is determined by
  * width and height. Those four points are connected
  * by straight lines and the sub-path is marked as
  * closed, so that you can fill or stroke this rectangle.
  * Canvas 2D APIのCanvasRenderingContext2D.rect()
  * メソッドは、幅と高さによって決定される大きさと位置
  * (x、y)の矩形のためのパスを作成します。それらの4つ
  * のポイントが直線で接続され、および、サブパスは閉じた
  * ものとしてマークされ、それによりこの矩形を埋めるか、
  * 線を引くことができます。
  * (MDN[https://developer.mozilla.org/en-US/docs/Web/
  * API/CanvasRenderingContext2D/rect])
  */
 ctx.clip();
 /** CanvasRenderingContext2D.clip()
  * The CanvasRenderingContext2D.clip() method of the
  * Canvas 2D API turns the path currently being built
  * into the current clipping path.
  * Canvas 2D API の CanvasRenderingContext2D.clip()
  * メソッドは、現在組み込まれているパスを現在のクリッピン
  * グパスに置き換えます。
  * (MDN[https://developer.mozilla.org/en-US/docs/Web/
  * API/CanvasRenderingContext2D/clip])
  */
});
bing.on('postcompose', function(event) {
/** postcompose イベント
 * レイヤを描画した後に発生するイベント。
 * (「Layer spy example」参照)
 */
var ctx = event.context;
 ctx.restore();
 /** CanvasRenderingContext2D.restore()
  * The CanvasRenderingContext2D.restore() method of
  * the Canvas 2D API restores the most recently
  * saved canvas state by popping the top entry in
  * the drawing state stack. If there is no saved
  * state, this method does nothing.
  * Canvas 2D API の CanvasRenderingContext2D.restore()
  * メソッドは、描画状態のスタックの一番上のエントリを抜き
  * 出すことによって、最後に保存されたキャンバスの状態を復
  * 元します。全く保存された状態が存在しない場合、このメソッ
  * ドは何もしません。
  * (MDN[https://developer.mozilla.org/en-US/docs/Web/
  * API/CanvasRenderingContext2D/restore])
  */
});
swipe.addEventListener('input', function() {
/** EventTarget.addEventListener
 * addEventListener は、 1 つのイベントターゲットにイベント
 * リスナーを1つ登録します。イベントターゲットは、ドキュメント
 * 上の単一のノード、ドキュメント自身、ウィンドウ、あるいは、
 * XMLHttpRequest です。
 *(MDN[https://developer.mozilla.org/ja/docs/Web/API/
 * EventTarget.addEventListener])
 */
 map.render();
 /** render()
  * Requests a render frame; rendering will effectively occur
  * at the next browser animation frame.
  * レンダーフレームをを要求します。すなわち、レンダリングは、
  * 次のブラウザのアニメーションフレームで、効果的に発生します。
  * (ol3 API)
  */
}, false);
2 - ol3.3ex 97a - Layer Swipe example 1
「Layer Swipe example (layer-swipe.html)」を参考に地図を表示してみます。
HTML ファイルの作成
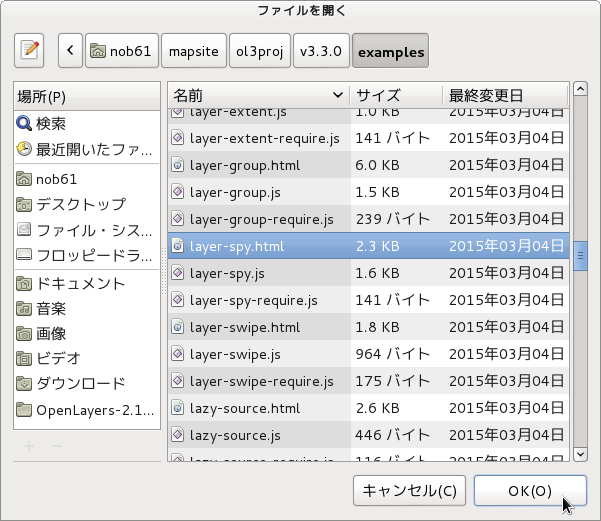
 a Eclipse のメニューの「ファイル」->「ファイルを開く」をクリックします。
 b 「ファイルを開く」ウィンドウで、「user」->「mapsite」->「ol3proj」->「v3.3.0」->「examples」->「layer-swipe.html」をクリックして選択し、「OK」ボタンをクリックします。
同じように「layer-swipe.js」を開きます。
 c メニューの「ファイル」->「新規」 -> 「ファイル」をクリックします。
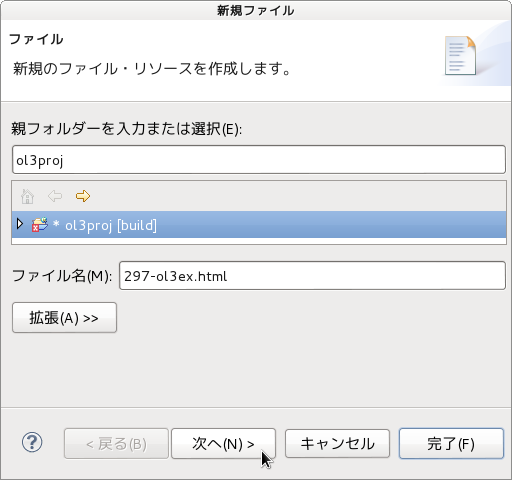 d 「ファイル」ウィンドウで「ol3proj」をクリックして選択し、「ファイル名」を「297-ol3ex.html」と入力し、「次へ」ボタンをクリックします。
」を参考に地図を表示してみます。
説明に次のようにあります。
Layer rendering can be manipulated in precompose and postcompose event listeners. These listeners get an event with a reference to the Canvas rendering context. In this example, the postcompose listener applies a filter to the image data.
レイヤレンダリングは precompose と postcompose イベントリスナで操作できます。これらのリスナは、キャンバス描画コンテキストを参照して、イベントを取得します。この例では、postcompose リスナは、画像データにフィルタを適用します。wnlQ/UzAfh1XgitI/AAAAAAAACUM/ygAC2IH6KD0/s1600/391d-oltaka.png) e 「File Template」ウィンドウで「HTML 5 Template」をクリックして選択し、「OK」ボタンをクリックします。
e 「File Template」ウィンドウで「HTML 5 Template」をクリックして選択し、「OK」ボタンをクリックします。
f 「layer-swipe.html」の内容をコピーして「297-ol3ex.html」に貼り付け、修正します。
g 同じように、新規に「297-ol3ex.js」ファイルを作成し、「File Template」ウィンドウで「JavaScript Template」をクリックして選択し、「完了」ボタンをクリックして、「layer-swipe.js」の内容をコピーして貼り付け、修正します。「layer-swipe-require.js」も「297-ol3ex-require.js」に貼り付けます。


「297-ol3ex.html」
HTML ファイルの作成
同じように「layer-swipe.js」を開きます。
d 「ファイル」ウィンドウで「ol3proj」をクリックして選択し、「ファイル名」を「297-ol3ex.html」と入力し、「次へ」ボタンをクリックします。
f 「layer-swipe.html」の内容をコピーして「297-ol3ex.html」に貼り付け、修正します。
g 同じように、新規に「297-ol3ex.js」ファイルを作成し、「File Template」ウィンドウで「JavaScript Template」をクリックして選択し、「完了」ボタンをクリックして、「layer-swipe.js」の内容をコピーして貼り付け、修正します。「layer-swipe-require.js」も「297-ol3ex-require.js」に貼り付けます。
「297-ol3ex.html」
<!doctype html>
<html lang="en">
 <head>
  <meta charset="utf-8">
  <meta http-equiv="X-UA-Compatible" content="chrome=1">
  <meta name="viewport" content="initial-scale=1.0, user-scalable=no, width=device-width">
<!--
  <link rel="stylesheet" href="../css/ol.css" type="text/css">
  <link rel="stylesheet" href="../resources/bootstrap/css/bootstrap.min.css" type="text/css">
  <link rel="stylesheet" href="../resources/layout.css" type="text/css">
  <link rel="stylesheet" href="../resources/bootstrap/css/bootstrap-responsive.min.css" type="text/css">
-->
  <!-- ディレクトリ修正 -->
  <link rel="stylesheet" href="v3.3.0/css/ol.css" type="text/css">
  <link rel="stylesheet" href="v3.3.0/resources/bootstrap/css/bootstrap.min.css" type="text/css">
  <link rel="stylesheet" href="v3.3.0/resources/layout.css" type="text/css">
  <link rel="stylesheet" href="v3.3.0/resources/bootstrap/css/bootstrap-responsive.min.css" type="text/css">
<title>Layer Swipe example</title>
 </head>
 <body>
  <!--
  bootstrap.min.css, bootstrap-responsive.min.css で設定されたセレクタを使用。
  -->
  <div class="navbar navbar-inverse navbar-fixed-top">
   <div class="navbar-inner">
    <div class="container">
     <!--
     <a class="brand" href="./"><img src="../resources/logo.png"> OpenLayers 3 Examples</a>
     -->
     <!-- ディレクトリ修正 -->
     <a class="brand" href="v3.3.0/examples/"><img src="v3.3.0/resources/logo.png"> OpenLayers 3 Examples</a>
    </div>
   </div>
  </div>
  <div class="container-fluid">
   <div class="row-fluid">
    <div class="span12">
     <div id="map" class="map"></div>
     <input id="swipe" type="range" style="width: 100%">
    </div>
   </div>
   <div class="row-fluid">
    <div class="span12">
    <h4 id="title">Layer Swipe example</h4>
     <p id="shortdesc">Example of a Layer swipe map.</p>
      <!--
      <p>See the <a href="layer-swipe.js" target="_blank">layer-swipe.js source</a>
       to see how this is done.</p>
      -->
      <!-- ファイル修正 -->
      <p>See the <a href="297-ol3ex.js" target="_blank">297-ol3ex.js source</a>
       to see how this is done.</p>
     </div>
     <div id="tags">swipe, openstreetmap</div>
    </div>
   </div>
  </div>
  <!--
  <script src="../resources/jquery.min.js" type="text/javascript"></script>
  <script src="../resources/example-behaviour.js" type="text/javascript"></script>
  -->
  <!-- ディレクトリ修正
   jQuery Minified版と
   example-behaviour.js(Examples用 JSコード[文字コードなど])
  -->
  <script src="v3.3.0/resources/jquery.min.js" type="text/javascript"></script>
  <script src="v3.3.0/resources/example-behaviour.js" type="text/javascript"></script>
  <!--
  <script src="loader.js?id=layer-swipe" type="text/javascript"></script>
  -->
  <!-- ファイル修正 -->  <!-- ディレクトリ修正 -->
  <script src="loader.js?id=297-ol3ex" type="text/javascript"></script>
 </body>
</html>
2 - ol3.3ex 96b - Layer spy example 2
「layer-spy.js(296-ol3ex.js)」は、マップを表示するための JavaScript ファイルです。
「296-ol3ex.js」
 originalEvent
「ol.MapBrowserEvent」
(Events emitted as map browser events are instances of this type. See ol.Map for which events trigger a map browser event.
マップブラウザイベントとして発するイベントは、このタイプのインスタンスです。イベントがマップブラウザイベントをトリガする ol.Map を参照してください。)
のメンバ。
ol/ol/mapbrowserevent.js 32行目
* @param {goog.events.BrowserEvent} browserEvent Browser event.
ol/ol/mapbrowserevent.js 52行目
this.originalEvent = browserEvent.getBrowserEvent();
goog.events.BrowserEvent
「events.BrowserEvent - Extends goog.events.Event」
(http://docs.closure-library.googlecode.com/git/class_goog_events_BrowserEvent.html)
Accepts a browser event object and creates a patched, cross browser event object. The content of this object will not be initialized if no event object is provided. If this is the case, init() needs to be invoked separately.
events.BrowserEvent。goog.events.Eventを拡張します。
ブラウザイベントオブジェクトを受け入れ、パッチを適用した、クロスブラウザイベントオブジェクトを作成します。イベントオブジェクトが提供されない場合は、このオブジェクトの内容は初期化されません。この場合は、init()は別々に呼び出す必要があります。
「Instance Methods」
getBrowserEvent() ⇒ Event
No description.
Returns: Event The underlying browser event object.
「296-ol3ex.js」
var key = 'Ak-dzM...(省略)';
var roads = new ol.layer.Tile({
 source: new ol.source.BingMaps({
 /** ol.source.BingMaps
  * Layer source for Bing Maps tile data.
  * Bing Maps タイルデータのレイヤソース。(ol3 API)
  */
  key: key,
  imagerySet: 'Road'
 })
});
var imagery = new ol.layer.Tile({
 source: new ol.source.BingMaps({
  key: key, imagerySet: 'Aerial'
 })
});
var map = new ol.Map({
 layers: [roads, imagery],
 target: 'map',
 view: new ol.View({
  center: ol.proj.transform(
[-109, 46.5], 'EPSG:4326', 'EPSG:3857'
  ),
  zoom: 6
 })
});
var radius = 75;
$(document).keydown(function(evt) {
/** .keydown()
 * Bind an event handler to the "keydown" JavaScript event,
 * or trigger that event on an element.
 * 「keydown」JavaScript イベントのイベントハンドラをバインドす
 * るか、その要素のイベントをトリガします。
 * (jQuery[https://api.jquery.com/keydown/])
 */
 if (evt.which === 38) {
 /** KeyboardEvent.which(Deprecated)
  * The KeyboardEvent.which read-only property returns the
  * numeric keyCode of the key pressed, or the character
  * code (charCode) for an alphanumeric key pressed.
  * KeyboardEvent.which 読み取り専用プロパティは、押されたキー
  * の数字キーコード、または、押されたアルファベットキーに対する
  * キャラクタコード(charCode)を返します。
  * (MDN[https://developer.mozilla.org/en-US/docs/Web/
  * API/KeyboardEvent/which])
  */
  radius = Math.min(radius + 5, 150);
  /** Math.min()
   * 引数として与えた複数の数の中で最小の数を返します。
   * (MDN [https://developer.mozilla.org/ja/docs/Web/
   * JavaScript/Reference/Global_Objects/Math/min])
   */
  map.render();
  /** render()
   * Requests a render frame; rendering will effectively
   * occur at the next browser animation frame.
   * レンダーフレームをを要求します。すなわち、レンダリングは、
   * 次のブラウザのアニメーションフレームで、効果的に発生します。
   * (ol3 API)
   */
} else if (evt.which === 40) {
  radius = Math.max(radius - 5, 25);
  /** Math.max()
   * 引数として与えた複数の数の中で最大の数を返します。
   * (MDN [https://developer.mozilla.org/ja/docs/Web/
   * JavaScript/Reference/Global_Objects/Math/max])
   */
  map.render();
 }
});
// get the pixel position with every move
// すべての移動のピクセル(画素)位置を取得
var mousePosition = null;
$(map.getViewport()).on('mousemove', function(evt) {
/** getViewport()
 * Return: Viewport (ol3 API)
 */
/** jQuery on イベント */
 mousePosition = map.getEventPixel(evt.originalEvent);
 /** getEventPixel()
  * Returns the map pixel position for a browser event.
  * ブラウザイベントに対して、マップのピクセル位置を返します。
  * (ol3 API)
  */
map.render();
}).on('mouseout', function() {
/** on
 * Listen for a certain type of event.
 * あるタイプのイベントをリッスンします。(ol3 API)
 */
 mousePosition = null;
 map.render();
});
// before rendering the layer, do some clipping
// レイヤを描画する前にクリップを実行
imagery.on('precompose', function(event) {
 var ctx = event.context;
 /** context{CanvasRenderingContext2D}
  * Canvas context. Only available when a Canvas renderer
  * is used, null otherwise.
  * canvas context。キャンバスレンダラを使用する場合にだけ
  * 利用でき、そうでない場合は、null。
  * (ol3 API[説明は Stable Only のチェックを外すと表示])
  */
 var pixelRatio = event.frameState.pixelRatio;
 /** frameState{olx.FrameState}
  * The frame state at the time of the event.
  * イベント時のフレーム状態。
  * (ol3 API[説明は Stable Only のチェックを外すと表示])
  */
 ctx.save();
 /** CanvasRenderingContext2D.save()
  * The CanvasRenderingContext2D.save() method of
  * the Canvas 2D API saves the entire state of the
  * canvas by pushing the current state onto a stack.
  * Canvas 2D API の CanvasRenderingContext2D.save()
  * メソッドは、スタック上に現在の状態を最後に追加するこ
  * とにより、キャンバスの状態全体を保存します。
  * (MDN[https://developer.mozilla.org/en-US/docs/Web/
  * API/CanvasRenderingContext2D/save])
  */
 ctx.beginPath();
 /** CanvasRenderingContext2D.beginPath()
  * The CanvasRenderingContext2D.beginPath() method of the
  * Canvas 2D API starts a new path by emptying the list of
  * sub-paths. Call this method when you want to create a
  * new path.
  * Canvas 2D API の CanvasRenderingContext2D.beginPath()
  * メソッドは、サブパスのリストを空にすることによって新しいパ
  * スを開始します。新しいパスを作成する場合、このメソッドを呼
  * び出します。
  * (MDN[https://developer.mozilla.org/en-US/docs/Web/
  * API/CanvasRenderingContext2D/beginPath])
  */
if (mousePosition) {
 // only show a circle around the mouse
 // マウスの周囲だけ円状に表示
  ctx.arc(mousePosition[0] * pixelRatio, mousePosition[1] * pixelRatio,
  /**CanvasRenderingContext2D.arc()
   * The CanvasRenderingContext2D.arc() method of the
   * Canvas 2D API adds an arc to the path which is
   * centered at (x, y) position with radius r starting at
   * startAngle and ending at endAngle going in the given
   * direction by anticlockwise (defaulting to clockwise).
   * Canvas 2D API の CanvasRenderingContext2D.arc()メソッ
   * ドは、anticlockwise キーで与えられた方向に startAngle
   * から開始し endAngle で終わる、半径r(x、y)の位置を中心
   * とするパスに弧を追加します(デフォルトでは時計回り)。
  * (MDN[https://developer.mozilla.org/en-US/docs/Web/
  * API/CanvasRenderingContext2D/arc])
   */
   radius * pixelRatio, 0, 2 * Math.PI);
   /** Math.PI()
    * 円周率。約 3.14159 です。
    * (MDN[https://developer.mozilla.org/ja/docs/Web
    * /JavaScript/Reference/Global_Objects/Math/PI])
    */
  ctx.lineWidth = 5 * pixelRatio;
  /** CanvasRenderingContext2D.lineWidth
   * The CanvasRenderingContext2D.lineWidth property of
   * the Canvas 2D API sets the thickness of lines in
   * space units. When getting, it returns the current
   * value (1.0 by default). When setting, zero, negative,
   * Infinity and NaN values are ignored; otherwise the
   * current value is set to the new value.
   * Canvas 2D API の CanvasRenderingContext2D.lineWidth
   * プロパティは、空間単位で線の太さを設定します。取得する
   * と、現在の値(デフォルトでは1.0)を返します。設定時、
   * ゼロ、負、無限大とNaN値は無視されます。それ以外の場合、
   * 現在の値は新しい値に設定されてます。
   * (MDN[https://developer.mozilla.org/en-US/docs/Web/
   * API/CanvasRenderingContext2D/lineWidth])
    */
  ctx.strokeStyle = 'rgba(0,0,0,0.5)';
  /** CanvasRenderingContext2D.strokeStyle
   * The CanvasRenderingContext2D.strokeStyle property of
   * the Canvas 2D API specifies the color or style to
   * use for the lines around shapes. The default is #000
   * (black).
   * Canvas 2D APIのCanvasRenderingContext2D.strokeStyle
   * プロパティは、図形の外周の線に使用する色やスタイルを指定
   * します。デフォルトは#000(黒)です。
   * (MDN[https://developer.mozilla.org/en-US/docs/Web/
   * API/CanvasRenderingContext2D/strokeStyle])
   */
  ctx.stroke();
  /** CanvasRenderingContext2D.stroke()
   * The CanvasRenderingContext2D.stroke() method of the
   * Canvas 2D API strokes the current or given path with
   * the current stroke style using the non-zero winding
   * rule.
   * Canvas 2D APIのCanvasRenderingContext2D.stroke()
   * メソッドは、ノンゼロワインディング規則を使用して、現在
   * の線のスタイルを持つ現在または与えられたパスを引きます。
   * (MDN[https://developer.mozilla.org/en-US/docs/Web/
   * API/CanvasRenderingContext2D/stroke])
   */
}
 ctx.clip();
 /** CanvasRenderingContext2D.clip()
  * The CanvasRenderingContext2D.clip() method of the
  * Canvas 2D API turns the path currently being built
  * into the current clipping path.
  * Canvas 2D API の CanvasRenderingContext2D.clip()
  * メソッドは、現在組み込まれているパスを現在のクリッピン
  * グパスに置き換えます。
  * (MDN[https://developer.mozilla.org/en-US/docs/Web/
  * API/CanvasRenderingContext2D/clip])
  */
});
// after rendering the layer, restore the canvas context
// レイヤを描画した後、キャンバスコンテキストを保存
imagery.on('postcompose', function(event) {
/** postcompose イベント
 * レイヤを描画した後に発生するイベント。
 * (「Layer spy example」参照)
 */
var ctx = event.context;
 ctx.restore();
 /** CanvasRenderingContext2D.restore()
  * The CanvasRenderingContext2D.restore() method of the
  * Canvas 2D API restores the most recently saved canvas
  * state by popping the top entry in the drawing state
  * stack. If there is no saved state, this method does
  * nothing.
  * Canvas 2D API の CanvasRenderingContext2D.restore()
  * メソッドは、描画状態のスタックの一番上のエントリを抜き
  * 出すことによって、最後に保存されたキャンバスの状態を復
  * 元します。全く保存された状態が存在しない場合、このメソッ
  * ドは何もしません。
  * (MDN[https://developer.mozilla.org/en-US/docs/Web/
  * API/CanvasRenderingContext2D/restore])
  */
});
「ol.MapBrowserEvent」
(Events emitted as map browser events are instances of this type. See ol.Map for which events trigger a map browser event.
マップブラウザイベントとして発するイベントは、このタイプのインスタンスです。イベントがマップブラウザイベントをトリガする ol.Map を参照してください。)
のメンバ。
ol/ol/mapbrowserevent.js 32行目
* @param {goog.events.BrowserEvent} browserEvent Browser event.
ol/ol/mapbrowserevent.js 52行目
this.originalEvent = browserEvent.getBrowserEvent();
goog.events.BrowserEvent
「events.BrowserEvent - Extends goog.events.Event」
(http://docs.closure-library.googlecode.com/git/class_goog_events_BrowserEvent.html)
Accepts a browser event object and creates a patched, cross browser event object. The content of this object will not be initialized if no event object is provided. If this is the case, init() needs to be invoked separately.
events.BrowserEvent。goog.events.Eventを拡張します。
ブラウザイベントオブジェクトを受け入れ、パッチを適用した、クロスブラウザイベントオブジェクトを作成します。イベントオブジェクトが提供されない場合は、このオブジェクトの内容は初期化されません。この場合は、init()は別々に呼び出す必要があります。
「Instance Methods」
getBrowserEvent() ⇒ Event
No description.
Returns: Event The underlying browser event object.
2 - ol3.3ex 96a - Layer spy example 1
「Layer spy example (layer-spy.html)」を参考に地図を表示してみます。
説明に次のようにあります。
View a portion of one layer over another
Layer rendering can be manipulated in precompose and postcompose event listeners. These listeners get an event with a reference to the Canvas rendering context. In this example, the precompose listener sets a clipping mask around the most recent mouse position, giving you a spyglass effect for viewing one layer over another.
Move around the map to see the effect. Use the ↑ up and ↓ down arrow keys to adjust the spyglass size.
レイヤの一部を別の上に表示します。
レイヤレンダリングは precompose と postcompose イベントリスナで操作できます。これらのリスナは、キャンバス描画コンテキストを参照して、イベントを取得します。この例では、precompose リスナは、最新のマウスの位置を中心にクリッピングマスクを設定して、レイヤを別の上に表示するためのスパイグラス効果を与えます。
効果を見るためにマップを移動してください。 スパイグラスのサイズを調整するには、アップ↑とダウン↓の矢印キーをを使用してください。
HTML ファイルの作成
a Eclipse のメニューの「ファイル」->「ファイルを開く」をクリックします。
 b 「ファイルを開く」ウィンドウで、「user」->「mapsite」->「ol3proj」->「v3.3.0」->「examples」->「layer-spy.html」をクリックして選択し、「OK」ボタンをクリックします。
同じように「layer-spy.js」を開きます。
c メニューの「ファイル」->「新規」 -> 「ファイル」をクリックします。
 d 「ファイル」ウィンドウで「ol3proj」をクリックして選択し、「ファイル名」を「296-ol3ex.html」と入力し、「次へ」ボタンをクリックします。
e 「File Template」ウィンドウで「HTML 5 Template」をクリックして選択し、「OK」ボタンをクリックします。
f 「layer-spy.html」の内容をコピーして「296-ol3ex.html」に貼り付け、修正します。
g 同じように、新規に「296-ol3ex.js」ファイルを作成し、「File Template」ウィンドウで「JavaScript Template」をクリックして選択し、「完了」ボタンをクリックして、「layer-spy.js」の内容をコピーして貼り付け、修正します。「layer-spy-require.js」も「296-ol3ex-require.js」に貼り付けます。

「296-ol3ex.html」
説明に次のようにあります。
View a portion of one layer over another
Layer rendering can be manipulated in precompose and postcompose event listeners. These listeners get an event with a reference to the Canvas rendering context. In this example, the precompose listener sets a clipping mask around the most recent mouse position, giving you a spyglass effect for viewing one layer over another.
Move around the map to see the effect. Use the ↑ up and ↓ down arrow keys to adjust the spyglass size.
レイヤの一部を別の上に表示します。
レイヤレンダリングは precompose と postcompose イベントリスナで操作できます。これらのリスナは、キャンバス描画コンテキストを参照して、イベントを取得します。この例では、precompose リスナは、最新のマウスの位置を中心にクリッピングマスクを設定して、レイヤを別の上に表示するためのスパイグラス効果を与えます。
効果を見るためにマップを移動してください。 スパイグラスのサイズを調整するには、アップ↑とダウン↓の矢印キーをを使用してください。
HTML ファイルの作成
b 「ファイルを開く」ウィンドウで、「user」->「mapsite」->「ol3proj」->「v3.3.0」->「examples」->「layer-spy.html」をクリックして選択し、「OK」ボタンをクリックします。同じように「layer-spy.js」を開きます。
f 「layer-spy.html」の内容をコピーして「296-ol3ex.html」に貼り付け、修正します。
g 同じように、新規に「296-ol3ex.js」ファイルを作成し、「File Template」ウィンドウで「JavaScript Template」をクリックして選択し、「完了」ボタンをクリックして、「layer-spy.js」の内容をコピーして貼り付け、修正します。「layer-spy-require.js」も「296-ol3ex-require.js」に貼り付けます。
「296-ol3ex.html」
<!doctype html>
<html lang="en">
 <head>
  <meta charset="utf-8">
  <meta http-equiv="X-UA-Compatible" content="chrome=1">
  <meta name="viewport" content="initial-scale=1.0, user-scalable=no, width=device-width">
<!--
  <link rel="stylesheet" href="../css/ol.css" type="text/css">
  <link rel="stylesheet" href="../resources/bootstrap/css/bootstrap.min.css" type="text/css">
  <link rel="stylesheet" href="../resources/layout.css" type="text/css">
  <link rel="stylesheet" href="../resources/bootstrap/css/bootstrap-responsive.min.css" type="text/css">
-->
  <!-- ディレクトリ修正 -->
  <link rel="stylesheet" href="v3.3.0/css/ol.css" type="text/css">
  <link rel="stylesheet" href="v3.3.0/resources/bootstrap/css/bootstrap.min.css" type="text/css">
  <link rel="stylesheet" href="v3.3.0/resources/layout.css" type="text/css">
  <link rel="stylesheet" href="v3.3.0/resources/bootstrap/css/bootstrap-responsive.min.css" type="text/css">
<title>Layer Spy example</title>
 </head>
 <body>
  <!--
  bootstrap.min.css, bootstrap-responsive.min.css で設定されたセレクタを使用。
  -->
  <div class="navbar navbar-inverse navbar-fixed-top">
   <div class="navbar-inner">
    <div class="container">
     <!--
     <a class="brand" href="./"><img src="../resources/logo.png"> OpenLayers 3 Examples</a>
     -->
     <!-- ディレクトリ修正 -->
     <a class="brand" href="v3.3.0/examples/"><img src="v3.3.0/resources/logo.png"> OpenLayers 3 Examples</a>
    </div>
   </div>
  </div>
  <div class="container-fluid">
   <div class="row-fluid">
    <div class="span12">
     <div id="map" class="map"></div>
    </div>
   </div>
   <div class="row-fluid">
    <div class="span12">
    <h4 id="title">Layer Spy example</h4>
     <p id="shortdesc">View a portion of one layer over
      another</p>
     <div id="docs">
      <p>Layer rendering can be manipulated in
       <code>precompose</code> and
       <code>postcompose</code> event listeners.
       These listeners get an event with a reference to the
       Canvas rendering context. In this example, the
       <code>precompose</code> listener sets a clipping mask
       around the most recent mouse position, giving you a
       spyglass effect for viewing one layer over another.
       </p>
      <p>Move around the map to see the effect.  Use the ↑
       up and ↓ down arrow keys to adjust the spyglass size.
       </p>
      <!--
      <p>See the <a href="layer-spy.js" target="_blank">layer-spy.js source</a>
       to see how this is done.</p>
      -->
      <!-- ファイル修正 -->
      <p>See the <a href="296-ol3ex.js" target="_blank">296-ol3ex.js source</a>
       to see how this is done.</p>
     </div>
     <div id="tags">spy, image manipulation</div>
    </div>
   </div>
  </div>
  <!--
  <script src="../resources/jquery.min.js" type="text/javascript"></script>
  <script src="../resources/example-behaviour.js" type="text/javascript"></script>
  -->
  <!-- ディレクトリ修正
   jQuery Minified版と
   example-behaviour.js(Examples用 JSコード[文字コードなど])
  -->
  <script src="v3.3.0/resources/jquery.min.js" type="text/javascript"></script>
  <script src="v3.3.0/resources/example-behaviour.js" type="text/javascript"></script>
  <!--
  <script src="loader.js?id=layer-spy" type="text/javascript"></script>
  -->
  <!-- ファイル修正 -->  <!-- ディレクトリ修正 -->
  <script src="loader.js?id=296-ol3ex" type="text/javascript"></script>
 </body>
</html>
2 - ol3.3ex 95b - Layer clipping example 2
「layer-clipping.js(295-ol3ex.js)」は、マップを表示するための JavaScript ファイルです。
「295-ol3ex.js」

「295-ol3ex.js」
var osm = new ol.layer.Tile({
 source: new ol.source.OSM()
 /** ol.source.OSM
  * Layer source for the OpenStreetMap tile server.
  * OpenStreetMap タイルサーバのレイヤソース。(ol3 API)
  */
});
var map = new ol.Map({
 layers: [osm],
 target: 'map',
 controls: ol.control.defaults({
 /** controls
  * Controls initially added to the map.
  * If not specified, ol.control.defaults() is used.
  * 初期設定で、マップに追加されたコントロール。
  * 明示されていなければ、ol.control.defaults() が使用されま
  * す。(ol3 API)
  */
 /** ol.control.defaults()
  * デフォルトでは、マップに含まコントロールのセット。
  * 特に設定しない限り、これは、以下の各コントロールの
  * インスタンスを含むコレクションを返します。(ol3 API)
  * ol.control.Zoom, ol.control.Rotate, ol.control.Attribution
  */
  attributionOptions: /** @type {olx.control.AttributionOptions} */ ({
  /** @type
   * 値のタイプ(型)の説明 - 式などで表示
   * (@use JSDoc[http://usejsdoc.org/]より)
   */
   collapsible: false // 折りたたみ
  })
 }),
 view: new ol.View({
  center: [0, 0],
  zoom: 2
 })
});
osm.on('precompose', function(event) {
/** on()
 * Listen for a certain type of event.
 * Returns: Unique key for the listener.(ol3 API)
 */
/** precompose イベント
 * レイヤを描画する前に発生するイベント。
 * (「Layer spy example」参照)
 */
 var ctx = event.context;
 /** context{CanvasRenderingContext2D}
  * Canvas context. Only available when a Canvas
  * renderer is used, null otherwise.
  * canvas context。キャンバスレンダラを使用する場合に
  * だけ利用でき、そうでない場合は、null。
  * (ol3 API[説明は Stable Only のチェックを外すと表示])
  */
 ctx.save();
 /** CanvasRenderingContext2D.save()
  * The CanvasRenderingContext2D.save() method of
  * the Canvas 2D API saves the entire state of the
  * canvas by pushing the current state onto a stack.
  * Canvas 2D API の CanvasRenderingContext2D.save()
  * メソッドは、スタック上に現在の状態を最後に追加することに
  * より、キャンバスの状態全体を保存します。
  * (MDN[https://developer.mozilla.org/en-US/docs/Web/
  * API/CanvasRenderingContext2D/save])
  */
 ctx.translate(ctx.canvas.width / 2, ctx.canvas.height / 2);
 /** CanvasRenderingContext2D.translate()
  * The CanvasRenderingContext2D.translate() method of
  * the Canvas 2D API adds a translation transformation
  * by moving the canvas and its origin x horizontally
  * and y vertically on the grid.
  * Canvas 2D API の CanvasRenderingContext2D.translate()
  * メソッドは、canvas およびその元のグリッド上の x 垂直方向、
  * および y 水平方向を移動することで変換変形を追加します。
  * (MDN[https://developer.mozilla.org/en-US/docs/Web/
  * API/CanvasRenderingContext2D/translate])
  */
 ctx.scale(3, 3);
 /** CanvasRenderingContext2D.scale()
  * The CanvasRenderingContext2D.scale() method of the
  * Canvas 2D API adds a scaling transformation to the
  * canvas units by x horizontally and by y vertically.
  * Canvas 2D API の CanvasRenderingContext2D.scale()
  * メソッドは、x水平方向、および y 垂直方向によってキャン
  * バス単位に伸縮変形を追加します。
  * (MDN[https://developer.mozilla.org/en-US/docs/Web/
  * API/CanvasRenderingContext2D/scale])
  */
ctx.translate(-75, -80);
 ctx.beginPath();
 /** CanvasRenderingContext2D.beginPath()
  * The CanvasRenderingContext2D.beginPath() method of
  * the Canvas 2D API starts a new path by emptying the
  * list of sub-paths. Call this method when you want
  * to create a new path.
  * Canvas 2D API の CanvasRenderingContext2D.beginPath()
  * メソッドは、サブパスのリストを空にすることによって新しいパ
  * スを開始します。新しいパスを作成する場合、このメソッドを呼
  * び出します。
  * (MDN[https://developer.mozilla.org/en-US/docs/Web/
  * API/CanvasRenderingContext2D/beginPath])
  */
 ctx.moveTo(75, 40);
 /** CanvasRenderingContext2D.moveTo()
  * The CanvasRenderingContext2D.moveTo() method of the
  * Canvas 2D API moves the starting point of a new
  * sub-path to the (x, y) coordinates.
  * Canvas 2D API の CanvasRenderingContext2D.moveTo()
  * メソッドは、新しいサブパスの開始点を(x、y)座標に、移動
  * します。
  * (MDN[https://developer.mozilla.org/en-US/docs/Web/
  * API/CanvasRenderingContext2D/moveTo])
  */
 ctx.bezierCurveTo(75, 37, 70, 25, 50, 25);
 /** CanvasRenderingContext2D.bezierCurveTo()
  * The CanvasRenderingContext2D.bezierCurveTo() method
  * of the Canvas 2D API adds a cubic Bézier curve to
  * the path. It requires three points. The first two
  * points are control points and the third one is the
  * end point. The starting point is the last point in
  * the current path, which can be changed using moveTo()
  * before creating the Bézier curve.
  * Canvas 2D API の CanvasRenderingContext2D.bezierCurveTo()
  * メソッドは、三次ベジェ曲線をパスに追加します。それは3つのポイ
  * ントが必要です。最初の2点は制御点で、3つ目は終点です。始点は、
  * ベジェ曲線を作成する前の moveTo()を使用して変更することがで
  * きる、現在のパスの最後の点です。
  * (MDN[https://developer.mozilla.org/en-US/docs/Web/
  * API/CanvasRenderingContext2D/bezierCurveTo])
  */
 ctx.bezierCurveTo(20, 25, 20, 62.5, 20, 62.5);
 ctx.bezierCurveTo(20, 80, 40, 102, 75, 120);
 ctx.bezierCurveTo(110, 102, 130, 80, 130, 62.5);
 ctx.bezierCurveTo(130, 62.5, 130, 25, 100, 25);
 ctx.bezierCurveTo(85, 25, 75, 37, 75, 40);
 ctx.clip();
 /** CanvasRenderingContext2D.clip()
  * The CanvasRenderingContext2D.clip() method of the
  * Canvas 2D API turns the path currently being built
  * into the current clipping path.
  * Canvas 2D API の CanvasRenderingContext2D.clip()
  * メソッドは、現在組み込まれているパスを現在のクリッピン
  * グパスに置き換えます。
  * (MDN[https://developer.mozilla.org/en-US/docs/Web/
  * API/CanvasRenderingContext2D/clip])
  */
 ctx.setTransform(1, 0, 0, 1, 0, 0);
 /** CanvasRenderingContext2D.setTransform()
  * The CanvasRenderingContext2D.setTransform() method
  * of the Canvas 2D API resets (overrides) the current
  * transformation to the identity matrix and then
  * invokes a transformation described by the arguments
  * of this method.
  * Canvas 2D API の CanvasRenderingContext2D.setTransform()
  * メソッドは、現在の指定されたマトリックスへの変換をリセット
  * (オーバーライド)し、その後、このメソッドの引数によって記述
  * された変換を呼び出します。
  * (MDN[https://developer.mozilla.org/en-US/docs/Web/
  * API/CanvasRenderingContext2D/setTransform])
  */
});
osm.on('postcompose', function(event) {
/** postcompose イベント
 * レイヤを描画した後に発生するイベント。
 * (「Layer spy example」参照)
 */
var ctx = event.context;
 ctx.restore();
 /** CanvasRenderingContext2D.restore()
  * The CanvasRenderingContext2D.restore() method of
  * the Canvas 2D API restores the most recently
  * saved canvas state by popping the top entry in
  * the drawing state stack. If there is no saved
  * state, this method does nothing.
  * Canvas 2D API の CanvasRenderingContext2D.restore()
  * メソッドは、描画状態のスタックの一番上のエントリを抜き
  * 出すことによって、最後に保存されたキャンバスの状態を復
  * 元します。全く保存された状態が存在しない場合、このメソッ
  * ドは何もしません。
  * (MDN[https://developer.mozilla.org/en-US/docs/Web/
  * API/CanvasRenderingContext2D/restore])
  */
});
2 - ol3.3ex 95a - Layer clipping example 1
「Layer clipping example (layer-clipping.html)」を参考に地図を表示してみます。
HTML ファイルの作成
a Eclipse のメニューの「ファイル」->「ファイルを開く」をクリックします。
 b 「ファイルを開く」ウィンドウで、「user」->「mapsite」->「ol3proj」->「v3.3.0」->「examples」->「layer-clipping.html」をクリックして選択し、「OK」ボタンをクリックします。
同じように「layer-clipping.js」を開きます。
c メニューの「ファイル」->「新規」 -> 「ファイル」をクリックします。
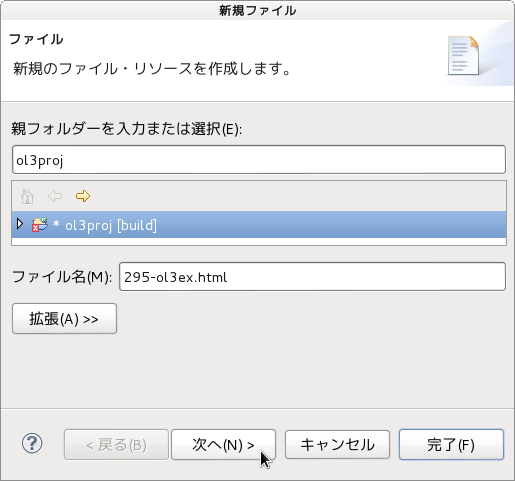 d 「ファイル」ウィンドウで「ol3proj」をクリックして選択し、「ファイル名」を「295-ol3ex.html」と入力し、「次へ」ボタンをクリックします。
e 「File Template」ウィンドウで「HTML 5 Template」をクリックして選択し、「OK」ボタンをクリックします。
f 「layer-clipping.html」の内容をコピーして「295-ol3ex.html」に貼り付け、修正します。
g 同じように、新規に「295-ol3ex.js」ファイルを作成し、「File Template」ウィンドウで「JavaScript Template」をクリックして選択し、「完了」ボタンをクリックして、「layer-clipping.js」の内容をコピーして貼り付け、修正します。「layer-clipping-require.js」も「295-ol3ex-require.js」に貼り付けます。

「295-ol3ex.html」
HTML ファイルの作成
同じように「layer-clipping.js」を開きます。
d 「ファイル」ウィンドウで「ol3proj」をクリックして選択し、「ファイル名」を「295-ol3ex.html」と入力し、「次へ」ボタンをクリックします。f 「layer-clipping.html」の内容をコピーして「295-ol3ex.html」に貼り付け、修正します。
g 同じように、新規に「295-ol3ex.js」ファイルを作成し、「File Template」ウィンドウで「JavaScript Template」をクリックして選択し、「完了」ボタンをクリックして、「layer-clipping.js」の内容をコピーして貼り付け、修正します。「layer-clipping-require.js」も「295-ol3ex-require.js」に貼り付けます。
「295-ol3ex.html」
<!doctype html>
<html lang="en">
 <head>
  <meta charset="utf-8">
  <meta http-equiv="X-UA-Compatible" content="chrome=1">
  <meta name="viewport" content="initial-scale=1.0, user-scalable=no, width=device-width">
<!--
  <link rel="stylesheet" href="../css/ol.css" type="text/css">
  <link rel="stylesheet" href="../resources/bootstrap/css/bootstrap.min.css" type="text/css">
  <link rel="stylesheet" href="../resources/layout.css" type="text/css">
  <link rel="stylesheet" href="../resources/bootstrap/css/bootstrap-responsive.min.css" type="text/css">
-->
  <!-- ディレクトリ修正 -->
  <link rel="stylesheet" href="v3.3.0/css/ol.css" type="text/css">
  <link rel="stylesheet" href="v3.3.0/resources/bootstrap/css/bootstrap.min.css" type="text/css">
  <link rel="stylesheet" href="v3.3.0/resources/layout.css" type="text/css">
  <link rel="stylesheet" href="v3.3.0/resources/bootstrap/css/bootstrap-responsive.min.css" type="text/css">
<title>Layer clipping example</title>
 </head>
 <body>
  <!--
  bootstrap.min.css, bootstrap-responsive.min.css で設定されたセレクタを使用。
  -->
  <div class="navbar navbar-inverse navbar-fixed-top">
   <div class="navbar-inner">
    <div class="container">
     <!--
     <a class="brand" href="./"><img src="../resources/logo.png"> OpenLayers 3 Examples</a>
     -->
     <!-- ディレクトリ修正 -->
     <a class="brand" href="v3.3.0/examples/"><img src="v3.3.0/resources/logo.png"> OpenLayers 3 Examples</a>
    </div>
   </div>
  </div>
  <div class="container-fluid">
   <div class="row-fluid">
    <div class="span12">
     <div id="map" class="map"></div>
    </div>
   </div>
   <div class="row-fluid">
    <div class="span12">
    <h4 id="title">Layer clipping example</h4>
     <p id="shortdesc">Layer clipping example.</p>
     <div id="docs">
      <!--
      <p>See the <a href="layer-clipping.js" target="_blank">layer-clipping.js source</a>
       to see how this is done.</p>
      -->
      <!-- ファイル修正 -->
      <p>See the <a href="295-ol3ex.js" target="_blank">295-ol3ex.js source</a>
       to see how this is done.</p>
     </div>
     <div id="tags">clipping, openstreetmap</div>
    </div>
   </div>
  </div>
  <!--
  <script src="../resources/jquery.min.js" type="text/javascript"></script>
  <script src="../resources/example-behaviour.js" type="text/javascript"></script>
  -->
  <!-- ディレクトリ修正
   jQuery Minified版と
   example-behaviour.js(Examples用 JSコード[文字コードなど])
  -->
  <script src="v3.3.0/resources/jquery.min.js" type="text/javascript"></script>
  <script src="v3.3.0/resources/example-behaviour.js" type="text/javascript"></script>
  <!--
  <script src="loader.js?id=layer-clipping" type="text/javascript"></script>
  -->
  <!-- ファイル修正 -->  <!-- ディレクトリ修正 -->
  <script src="loader.js?id=295-ol3ex" type="text/javascript"></script>
 </body>
</html>
2 - ol3.3ex 94b - Image filter example 2
「image-filter.js(294-ol3ex.js)」は、マップを表示するための JavaScript ファイルです。
「294-ol3ex.js」

「294-ol3ex.js」
var key = 'Ak-dzM省略';

var imagery = new ol.layer.Tile({
 source: new ol.source.BingMaps({key: key, imagerySet: 'Aerial'})
 /** ol.source.BingMaps
  * Layer source for Bing Maps tile data.
  * Bing Maps タイルデータのレイヤソース。(ol3 API)
  */
});
var map = new ol.Map({
 layers: [imagery],
 target: 'map',
 view: new ol.View({
  center: ol.proj.transform([-120, 50], 'EPSG:4326', 'EPSG:3857'),
  zoom: 6
 })
});
var kernels = {
 none: [
  0, 0, 0,
  0, 1, 0,
  0, 0, 0
 ],
 sharpen: [
  0, -1, 0,
  -1, 5, -1,
  0, -1, 0
 ],
 sharpenless: [
  0, -1, 0,
  -1, 10, -1,
  0, -1, 0
 ],
 blur: [
  1, 1, 1,
  1, 1, 1,
  1, 1, 1
 ],
 shadow: [
  1, 2, 1,
  0, 1, 0,
  -1, -2, -1
 ],
 emboss: [
  -2, 1, 0,
  -1, 1, 1,
  0, 1, 2
 ],
 edge: [
  0, 1, 0,
  1, -4, 1,
  0, 1, 0
 ]
};
function normalize(kernel) {
 var len = kernel.length;
 var normal = new Array(len);
 /** Array(arraylength)
  * JavaScript は配列を扱うことができます。配列とは順序を持つ複
  * 数のデータの集合であり、JavaScript のグローバルオブジェクト
  * である Array は、高位の、(C言語等で云うところの)「リス
  * ト」の様な、配列のコンストラクタです。
  * arraylength
  * Array コンストラクタに渡される唯一の引数(arrayLength)に
  * 0 から 4,294,967,295( 232-1 ) までの整数値を指定する場合
  * その値を要素数とする配列が作成されます。その際に範囲外の値
  * は、を指定した場合には、例外: RangeError がスローされます。
  * (MDN[https://developer.mozilla.org/ja/docs/Web/
  * JavaScript/Reference/Global_Objects/Array])
  */
 var i, sum = 0;
 for (i = 0; i < len; ++i) {
  sum += kernel[i];
 }
 if (sum <= 0) {
  normal.normalized = false;
  sum = 1;
 } else {
  normal.normalized = true;
 }
 for (i = 0; i < len; ++i) {
  normal[i] = kernel[i] / sum;
 }
 return normal;
}
var select = document.getElementById('kernel');
var selectedKernel = normalize(kernels[select.value]);
/**
 * Update the kernel and re-render on change.
 */
select.onchange = function() {
/** GlobalEventHandlers.onchange()
 * The onchange property sets and returns the event handler
 * for the change event.
 * onchange プロパティは、change イベントに対してイベントハ
 * ンドラを設定、および、返します。
 * (MDN[https://developer.mozilla.org/en-US/docs/Web/
 * API/GlobalEventHandlers/onchange])
 */
selectedKernel = normalize(kernels[select.value]);
 map.render();
 /** render()
  * Requests a render frame; rendering will effectively occur
  * at the next browser animation frame.
  * レンダーフレームをを要求します。すなわち、レンダリングは、
  * 次のブラウザのアニメーションフレームで、効果的に発生します。
  * (ol3 API)
  */
};
/**
 * Apply a filter on "postcompose" events.
 * @param {ol.render.Event} event Render event.
 */
imagery.on('postcompose', function(event) {
/** on()
 * Listen for a certain type of event.
 * Returns: Unique key for the listener.(ol3 API)
 */
 convolve(event.context, selectedKernel);
});
/**
 * Apply a convolution kernel to canvas.  This works for any
 * size kernel, but performance starts degrading above 3 x 3.
 * キャンバスにコンボリューションカーネルを適用します。これは、
 * 任意のサイズのカーネルで動作しますが、パフォーマンスは、
 * 3×3 以上で低下を始めます。
 * @param {CanvasRenderingContext2D} context Canvas 2d context.
 * @param {Array.<number>} kernel Kernel.
 */
/** 「@param」
 * The @param tag provides the name, type, and description
 * of a function parameter.
 * The @param tag requires you to specify the name of the
 * parameter you are documenting. You can also include the
 * parameter's type, enclosed in curly brackets, and a
 * description of the parameter.
 * @paramタグは、関数パラメータの名前と型、説明を提供します。
 * @paramタグを使用すると、文書化されたパラメータの名前を
 * 指定する必要があります。また、パラメータのタイプと、中括弧
 * で囲まれたおよびパラメータの説明を含めることができます。
 * (@use JSDoc [http://usejsdoc.org/tags-param.html])
 */
function convolve(context, kernel) {
 var canvas = context.canvas;
 //canvas 要素を取得して変数 canvas に代入
 var width = canvas.width;
 /** HTMLCanvasElement.width
  * A positive integer reflecting the width HTML attribute
  * of the <canvas> element interpreted in CSS pixels.
  * When the attribute is not specified, or if it is set
  * to an invalid value, like a negative, the default value
  * of 300 is used.
  * CSSピクセルで解釈された <canvas> 要素の幅 HTML 属性
  * を反映する正の整数。属性が指定されていない場合、または、
  * 負の値のような、無効な値に設定されている場合、デフォルト
  * 値 300 が使用さます。
  * (MDN[https://developer.mozilla.org/en-US/docs/Web/
  * API/HTMLCanvasElement])
  */
 var height = canvas.height;
 /** HTMLCanvasElement.height
  * A positive integer reflecting the height HTML attribute
  * of the <canvas> element interpreted in CSS pixels.
  * When the attribute is not specified, or if it is set
  * to an invalid value, like a negative, the default value
  * of 150 is used.
  * CSSピクセルで解釈された <canvas> 要素の高さ HTML 属
  * 性を反映する正の整数。属性が指定されていない場合、または、
  * 負の値のような、無効な値に設定されている場合、デフォルト
  * 値 150 が使用さます。
  * (MDN[https://developer.mozilla.org/en-US/docs/Web/
  * API/HTMLCanvasElement])
  */
 var size = Math.sqrt(kernel.length);
 /** Math.sqrt()
  * 引数として与えた数の平方根を返します。
  * (MDN[https://developer.mozilla.org/ja/docs/Web/
  * JavaScript/Reference/Global_Objects/Math/sqrt])
  */
 var half = Math.floor(size / 2);
 /** Math.floor()
  * The Math.floor() function returns the largest
  * integer less than or equal to a given number.
  * Math.floor() 関数は、指定された数以下の最大の整数、
  * または、等しい数を返します。
  * (MDN[https://developer.mozilla.org/en-US/docs/Web/
  * JavaScript/Reference/Global_Objects/Math/floor])
  */
 var inputData = context.getImageData(0, 0, width, height).data;
 /**  CanvasRenderingContext2D.getImageData()
  * The CanvasRenderingContext2D.getImageData() method
  * of the Canvas 2D API returns an ImageData object
  * representing the underlying pixel data for the
  * area of the canvas denoted by the rectangle which
  * starts at (sx, sy) and has an sw width and sh
  * height.
  * Canvas 2D API の
  * CanvasRenderingContext2D.getImageData()メソッド
  * は、(SX、SY)で始まり、および、SWの幅とSHの高さを持つ、
  * 長方形で表示されるキャンバスの領域の基礎となるピクセル
  * データを表現するの ImageData オブジェクトを返します。
  * (MDN[https://developer.mozilla.org/en-US/docs/Web/
  * API/CanvasRenderingContext2D/getImageData])
  */
 var output = context.createImageData(width, height);
 /** CanvasRenderingContext2D.createImageData()
  * The CanvasRenderingContext2D.createImageData()
  * method of the Canvas 2D API creates a new, blank
  * ImageData object with the specified dimensions.
  * All of the pixels in the new object are transparent
  * black.
  * Canvas 2D APIの
  * CanvasRenderingContext2D.createImageData()メソッド
  * は、指定された大きさで新しい、空白の ImageData オブジェ
  * クトを作成します。新しいオブジェクトの全ての画素は透明
  * な黒です。
  * (MDN[https://developer.mozilla.org/en-US/docs/Web/
  * API/CanvasRenderingContext2D/createImageData])
  */
 var outputData = output.data;

 for (var pixelY = 0; pixelY < height; ++pixelY) {
  var pixelsAbove = pixelY * width;
  for (var pixelX = 0; pixelX < width; ++pixelX) {
   var r = 0, g = 0, b = 0, a = 0;
   for (var kernelY = 0; kernelY < size; ++kernelY) {
    for (var kernelX = 0; kernelX < size; ++kernelX) {
     var weight = kernel[kernelY * size + kernelX];
     var neighborY = Math.min(
     /** Math.min()
      * 引数として与えた複数の数の中で最小の数を返します。
      * (MDN [https://developer.mozilla.org/ja/docs/Web/
      * JavaScript/Reference/Global_Objects/Math/min])
      */
      height - 1, Math.max(0, pixelY + kernelY - half));
      /** Math.max()
        * 引数として与えた複数の数の中で最大の数を返します。
       * (MDN [https://developer.mozilla.org/ja/docs/Web/
       * JavaScript/Reference/Global_Objects/Math/max])
       */
     var neighborX = Math.min(
      width - 1, Math.max(0, pixelX + kernelX - half));
     var inputIndex = (neighborY * width + neighborX) * 4;
     r += inputData[inputIndex] * weight;
     g += inputData[inputIndex + 1] * weight;
     b += inputData[inputIndex + 2] * weight;
     a += inputData[inputIndex + 3] * weight;
    }
   }
   var outputIndex = (pixelsAbove + pixelX) * 4;
   outputData[outputIndex] = r;
   outputData[outputIndex + 1] = g;
   outputData[outputIndex + 2] = b;
   outputData[outputIndex + 3] = kernel.normalized ? a : 255;
  }
 }
 context.putImageData(output, 0, 0);
 /** anvasRenderingContext2D.putImageData()
  * The CanvasRenderingContext2D.putImageData() method of
  * the Canvas 2D API paints data from the given ImageData
  * object onto the bitmap. If a dirty rectangle is
  * provided, only the pixels from that rectangle are
  * painted.
  * Canvas 2D API の
  * CanvasRenderingContext2D.putImageData()メソッドは、与え
  * られた ImageData オブジェクトからのデータでビットマップ上
  * に描画します。汚染された矩形が提供される場合、その矩形のピ
  * クセルだけが描画されます。
  * (MDN[https://developer.mozilla.org/en-US/docs/Web/
  * API/CanvasRenderingContext2D/putImageData])
  */
}
2 - ol3.3ex 94a - Image filter example 1
「Image filter example (image-filter.html)」を参考に地図を表示してみます。
説明に次のようにあります。
Layer rendering can be manipulated in precompose and postcompose event listeners. These listeners get an event with a reference to the Canvas rendering context. In this example, the postcompose listener applies a filter to the image data.
レイヤレンダリングは precompose と postcompose イベントリスナで操作できます。これらのリスナは、キャンバス描画コンテキストを参照して、イベントを取得します。この例では、postcompose リスナは、画像データにフィルタを適用します。
HTML ファイルの作成
a Eclipse のメニューの「ファイル」->「ファイルを開く」をクリックします。
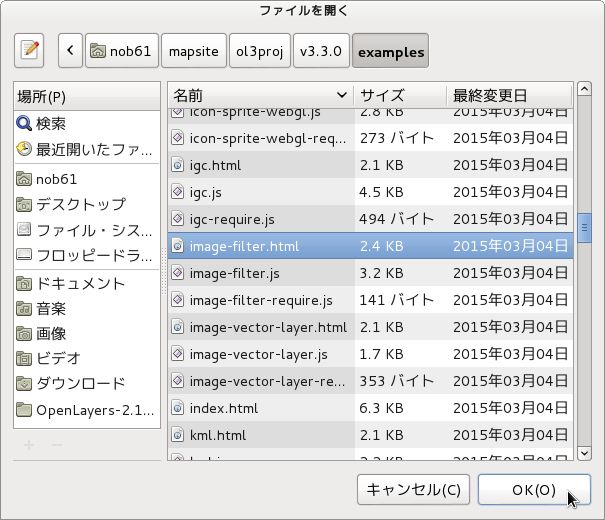 b 「ファイルを開く」ウィンドウで、「user」->「mapsite」->「ol3proj」->「v3.3.0」->「examples」->「image-filter.html」をクリックして選択し、「OK」ボタンをクリックします。
同じように「image-filter.js」を開きます。
c メニューの「ファイル」->「新規」 -> 「ファイル」をクリックします。
 d 「ファイル」ウィンドウで「ol3proj」をクリックして選択し、「ファイル名」を「294-ol3ex.html」と入力し、「次へ」ボタンをクリックします。
e 「File Template」ウィンドウで「HTML 5 Template」をクリックして選択し、「OK」ボタンをクリックします。
f 「image-filter.html」の内容をコピーして「294-ol3ex.html」に貼り付け、修正します。
g 同じように、新規に「294-ol3ex.js」ファイルを作成し、「File Template」ウィンドウで「JavaScript Template」をクリックして選択し、「完了」ボタンをクリックして、「image-filter.js」の内容をコピーして貼り付け、修正します。「image-filter-require.js」も「294-ol3ex-require.js」に貼り付けます。

「294-ol3ex.html」
説明に次のようにあります。
Layer rendering can be manipulated in precompose and postcompose event listeners. These listeners get an event with a reference to the Canvas rendering context. In this example, the postcompose listener applies a filter to the image data.
レイヤレンダリングは precompose と postcompose イベントリスナで操作できます。これらのリスナは、キャンバス描画コンテキストを参照して、イベントを取得します。この例では、postcompose リスナは、画像データにフィルタを適用します。
HTML ファイルの作成
b 「ファイルを開く」ウィンドウで、「user」->「mapsite」->「ol3proj」->「v3.3.0」->「examples」->「image-filter.html」をクリックして選択し、「OK」ボタンをクリックします。同じように「image-filter.js」を開きます。
f 「image-filter.html」の内容をコピーして「294-ol3ex.html」に貼り付け、修正します。
g 同じように、新規に「294-ol3ex.js」ファイルを作成し、「File Template」ウィンドウで「JavaScript Template」をクリックして選択し、「完了」ボタンをクリックして、「image-filter.js」の内容をコピーして貼り付け、修正します。「image-filter-require.js」も「294-ol3ex-require.js」に貼り付けます。
「294-ol3ex.html」
<!doctype html>
<html lang="en">
 <head>
  <meta charset="utf-8">
  <meta http-equiv="X-UA-Compatible" content="chrome=1">
  <meta name="viewport" content="initial-scale=1.0, user-scalable=no, width=device-width">
<!--
  <link rel="stylesheet" href="../css/ol.css" type="text/css">
  <link rel="stylesheet" href="../resources/bootstrap/css/bootstrap.min.css" type="text/css">
  <link rel="stylesheet" href="../resources/layout.css" type="text/css">
  <link rel="stylesheet" href="../resources/bootstrap/css/bootstrap-responsive.min.css" type="text/css">
-->
  <!-- ディレクトリ修正 -->
  <link rel="stylesheet" href="v3.3.0/css/ol.css" type="text/css">
  <link rel="stylesheet" href="v3.3.0/resources/bootstrap/css/bootstrap.min.css" type="text/css">
  <link rel="stylesheet" href="v3.3.0/resources/layout.css" type="text/css">
  <link rel="stylesheet" href="v3.3.0/resources/bootstrap/css/bootstrap-responsive.min.css" type="text/css">
<title>Image Filter example</title>
 </head>
 <body>
  <!--
  bootstrap.min.css, bootstrap-responsive.min.css で設定されたセレクタを使用。
  -->
  <div class="navbar navbar-inverse navbar-fixed-top">
   <div class="navbar-inner">
    <div class="container">
     <!--
     <a class="brand" href="./"><img src="../resources/logo.png"> OpenLayers 3 Examples</a>
     -->
     <!-- ディレクトリ修正 -->
     <a class="brand" href="v3.3.0/examples/"><img src="v3.3.0/resources/logo.png"> OpenLayers 3 Examples</a>
    </div>
   </div>
  </div>
  <div class="container-fluid">
   <div class="row-fluid">
    <div class="span12">
     <div id="map" class="map"></div>
    </div>
   </div>
   <div class="row-fluid">
    <div class="span12">
    <h4 id="title">Image filter example</h4>
     <p id="shortdesc">Apply a filter to imagery</p>
     <select id="kernel" name="kernel">
      <option>none</option>
      <option selected>sharpen</option>
      <option value="sharpenless">sharpen less</option>
      <option>blur</option>
      <option>shadow</option>
      <option>emboss</option>
      <option value="edge">edge detect</option>
     </select>
     <div id="docs">
      <p>Layer rendering can be manipulated in
       <code>precompose</code> and
       <code>postcompose</code> event listeners.
       These listeners get an event with a reference to the
       Canvas rendering context. In this example, the
       <code>postcompose</code> listener applies
       a filter to the image data.</p>
      <!--
      <p>See the <a href="image-filter.js" target="_blank">image-filter.js source</a>
       for details on how this is done.</p>
      -->
      <!-- ファイル修正 -->
      <p>See the <a href="294-ol3ex.js" target="_blank">294-ol3ex.js source</a>
       for details on how this is done.</p>
     </div>
     <div id="tags">filter, image manipulation</div>
    </div>
   </div>
  </div>
  <!--
  <script src="../resources/jquery.min.js" type="text/javascript"></script>
  <script src="../resources/example-behaviour.js" type="text/javascript"></script>
  -->
  <!-- ディレクトリ修正
   jQuery Minified版と
   example-behaviour.js(Examples用 JSコード[文字コードなど])
  -->
  <script src="v3.3.0/resources/jquery.min.js" type="text/javascript"></script>
  <script src="v3.3.0/resources/example-behaviour.js" type="text/javascript"></script>
  <!--
  <script src="loader.js?id=image-filter" type="text/javascript"></script>
  -->
  <!-- ファイル修正 -->  <!-- ディレクトリ修正 -->
  <script src="loader.js?id=294-ol3ex" type="text/javascript"></script>
 </body>
</html>
2 - ol3.3ex 93b - Canvas tiles example 2
「canvas-tiles.js(293-ol3ex.js)」は、マップを表示するための JavaScript ファイルです。
「293-ol3ex.js」

「293-ol3ex.js」
var map = new ol.Map({
 layers: [
  new ol.layer.Tile({
   source: new ol.source.OSM()
   /** ol.source.OSM
    * Layer source for the OpenStreetMap tile server.
    * OpenStreetMap タイルサーバのレイヤソース。(ol3 API)
    */
  }),
  new ol.layer.Tile({
   source: new ol.source.TileDebug({
   /** ol.source.TileDebug
    * A pseudo tile source, which does not fetch
    * tiles from a server, but renders a grid outline
    * for the tile grid/projection along with the
    * coordinates for each tile. See
    * examples/canvas-tiles for an example.
    * Uses Canvas context2d, so requires Canvas
    * support.
    * サーバからタイルを取ってこないが、各タイルの座標と
    * 一緒にタイルグリッド/投影法のグリッドのアウトライ
    * ンを描画する擬似タイルソース。例えば、
    * examples/canvas-tiles を参照してください。
    * キャンバス context2d を使用すると、キャンバスのサ
    * ポートを必要とします。(ol3 API)
    */
projection: 'EPSG:3857',
    tileGrid: new ol.tilegrid.XYZ({
    /** ol.tilegrid.XYZ
     * Set the grid pattern for sources accessing XYZ
     * tiled-image servers.
     * XYZタイル画像サーバにアクセスするソースのグリッ
     * ドパターンを設定します。(ol3 API)
     */
     maxZoom: 22
    })
   })
  })
 ],
 renderer: exampleNS.getRendererFromQueryString(),
/** 'example-behavior.js' により URL にある renderer を返します */
target: 'map',
 controls: ol.control.defaults({
 /** controls
  * Controls initially added to the map.
  * If not specified, ol.control.defaults() is used.
  * 初期設定で、マップに追加されたコントロール。
  * 明示されていなければ、ol.control.defaults() が使用されま
  * す。(ol3 API)
  */
 /** ol.control.defaults()
  * デフォルトでは、マップに含まコントロールのセット。
  * 特に設定しない限り、これは、以下の各コントロールの
  * インスタンスを含むコレクションを返します。(ol3 API)
  * ol.control.Zoom, ol.control.Rotate, ol.control.Attribution
  */
  attributionOptions: /** @type {olx.control.AttributionOptions} */ ({
  /** @type
   * 値のタイプ(型)の説明 - 式などで表示
   * (@use JSDoc[http://usejsdoc.org/]より)
   */
   collapsible: false // 折りたたみ
  })
 }),
 view: new ol.View({
  center: ol.proj.transform(
   [-0.1275, 51.507222], 'EPSG:4326', 'EPSG:3857'),
  zoom: 10
 })
});
2 - ol3.3ex 93a - Canvas tiles example 1
「Canvas tiles example (canvas-tiles.html)」を参考に地図を表示してみます。
説明に次のようにあります。
Renders tiles with coordinates for debugging.
The black grid tiles are generated on the client with an HTML5 canvas. Note that the tile coordinates are ol3 normalized tile coordinates (origin bottom left), not OSM tile coordinates (origin top left).
デバッグのための座標を持つタイルをレンダリングします。
黒の格子タイルは HTML5 のキャンバスを使用してクライアントで生成されます。タイル座標が ol3 正規化タイル座標(元の左下)で、OSMタイル座標(元の左上)ではないことに注意してください。
HTML ファイルの作成
a Eclipse のメニューの「ファイル」->「ファイルを開く」をクリックします。
 b 「ファイルを開く」ウィンドウで、「user」->「mapsite」->「ol3proj」->「v3.3.0」->「examples」->「canvas-tiles.html」をクリックして選択し、「OK」ボタンをクリックします。
同じように「canvas-tiles.js」を開きます。
c メニューの「ファイル」->「新規」 -> 「ファイル」をクリックします。
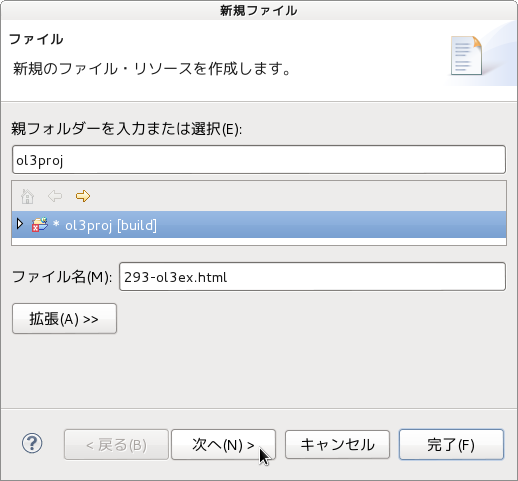 d 「ファイル」ウィンドウで「ol3proj」をクリックして選択し、「ファイル名」を「293-ol3ex.html」と入力し、「次へ」ボタンをクリックします。
e 「File Template」ウィンドウで「HTML 5 Template」をクリックして選択し、「OK」ボタンをクリックします。
f 「canvas-tiles.html」の内容をコピーして「293-ol3ex.html」に貼り付け、修正します。
g 同じように、新規に「293-ol3ex.js」ファイルを作成し、「File Template」ウィンドウで「JavaScript Template」をクリックして選択し、「完了」ボタンをクリックして、「canvas-tiles.js」の内容をコピーして貼り付け、修正します。「canvas-tiles-require.js」も「293-ol3ex-require.js」に貼り付けます。

「293-ol3ex.html」
説明に次のようにあります。
Renders tiles with coordinates for debugging.
The black grid tiles are generated on the client with an HTML5 canvas. Note that the tile coordinates are ol3 normalized tile coordinates (origin bottom left), not OSM tile coordinates (origin top left).
デバッグのための座標を持つタイルをレンダリングします。
黒の格子タイルは HTML5 のキャンバスを使用してクライアントで生成されます。タイル座標が ol3 正規化タイル座標(元の左下)で、OSMタイル座標(元の左上)ではないことに注意してください。
HTML ファイルの作成
同じように「canvas-tiles.js」を開きます。
d 「ファイル」ウィンドウで「ol3proj」をクリックして選択し、「ファイル名」を「293-ol3ex.html」と入力し、「次へ」ボタンをクリックします。f 「canvas-tiles.html」の内容をコピーして「293-ol3ex.html」に貼り付け、修正します。
g 同じように、新規に「293-ol3ex.js」ファイルを作成し、「File Template」ウィンドウで「JavaScript Template」をクリックして選択し、「完了」ボタンをクリックして、「canvas-tiles.js」の内容をコピーして貼り付け、修正します。「canvas-tiles-require.js」も「293-ol3ex-require.js」に貼り付けます。
「293-ol3ex.html」
<!doctype html>
<html lang="en">
 <head>
  <meta charset="utf-8">
  <meta http-equiv="X-UA-Compatible" content="chrome=1">
  <meta name="viewport" content="initial-scale=1.0, user-scalable=no, width=device-width">
<!--
  <link rel="stylesheet" href="../css/ol.css" type="text/css">
  <link rel="stylesheet" href="../resources/bootstrap/css/bootstrap.min.css" type="text/css">
  <link rel="stylesheet" href="../resources/layout.css" type="text/css">
  <link rel="stylesheet" href="../resources/bootstrap/css/bootstrap-responsive.min.css" type="text/css">
-->
  <!-- ディレクトリ修正 -->
  <link rel="stylesheet" href="v3.3.0/css/ol.css" type="text/css">
  <link rel="stylesheet" href="v3.3.0/resources/bootstrap/css/bootstrap.min.css" type="text/css">
  <link rel="stylesheet" href="v3.3.0/resources/layout.css" type="text/css">
  <link rel="stylesheet" href="v3.3.0/resources/bootstrap/css/bootstrap-responsive.min.css" type="text/css">
<title>Canvas tiles example</title>
 </head>
 <body>
  <!--
  bootstrap.min.css, bootstrap-responsive.min.css で設定されたセレクタを使用。
  -->
  <div class="navbar navbar-inverse navbar-fixed-top">
   <div class="navbar-inner">
    <div class="container">
     <!--
     <a class="brand" href="./"><img src="../resources/logo.png"> OpenLayers 3 Examples</a>
     -->
     <!-- ディレクトリ修正 -->
     <a class="brand" href="v3.3.0/examples/"><img src="v3.3.0/resources/logo.png"> OpenLayers 3 Examples</a>
    </div>
   </div>
  </div>
  <div class="container-fluid">
   <div class="row-fluid">
    <div class="span12">
     <div id="map" class="map"></div>
    </div>
   </div>
   <div class="row-fluid">
    <div class="span12">
    <h4 id="title">Canvas tiles example</h4>
     <p id="shortdesc">Renders tiles with coordinates for
      debugging.</p>
     <div id="docs">
      <p>The black grid tiles are generated on the client
       with an HTML5 canvas. Note that the tile coordinates
       are ol3 normalized tile coordinates (origin bottom
       left), not OSM tile coordinates (origin top left).</p>
      <!--
      <p>See the <a href="canvas-tiles.js" target="_blank">canvas-tiles.js source</a>
       to see how this is done.</p>
      -->
      <!-- ファイル修正 -->
      <p>See the <a href="293-ol3ex.js" target="_blank">293-ol3ex.js source</a>
       to see how this is done.</p>
     </div>
     <div id="tags">layers, openstreetmap, canvas canvas,
      sync, object</div>
    </div>
   </div>
  </div>
  <!--
  <script src="../resources/jquery.min.js" type="text/javascript"></script>
  <script src="../resources/example-behaviour.js" type="text/javascript"></script>
  -->
  <!-- ディレクトリ修正
   jQuery Minified版と
   example-behaviour.js(Examples用 JSコード[文字コードなど])
  -->
  <script src="v3.3.0/resources/jquery.min.js" type="text/javascript"></script>
  <script src="v3.3.0/resources/example-behaviour.js" type="text/javascript"></script>
  <!--
  <script src="loader.js?id=canvas-tiles" type="text/javascript"></script>
  -->
  <!-- ファイル修正 -->  <!-- ディレクトリ修正 -->
  <script src="loader.js?id=293-ol3ex" type="text/javascript"></script>
 </body>
</html>
登録:
投稿 (Atom)