2015年2月22日日曜日

2 - ol3.2ex 69b -Teleport example 2

「teleport.js(269-ol3ex.js)」は、マップを表示するための JavaScript ファイルです。

「269-ol3ex.js」
var map = new ol.Map({
 layers: [
  new ol.layer.Tile({
  /** ol.layer.Tile 
   * For layer sources that provide pre-rendered, tiled 
   * images in grids that are organized by zoom levels for 
   * specific resolutions. 
   * プリレンダリング(事前描画)を提供するレイヤソースのための、
   * 特定の解像度でのズームレベルによって編成されているグリッドの
   * タイルイメージ。(ol3 API)
   */
   source: new ol.source.OSM()
   /** ol.source.OSM 
    * Layer source for the OpenStreetMap tile server.
    * OpenStreetMap タイルサーバのレイヤソース。(ol3 API)
    */
  })
 ],
 renderer: exampleNS.getRendererFromQueryString(),
 /** 'example-behavior.js' により URL にある renderer を返します */
 controls: ol.control.defaults({
 /** controls
  * Controls initially added to the map. 
  * If not specified, ol.control.defaults() is used.
  * 初期設定で、マップに追加されたコントロール。
  * 明示されていなければ、ol.control.defaults() が使用されます。
  * (ol3 API)
  */
 /** ol.control.defaults()
  * デフォルトでは、マップに含まコントロールのセット。
  * 特に設定しない限り、これは、以下の各コントロールの
  * インスタンスを含むコレクションを返します。(ol3 API)
  * ol.control.Zoom, ol.control.Rotate, ol.control.Attribution
  */
  attributionOptions: /** @type {olx.control.AttributionOptions} */ ({
  /** @type 
   * 値のタイプ(型)の説明 - 式などで表示
   * (@use JSDoc[http://usejsdoc.org/]より)
   */
   collapsible: false // 折りたたみ
  })
 }),
 view: new ol.View({
  center: [0, 0],
  zoom: 2
 })
});
map.setTarget('map1');
/** setTarget(target)
 * Sets the layergroup of this map.
 * このマップのレイヤグループを設定します。(ol3 API)
 */
var teleportButton = document.getElementById('teleport');
teleportButton.addEventListener('click', function() {
/** EventTarget.addEventListener
 * addEventListener は、 1 つのイベントターゲットにイベント 
 * リスナーを1 つ登録します。イベントターゲットは、ドキュメント
 * 上の単一のノード、ドキュメント自身、ウィンドウ、あるいは、
 * XMLHttpRequest です。
 *(MDN[https://developer.mozilla.org/ja/docs/Web/API/
 * EventTarget.addEventListener])
 */
 var target = map.getTarget() === 'map1' ? 'map2' : 'map1';
  /** getTarget()
   * Get the target in which this map is rendered. 
   * Note that this returns what is entered as an option or  
   * in setTarget: if that was an element, it returns an 
   * element; if a string, it returns that.
   * レンダリングされたこのマップのターゲットを取得します。
   * これはオプションとして、または setTarget に入力されている
   * ものを返すことに注意してください:それが要素ならば、要素
   * を返します。文字列ならば、それを返します。(ol3 API)
   */
 /** 条件演算子 condition ? expr1 : expr2 
  * condition: true か false かを評価する条件文です。
  * expr1, expr2: 各々の値の場合に実行する式です。
  * condition が true の場合、演算子は expr1 の値を選択します。
  * そうでない場合は expr2 の値を選択します。
  * (MDN[https://developer.mozilla.org/ja/docs/JavaScript/
  * Reference/Operators/Conditional_Operator])
  */
  map.setTarget(target);
}, false);

2 - ol3.2ex 69a - Teleport example 1

「Teleport example (teleport.html)」を参考に地図を表示してみます。
説明に次のようにあります。

Example of moving a map from one target to another.
Click on the Teleport button below the map to move the map from one target to another.

一つのターゲットから別のターゲットへマップを移動する例。
マップの下の「Teleport」ボタンをクリックすると、一つのターゲットから別のターゲットへマップが移動します。

HTML ファイルの作成
a Eclipse のメニューの「ファイル」->「ファイルを開く」をクリックします。


b 「ファイルを開く」ウィンドウで、「user」->「mapsite」->「ol3proj」->「v3.2.1」->「examples」->「teleport.html」をクリックして選択し、「OK」ボタンをクリックします。
同じように「teleport.js」を開きます。


c メニューの「ファイル」->「新規」 -> 「ファイル」をクリックします。


d 「ファイル」ウィンドウで「ol3proj」をクリックして選択し、「ファイル名」を「269-ol3ex.html」と入力し、「次へ」ボタンをクリックします。


e 「File Template」ウィンドウで「HTML 5 Template」をクリックして選択し、「OK」ボタンをクリックします。


f 「teleport.html」の内容をコピーして「269-ol3ex.html」に貼り付け、修正します。
g 同じように、新規に「269-ol3ex.js」ファイルを作成し、「File Template」ウィンドウで「JavaScript Template」をクリックして選択し、「完了」ボタンをクリックして、「teleport.js」の内容をコピーして貼り付け、修正します。「teleport-require.js」も「269-ol3ex-require.js」に貼り付けます。


「269-ol3ex.html」
<!doctype html>
<html lang="en">
 <head>
  <meta charset="utf-8">
  <meta http-equiv="X-UA-Compatible" content="chrome=1">
  <meta name="viewport" content="initial-scale=1.0, user-scalable=no, width=device-width">
<!--
  <link rel="stylesheet" href="../css/ol.css" type="text/css">
  <link rel="stylesheet" href="../resources/bootstrap/css/bootstrap.min.css" type="text/css">
  <link rel="stylesheet" href="../resources/layout.css" type="text/css">
  <link rel="stylesheet" href="../resources/bootstrap/css/bootstrap-responsive.min.css" type="text/css">
-->
  <!-- ディレクトリ修正 -->
  <link rel="stylesheet" href="v3.2.1/css/ol.css" type="text/css">
  <link rel="stylesheet" href="v3.2.1/resources/bootstrap/css/bootstrap.min.css" type="text/css">
  <link rel="stylesheet" href="v3.2.1/resources/layout.css" type="text/css">
  <link rel="stylesheet" href="v3.2.1/resources/bootstrap/css/bootstrap-responsive.min.css" type="text/css">
  <title>Teleport example</title>
 </head>
 <body>
  <!-- 
  bootstrap.min.css, bootstrap-responsive.min.css で設定されたセレクタを使用。
  -->
  <div class="navbar navbar-inverse navbar-fixed-top">
   <div class="navbar-inner">
    <div class="container">
     <!--
     <a class="brand" href="./"><img src="../resources/logo.png"> OpenLayers 3 Examples</a>
     -->
     <!-- ディレクトリ修正 -->
     <a class="brand" href="v3.2.1/examples/"><img src="v3.2.1/resources/logo.png"> OpenLayers 3 Examples</a>
    </div>
   </div>
  </div>
  <div class="container-fluid">
   <div class="row-fluid">
    <div class="span8">
     <div id="map1" class="map"></div>
    </div>
    <div class="span4">
     <div id="map2" class="map"></div>
    </div>
   </div>
   <div class="row-fluid">
    <div class="span12">
     <a id="teleport" href="#" class="btn">Teleport</a>
    </div>
   </div>
   <div class="row-fluid">
    <div class="span12">
     <h4 id="title">Teleport example </h4>
     <p id="shortdesc">Example of moving a map from one 
      target to another.</p>
     <div id="docs">
      <p>Click on the Teleport button below the map to 
       move the map from one target to another.</p>
      <!--
      <p>See the <a href="teleport.js" target="_blank">teleport.js source</a> to see how this is done.</p>
      -->
      <!-- ファイル修正 -->
      <p>See the <a href="269-ol3ex.js" target="_blank">269-ol3ex.js source</a> to see how this is done.</p>
     </div>
     <div id="tags">teleport, openstreetmap</div>
    </div>
   </div>
  </div>
  <!--
  <script src="../resources/jquery.min.js" type="text/javascript"></script>
  <script src="../resources/example-behaviour.js" type="text/javascript"></script>
  -->
  <!-- ディレクトリ修正
   jQuery Minified版と
   example-behaviour.js(Examples用 JSコード[文字コードなど])
  -->
  <script src="v3.2.1/resources/jquery.min.js" type="text/javascript"></script>
  <script src="v3.2.1/resources/example-behaviour.js" type="text/javascript"></script>
  <!--
  <script src="loader.js?id=teleport" type="text/javascript"></script>
  -->
  <!-- ファイル修正 -->  <!-- ディレクトリ修正 -->
  <script src="loader.js?id=269-ol3ex" type="text/javascript"></script>
 </body>
</html>

2 - ol3.2ex 68b -Animation example 2

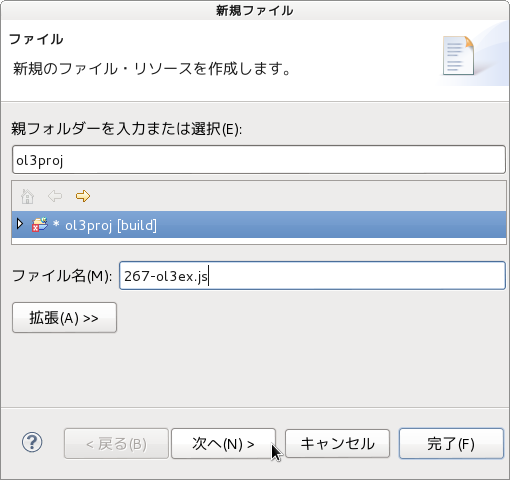
「animation.js(268-ol3ex.js)」は、マップを表示するための JavaScript ファイルです。

「268-ol3ex.js」
// from https://github.com/DmitryBaranovskiy/raphael
function bounce(t) {
 var s = 7.5625, p = 2.75, l;
 if (t < (1 / p)) {
  l = s * t * t;
 } else {
  if (t < (2 / p)) {
   t -= (1.5 / p);
   l = s * t * t + 0.75;
  } else {
   if (t < (2.5 / p)) {
    t -= (2.25 / p);
    l = s * t * t + 0.9375;
   } else {
    t -= (2.625 / p);
    l = s * t * t + 0.984375;
   }
  }
 }
 return l;
}
// from https://github.com/DmitryBaranovskiy/raphael
function elastic(t) {
 return Math.pow(2, -10 * t) * Math.sin((t - 0.075) * (2 * Math.PI) / 0.3) + 1;
 /** Math.pow(base, exponent)
  * base を exponent 乗した値、つまり、base^exponent の値を返
  * します。
  * (MDN[https://developer.mozilla.org/ja/docs/Web/
  * JavaScript/Reference/Global_Objects/Math/pow])
  */
 /** Math.sin()
  * 引数として与えた数のサイン(正弦)を返します。
  * (MDN[https://developer.mozilla.org/ja/docs/Web/
  * JavaScript/Reference/Global_Objects/Math/sin])
  */
  /** Math.PI()
   * 円周率。約 3.14159 です。
   * (MDN[https://developer.mozilla.org/ja/docs/Web
   * /JavaScript/Reference/Global_Objects/Math/PI])
   */
}
var london = ol.proj.transform([-0.12755, 51.507222], 'EPSG:4326', 'EPSG:3857');
/** ol.proj.transform(coordinate, source, destination)
 * Transforms a coordinate from source projection to 
 * destination projection. This returns a new coordinate 
 * (and does not modify the original).
 * ソース投影から変換先投影に座標変換します。これは、新しい座標
 * を返します(オリジナルを変更しません)。(ol3 API)
 */
var moscow = ol.proj.transform([37.6178, 55.7517], 'EPSG:4326', 'EPSG:3857');
var istanbul = ol.proj.transform([28.9744, 41.0128], 'EPSG:4326', 'EPSG:3857');
var rome = ol.proj.transform([12.5, 41.9], 'EPSG:4326', 'EPSG:3857');
var bern = ol.proj.transform([7.4458, 46.95], 'EPSG:4326', 'EPSG:3857');
var madrid = ol.proj.transform([-3.683333, 40.4], 'EPSG:4326', 'EPSG:3857');
var view = new ol.View({
 // the view's initial state
 center: istanbul,
 zoom: 6
});
var map = new ol.Map({
 layers: [
  new ol.layer.Tile({
  /** ol.layer.Tile 
   * For layer sources that provide pre-rendered, tiled 
   * images in grids that are organized by zoom levels for 
   * specific resolutions. 
   * プリレンダリング(事前描画)を提供するレイヤソースのための、
   * 特定の解像度でのズームレベルによって編成されているグリッドの
   * タイルイメージ。(ol3 API)
   */
   preload: 4,
   /** preload:
    * Preload. Load low-resolution tiles up to 
    * preload levels. By default preload is 0, 
    * which means no preloading.
    * プリロード。プリロードレベルに至るまで低解像度の
    * タイルをロードします。デフォルトはプリロード 0 で、
    * プレロードがないことを意味します。(ol3 API)
    */
   source: new ol.source.OSM()
   /** ol.source.OSM 
    * Layer source for the OpenStreetMap tile server.
    * OpenStreetMap タイルサーバのレイヤソース。(ol3 API)
    */
  })
 ],
 renderer: exampleNS.getRendererFromQueryString(),
 /** 'example-behavior.js' により URL にある renderer を返します */
 /** Improve user experience by loading tiles while 
  * animating. Will make animations stutter on mobile 
  * or slow devices.
  * アニメーション化しながらタイルをロードすることによりユーザ
  * エクスペリエンスを向上させます。アニメーションは、モバイル
  * または低速デバイス上で途切れ途切れになります。
  */
 loadTilesWhileAnimating: true,
 /** loadTilesWhileAnimating:
  * When set to true, tiles will be loaded during 
  * animations. This may improve the user experience, 
  * but can also make animations stutter on devices 
  * with slow memory. Default is `false`.
  * true に設定すると、タイルは、アニメーションの間にに
  * ロードされます。これは、ユーザーエクスペリエンスを向
  * 上させることだけでなく、アニメーションが遅いメモリを
  * 搭載したデバイス上で途切れ途切れにすることができます。
  * デフォルトは `false` です。(ol3/extents/olx)
  */
 target: 'map',
 controls: ol.control.defaults({
 /** controls
  * Controls initially added to the map. 
  * If not specified, ol.control.defaults() is used.
  * 初期設定で、マップに追加されたコントロール。
  * 明示されていなければ、ol.control.defaults() が使用されます。
  * (ol3 API)
  */
 /** ol.control.defaults()
  * デフォルトでは、マップに含まコントロールのセット。
  * 特に設定しない限り、これは、以下の各コントロールの
  * インスタンスを含むコレクションを返します。(ol3 API)
  * ol.control.Zoom, ol.control.Rotate, ol.control.Attribution
  */
  attributionOptions: /** @type {olx.control.AttributionOptions} */ ({
  /** @type 
   * 値のタイプ(型)の説明 - 式などで表示
   * (@use JSDoc[http://usejsdoc.org/]より)
   */
   collapsible: false // 折りたたみ
  })
 }),
 view: view
});
var rotateLeft = document.getElementById('rotate-left');
rotateLeft.addEventListener('click', function() {
/** EventTarget.addEventListener
 * addEventListener は、 1 つのイベントターゲットにイベント 
 * リスナーを1 つ登録します。イベントターゲットは、ドキュメント
 * 上の単一のノード、ドキュメント自身、ウィンドウ、あるいは、
 * XMLHttpRequest です。
 *(MDN[https://developer.mozilla.org/ja/docs/Web/API/
 * EventTarget.addEventListener])
 */
 var rotateLeft = ol.animation.rotate({
 /** ol.animation
  * The animation static methods are designed to be 
  * used with the ol.Map#beforeRender method. 
  * アニメーション静的メソッドは ol.Map#beforeRender
  * メソッドで使用するように設計されています。(使用例は
  * ol3 API を参照してください。メソッドについては
  * 「Stable Only」のチェックを外すと表示されます。 )
  */
  duration: 2000,
  /** duration:
   * The duration of the animation in milliseconds. 
   * Default is 1000.
   * ミリ秒単位のアニメーションの継続時間。デフォルトは、1000。
   * (ol3 API[説明は Stable Only のチェックを外すと表示])
   */
  rotation: -4 * Math.PI
  /** rotation:
   * The rotation value (in radians) to begin 
   * rotating from, typically 
   * map.getView().getRotation(). 
   * If undefined then 0 is assumed.
   * 一般的に、 map.getView()。getRotation()から
   * 回転を開始しする(ラジアン)回転値。定義されていなけ
   * れば、0 が仮定されています。
   * (ol3 API[説明は Stable Only のチェックを外すと表示])
   */
  /** Math.PI
   * 円周率。約 3.14159 です。
   * (MDN[https://developer.mozilla.org/ja/docs/Web
   * /JavaScript/Reference/Global_Objects/Math/PI])
   */
 });
 map.beforeRender(rotateLeft);
 /** beforeRender()
  * Add functions to be called before rendering. 
  * This can be used for attaching animations before 
  * updating the map's view. The ol.animation 
  * namespace provides several static methods for 
  * creating prerender functions.
  * レンダリングの前に呼び出される関数を追加します。これは、
  * マップのビューを更新する前にアニメーションを取り付ける
  * ために使用することができます。 ol.animation名前空間は、
  * 事前レンダリング機能を作成するためのいくつかの静的メソッ
  * ドを提供します。
  * (ol3 API[説明は Stable Only のチェックを外すと表示])
  */
}, false);
var rotateRight = document.getElementById('rotate-right');
rotateRight.addEventListener('click', function() {
 var rotateRight = ol.animation.rotate({
  duration: 2000,
  rotation: 4 * Math.PI
 });
 map.beforeRender(rotateRight);
}, false);
var rotateAroundRome = document.getElementById('rotate-around-rome');
rotateAroundRome.addEventListener('click', function() {
 var currentRotation = view.getRotation();
 /** getRotation()
  * Returns: The rotation of the view.(ol3 API)
  */
 var rotateAroundRome = ol.animation.rotate({
  anchor: rome,
  /** anchor:
   * The rotation center/anchor. The map rotates 
   * around the center of the view if unspecified.
   * 回転の中心/アンカー。マップが指定されていない場合、
   * ビューの中央を中心に回転します。
   * (ol3 API[説明は Stable Only のチェックを外すと表示])
   */
  duration: 1000,
  rotation: currentRotation
 });
 map.beforeRender(rotateAroundRome);
 view.rotate(currentRotation + (Math.PI / 2), rome);
}, false);
var panToLondon = document.getElementById('pan-to-london');
panToLondon.addEventListener('click', function() {
 var pan = ol.animation.pan({
  duration: 2000,
  source: /** @type {ol.Coordinate} */ (view.getCenter())
  /** source:
   * The location to start panning from, typically 
   * map.getView().getCenter().
   * 一般的に、 map.getView()。getCenter()から
   * 移動を開始しする位置。
   * (ol3 API[説明は Stable Only のチェックを外すと表示])
   */
  /** @type 
   * 値のタイプ(型)の説明 - 式などで表示
   * (@use JSDoc[http://usejsdoc.org/]より)
   */
  /** getCenter()
   * Return: The center of the view.(ol3 API)
   */
 });
 map.beforeRender(pan);
 view.setCenter(london);
 /** setCenter()
  * Set the center of the current view.
  * 現在のビューの中心を設定します。(ol3 API)
  */
}, false);
var elasticToMoscow = document.getElementById('elastic-to-moscow');
elasticToMoscow.addEventListener('click', function() {
 var pan = ol.animation.pan({
  duration: 2000,
  easing: elastic,
  /** easing:
   * The easing function to use. Can be an ol.
   * easing or a custom function. Default is 
   * ol.easing.inAndOut.
   * 使用するためのイージング関数。 ol.easing またはカス
   * タム関数とすることができる。デフォルトは
   * ol.easing.inAndOut です。
   * (ol3 API[説明は Stable Only のチェックを外すと表示])
   */
  source: /** @type {ol.Coordinate} */ (view.getCenter())
 });
 map.beforeRender(pan);
 view.setCenter(moscow);
}, false);
var bounceToIstanbul = document.getElementById('bounce-to-istanbul');
bounceToIstanbul.addEventListener('click', function() {
 var pan = ol.animation.pan({
  duration: 2000,
  easing: bounce,
  source: /** @type {ol.Coordinate} */ (view.getCenter())
 });
 map.beforeRender(pan);
 view.setCenter(istanbul);
}, false);
var spinToRome = document.getElementById('spin-to-rome');
spinToRome.addEventListener('click', function() {
 var duration = 2000;
 var start = +new Date();
 /** Date
  * 日付や時刻を扱うことが可能な、JavaScript の Date 
  * インスタンスを生成します。
  * (MDN[https://developer.mozilla.org/ja/docs/Web/
  * JavaScript/Reference/Global_Objects/Date])
  */
 var pan = ol.animation.pan({
  duration: duration,
  source: /** @type {ol.Coordinate} */ (view.getCenter()),
  start: start
  /** start:
   * The start time of the animation. Default is 
   * immediately.
   * アニメーションの開始時刻。デフォルトは直後にです。
   * (ol3 API[説明は Stable Only のチェックを外すと表示])
   */
 });
 var rotate = ol.animation.rotate({
  duration: duration,
  rotation: 2 * Math.PI,
  start: start
 });
 map.beforeRender(pan, rotate);
 view.setCenter(rome);
}, false);
var flyToBern = document.getElementById('fly-to-bern');
flyToBern.addEventListener('click', function() {
 var duration = 2000;
 var start = +new Date();
 var pan = ol.animation.pan({
  duration: duration,
  source: /** @type {ol.Coordinate} */ (view.getCenter()),
  start: start
 });
 var bounce = ol.animation.bounce({
  duration: duration,
  resolution: 4 * view.getResolution(),
  /** resolution:
   * The resolution to start the bounce from, 
   * typically map.getView().getResolution().
   * 一般的に、 map.getView()。getResolution()から
   * バウンス(跳ねる)を開始しする解像度。
   * (ol3 API[説明は Stable Only のチェックを外すと表示])
   */
  /** getResolution()
   * Return: The resolution of the view.
   * view(ビュー)の解像度を返します。(ol3 API)
   */
  start: start
 });
  map.beforeRender(pan, bounce);
  view.setCenter(bern);
}, false);
var spiralToMadrid = document.getElementById('spiral-to-madrid');
spiralToMadrid.addEventListener('click', function() {
 var duration = 2000;
 var start = +new Date();
 var pan = ol.animation.pan({
  duration: duration,
  source: /** @type {ol.Coordinate} */ (view.getCenter()),
  start: start
 });
 var bounce = ol.animation.bounce({
  duration: duration,
  resolution: 2 * view.getResolution(),
  start: start
  });
 var rotate = ol.animation.rotate({
  duration: duration,
  rotation: -4 * Math.PI,
  start: start
 });
 map.beforeRender(pan, bounce, rotate);
 view.setCenter(madrid);
}, false);

2 - ol3.2ex 68a - Animation example 1

「Animation example (animation.html)」を参考に地図を表示してみます。

HTML ファイルの作成
a Eclipse のメニューの「ファイル」->「ファイルを開く」をクリックします。


b 「ファイルを開く」ウィンドウで、「user」->「mapsite」->「ol3proj」->「v3.2.1」->「examples」->「animation.html」をクリックして選択し、「OK」ボタンをクリックします。
同じように「animation.js」を開きます。


c メニューの「ファイル」->「新規」 -> 「ファイル」をクリックします。


d 「ファイル」ウィンドウで「ol3proj」をクリックして選択し、「ファイル名」を「268-ol3ex.html」と入力し、「次へ」ボタンをクリックします。


e 「File Template」ウィンドウで「HTML 5 Template」をクリックして選択し、「OK」ボタンをクリックします。


f 「animation.html」の内容をコピーして「268-ol3ex.html」に貼り付け、修正します。
g 同じように、新規に「268-ol3ex.js」ファイルを作成し、「File Template」ウィンドウで「JavaScript Template」をクリックして選択し、「完了」ボタンをクリックして、「animation.js」の内容をコピーして貼り付け、修正します。「animation-require.js」も「268-ol3ex-require.js」に貼り付けます。


「268-ol3ex.html」
<!doctype html>
<html lang="en">
 <head>
  <meta charset="utf-8">
  <meta http-equiv="X-UA-Compatible" content="chrome=1">
  <meta name="viewport" content="initial-scale=1.0, user-scalable=no, width=device-width">
<!--
  <link rel="stylesheet" href="../css/ol.css" type="text/css">
  <link rel="stylesheet" href="../resources/bootstrap/css/bootstrap.min.css" type="text/css">
  <link rel="stylesheet" href="../resources/layout.css" type="text/css">
  <link rel="stylesheet" href="../resources/bootstrap/css/bootstrap-responsive.min.css" type="text/css">
-->
  <!-- ディレクトリ修正 -->
  <link rel="stylesheet" href="v3.2.1/css/ol.css" type="text/css">
  <link rel="stylesheet" href="v3.2.1/resources/bootstrap/css/bootstrap.min.css" type="text/css">
  <link rel="stylesheet" href="v3.2.1/resources/layout.css" type="text/css">
  <link rel="stylesheet" href="v3.2.1/resources/bootstrap/css/bootstrap-responsive.min.css" type="text/css">
  <title>Animation example</title>
 </head>
 <body>
  <!-- 
  bootstrap.min.css, bootstrap-responsive.min.css で設定されたセレクタを使用。
  -->
  <div class="navbar navbar-inverse navbar-fixed-top">
   <div class="navbar-inner">
    <div class="container">
     <!--
     <a class="brand" href="./"><img src="../resources/logo.png"> OpenLayers 3 Examples</a>
     -->
     <!-- ディレクトリ修正 -->
     <a class="brand" href="v3.2.1/examples/"><img src="v3.2.1/resources/logo.png"> OpenLayers 3 Examples</a>
    </div>
   </div>
  </div>
  <div class="container-fluid">
   <div class="row-fluid">
    <div class="span12">
     <div id="map" class="map"></div>
    </div>
   </div>
   <div class="row-fluid">
    <div class="span12">
     <button id="rotate-left"><i class="icon-arrow-left"></i></button>
     <button id="rotate-right"><i class="icon-arrow-right"></i></button>
     <button id="rotate-around-rome">Rotate around Rome</button>
     <button id="pan-to-london">Pan to London</button>
     <button id="elastic-to-moscow">Elastic to Moscow</button>
     <button id="bounce-to-istanbul">Bounce to Istanbul</button>
     <button id="spin-to-rome">Spin to Rome</button>
     <button id="fly-to-bern">Fly to Bern</button>
     <button id="spiral-to-madrid">Spiral to Madrid</button>
    </div>
   </div>
   <div class="row-fluid">
    <div class="span12">
     <h4 id="title">Animation example </h4>
     <p id="shortdesc">Demonstrates animated pan, zoom, and
      rotation.</p>
     <div id="docs">
      <!--
      See the <a href="animation.js" target="_blank">animation.js source</a> to see how this is done.</p>
      -->
      <!-- ファイル修正 -->
      See the <a href="268-ol3ex.js" target="_blank">268-ol3ex.js source</a> to see how this is done.</p>
     </div>
     <div id="tags">animation</div>
    </div>
   </div>
  </div>
  <!--
  <script src="../resources/jquery.min.js" type="text/javascript"></script>
  <script src="../resources/example-behaviour.js" type="text/javascript"></script>
  -->
  <!-- ディレクトリ修正
   jQuery Minified版と
   example-behaviour.js(Examples用 JSコード[文字コードなど])
  -->
  <script src="v3.2.1/resources/jquery.min.js" type="text/javascript"></script>
  <script src="v3.2.1/resources/example-behaviour.js" type="text/javascript"></script>
  <!--
  <script src="loader.js?id=animation" type="text/javascript"></script>
  -->
  <!-- ファイル修正 -->  <!-- ディレクトリ修正 -->
  <script src="loader.js?id=268-ol3ex" type="text/javascript"></script>
 </body>
</html>

2 - ol3.2ex 67b -Accessibility example 2

「accessible.js(267-ol3ex.js)」は、マップを表示するための JavaScript ファイルです。

「267-ol3ex.js」
var map = new ol.Map({
 layers: [
  new ol.layer.Tile({
  /** ol.layer.Tile 
   * For layer sources that provide pre-rendered, tiled 
   * images in grids that are organized by zoom levels for 
   * specific resolutions. 
   * プリレンダリング(事前描画)を提供するレイヤソースのための、
   * 特定の解像度でのズームレベルによって編成されているグリッドの
   * タイルイメージ。(ol3 API)
   */
   source: new ol.source.OSM()
   /** ol.source.OSM 
    * Layer source for the OpenStreetMap tile server.
    * OpenStreetMap タイルサーバのレイヤソース。(ol3 API)
    */
  })
 ],
 renderer: exampleNS.getRendererFromQueryString(),
 /** 'example-behavior.js' により URL にある renderer を返します */
 target: 'map',
 controls: ol.control.defaults({
 /** controls
  * Controls initially added to the map. 
  * If not specified, ol.control.defaults() is used.
  * 初期設定で、マップに追加されたコントロール。
  * 明示されていなければ、ol.control.defaults() が使用されます。
  * (ol3 API)
  */
 /** ol.control.defaults()
  * デフォルトでは、マップに含まコントロールのセット。
  * 特に設定しない限り、これは、以下の各コントロールの
  * インスタンスを含むコレクションを返します。(ol3 API)
  * ol.control.Zoom, ol.control.Rotate, ol.control.Attribution
  */
  attributionOptions: /** @type {olx.control.AttributionOptions} */ ({
  /** @type 
   * 値のタイプ(型)の説明 - 式などで表示
   * (@use JSDoc[http://usejsdoc.org/]より)
   */
   collapsible: false // 折りたたみ
  })
 }),
 view: new ol.View({
  center: [0, 0],
  zoom: 2
 })
});
jQuery('#map').after('<button type="button" ' +
/** .after()
 * Insert content, specified by the parameter, after 
 * each element in the set of matched elements.
 * マッチしたエレメントのセットの各エレメントの後に、パラ
 * メータによって指定されたコンテキストを挿入します。(
 * (jQuery[http://api.jquery.com/after/])
 */
 'onclick="map.getView().setZoom(map.getView().getZoom() - 1);">' +
 /** getView()
  * Get the view associated with this map. A view 
  * manages properties such as center and resolution.
  * このマップと関連するビューを取得します。ビューは、
  * 中心や解像度のような属性を管理します。
  * Return: The view that controls this map.(ol3 API)
  */
 /** setZoom(zoom)
  * Zoom to a specific zoom level.
  * 指定したズームレベルにズームします。(ol3 API)
  */
 /** getZoom()
  * Get the current zoom level. Return undefined if 
  * the current resolution is undefined or not a 
  * "constrained resolution".
  * 現在のズームレベルを取得します。現在の解像度が未定義か
  * 「制約解像度」の場合は undefined を返します。(ol3 API)
  */
 'Zoom out</button>');
jQuery('#map').after('<button type="button" ' +
 'onclick="map.getView().setZoom(map.getView().getZoom() + 1);">' +
 'Zoom in</button>');

2 - ol3.2ex 67a - Accessibility example 1

「Accessibility example (accessible.html)」を参考に地図を表示してみます。
説明に次のようにあります。

Example of an accessible map.

This page's map element has its tabindex attribute set to "0", that makes it focusable. To focus the map element you can either navigate to it using the "tab" key or use the skip link. When the map element is focused the + and - keys can be used to zoom in and out and the arrow keys can be used to pan.

When clicked the "Zoom in" and "Zoom out" buttons below the map zoom the map in and out, respectively. You can navigate to the buttons using the "tab" key, and press the "enter" key to trigger the zooming action.

アクセス可能なマップの例。

このページのマップエレメントは、フォーカス可能な、「0」に設定された tabindex 属性を持っています。マップエレメントに焦点を当てるために、"タブ"キーを使用することでそれに移動して入力でき、または、スキップリンクを使用できま す。マップエレメントに焦点が当てられたとき、+ および - キーはズームインとズームアウトに使用することができ、矢印キーはパンに使用することができます。

マップの下の「Zoom in」および「Zoom out」ボタンをクリックしたとき、それぞれ、マップをズームインおよびズームアウトします。「タブ」キーを使用してボタンに移動し、ズーミング動作をトリガーする「Enter」キーを押すことができます。

HTML ファイルの作成
a Eclipse のメニューの「ファイル」->「ファイルを開く」をクリックします。


b 「ファイルを開く」ウィンドウで、「user」->「mapsite」->「ol3proj」->「v3.2.1」->「examples」->「accessible.html」をクリックして選択し、「OK」ボタンをクリックします。
同じように「accessible.js」を開きます。


c メニューの「ファイル」->「新規」 -> 「ファイル」をクリックします。


d 「ファイル」ウィンドウで「ol3proj」をクリックして選択し、「ファイル名」を「267-ol3ex.html」と入力し、「次へ」ボタンをクリックします。


e 「File Template」ウィンドウで「HTML 5 Template」をクリックして選択し、「OK」ボタンをクリックします。


f 「accessible.html」の内容をコピーして「267-ol3ex.html」に貼り付け、修正します。
g 同じように、新規に「267-ol3ex.js」ファイルを作成し、「File Template」ウィンドウで「JavaScript Template」をクリックして選択し、「完了」ボタンをクリックして、「accessible.js」の内容をコピーして貼り付け、修正します。「accessible-require.js」も「267-ol3ex-require.js」に貼り付けます。


「267-ol3ex.html」
<!doctype html>
<html lang="en">
 <head>
  <meta charset="utf-8">
  <meta http-equiv="X-UA-Compatible" content="chrome=1">
  <meta name="viewport" content="initial-scale=1.0, user-scalable=no, width=device-width">
<!--
  <link rel="stylesheet" href="../css/ol.css" type="text/css">
  <link rel="stylesheet" href="../resources/bootstrap/css/bootstrap.min.css" type="text/css">
  <link rel="stylesheet" href="../resources/layout.css" type="text/css">
  <link rel="stylesheet" href="../resources/bootstrap/css/bootstrap-responsive.min.css" type="text/css">
-->
  <!-- ディレクトリ修正 -->
  <link rel="stylesheet" href="v3.2.1/css/ol.css" type="text/css">
  <link rel="stylesheet" href="v3.2.1/resources/bootstrap/css/bootstrap.min.css" type="text/css">
  <link rel="stylesheet" href="v3.2.1/resources/layout.css" type="text/css">
  <link rel="stylesheet" href="v3.2.1/resources/bootstrap/css/bootstrap-responsive.min.css" type="text/css">
  <title>Accessibility example</title>
  <style>
   a.skiplink {
    position: absolute;
    clip: rect(1px, 1px, 1px, 1px);
    padding: 0;
    border: 0;
    height: 1px;
    width: 1px;
    overflow: hidden;
   }
   a.skiplink:focus {
    clip: auto;
    height: auto;
    width: auto;
    background-color: #fff;
    padding: 0.3em;
   }
  </style>
 </head>
 <body>
  <!-- 
  bootstrap.min.css, bootstrap-responsive.min.css で設定されたセレクタを使用。
  -->
  <div class="navbar navbar-inverse navbar-fixed-top">
   <div class="navbar-inner">
    <div class="container">
     <!--
     <a class="brand" href="./"><img src="../resources/logo.png"> OpenLayers 3 Examples</a>
     -->
     <!-- ディレクトリ修正 -->
     <a class="brand" href="v3.2.1/examples/"><img src="v3.2.1/resources/logo.png"> OpenLayers 3 Examples</a>
    </div>
   </div>
  </div>
  <div class="container-fluid">
   <div class="row-fluid">
    <div class="span12">
     <a class="skiplink" href="#map">Go to map</a>
     <div id="map" class="map"></div>
    </div>
   </div>
   <div class="row-fluid">
    <div class="span12">
     <h4 id="title">Accessibility example </h4>
     <p id="shortdesc">Example of an accessible map.</p>
     <div id="docs">
     <p>This page's <code>map</code> element has its 
      <code>tabindex</code> attribute set to <code>"0"</code>, 
      that makes it focusable. To focus the map element you 
      can either navigate to it using the "tab" key or use 
      the skip link. When the <code>map</code> 
      element is focused the + and - keys can be used to zoom 
      in and out and the arrow keys can be used to pan.</p>
     <p>When clicked the "Zoom in" and "Zoom out" buttons 
      below the map zoom the map in and out, respectively. 
      You can navigate to the buttons using the "tab" key, 
      and press the "enter" key to trigger the zooming 
      action.</p>
      <!--
      See the <a href="accessible.js" target="_blank">accessible.js source</a> to see how this is done.</p>
      -->
      <!-- ファイル修正 -->
      See the <a href="267-ol3ex.js" target="_blank">267-ol3ex.js source</a> to see how this is done.</p>
     </div>
     <div id="tags">accessibility, tabindex</div>
    </div>
   </div>
  </div>
  <!--
  <script src="../resources/jquery.min.js" type="text/javascript"></script>
  <script src="../resources/example-behaviour.js" type="text/javascript"></script>
  -->
  <!-- ディレクトリ修正
   jQuery Minified版と
   example-behaviour.js(Examples用 JSコード[文字コードなど])
  -->
  <script src="v3.2.1/resources/jquery.min.js" type="text/javascript"></script>
  <script src="v3.2.1/resources/example-behaviour.js" type="text/javascript"></script>
  <!--
  <script src="loader.js?id=accessible" type="text/javascript"></script>
  -->
  <!-- ファイル修正 -->  <!-- ディレクトリ修正 -->
  <script src="loader.js?id=267-ol3ex" type="text/javascript"></script>
 </body>
</html>

2015年2月18日水曜日

2 - ol3.2ex 66b -Preload example 2

「preload.js(266-ol3ex.js)」は、マップを表示するための JavaScript ファイルです。
「266-ol3ex.js」
var map1 = new ol.Map({
 layers: [
  new ol.layer.Tile({
  /** ol.layer.Tile 
   * For layer sources that provide pre-rendered, tiled 
   * images in grids that are organized by zoom levels for 
   * specific resolutions. 
   * プリレンダリング(事前描画)を提供するレイヤソースのための、
   * 特定の解像度でのズームレベルによって編成されているグリッドの
   * タイルイメージ。(ol3 API)
   */
   preload: Infinity,
   /** preload:
    * Preload. Load low-resolution tiles up to 
    * preload levels. By default preload is 0, 
    * which means no preloading.
    * プリロード。プリロードレベルに至るまで低解像度の
    * タイルをロードします。デフォルトはプリロード 0 で、
    * プレロードがないことを意味します。(ol3 API)
    */
   source: new ol.source.BingMaps({
   /** ol.source.BingMaps
    * Layer source for Bing Maps tile data.
    * Bing Maps タイルデータのレイヤソース。(ol3 API)
    */
    key: 'Ak-dzM4w...(省略)',
    imagerySet: 'Aerial'
   })
  })
 ],
 renderer: exampleNS.getRendererFromQueryString(),
 //'example-behavior.js' により URL にある renderer を返します
 target: 'map1',
 view: new ol.View({
  center: [-4808600, -2620936],
  zoom: 8
 })
});
var map2 = new ol.Map({
 layers: [
  new ol.layer.Tile({
   preload: 0, // default value
   source: new ol.source.BingMaps({
    key: 'Ak-dzM4w...(省略)',
    imagerySet: 'AerialWithLabels'
   })
  })
 ],
 renderer: exampleNS.getRendererFromQueryString(),
 target: 'map2'
});
map2.bindTo('view', map1);
/** bindTo 
 * The bindTo method allows you to set up a two-way 
 * binding between a `source` and `target` object. 
 * The method returns an object with a `transform` 
 * method that you can use to provide `from` and 
 * `to` functions to transform values on the way 
 * from the source to the target and on the way back.
 * bindTo メソッドは、`source` と ` target` オブジェク
 * ト間の結合を双方向に設定することができます。メソッドは、
 * ソースからターゲットに、および、その逆方向に値を変換
 * する、 `from` と ` to` ファンクションを提供するため
 * に使用することがでる `transform` メソッドをともなっ
 * た、オブジェクトを返します。(ol/ol/object.js)
 */

2 - ol3.2ex 66a - Preload example 1

「Preload example (preload.html)」を参考に地図を表示してみます。
説明に次のようにあります。

Example of tile preloading.
The map on the left preloads low resolution tiles. The map on the right does not use any preloading. Try zooming out and panning to see the difference.

タイルプリロードの例。
左のマップは低解像度のタイルをプリロード(事前読込み)します。右のマップは、どれもプリロードを使用しません。その差を見るためにズームアウトとパンを試しください。

HTML ファイルの作成
a Eclipse のメニューの「ファイル」->「ファイルを開く」をクリックします。


b 「ファイルを開く」ウィンドウで、「user」->「mapsite」->「ol3proj」->「v3.2.1」->「examples」->「preload.html」をクリックして選択し、「OK」ボタンをクリックします。
同じように「preload.js」を開きます。


c メニューの「ファイル」->「新規」 -> 「ファイル」をクリックします。


d 「ファイル」ウィンドウで「ol3proj」をクリックして選択し、「ファイル名」を「266-ol3ex.html」と入力し、「次へ」ボタンをクリックします。


e 「File Template」ウィンドウで「HTML 5 Template」をクリックして選択し、「OK」ボタンをクリックします。


f 「preload.html」の内容をコピーして「266-ol3ex.html」に貼り付け、修正します。
g 同じように、新規に「266-ol3ex.js」ファイルを作成し、「File Template」ウィンドウで「JavaScript Template」をクリックして選択し、「完了」ボタンをクリックして、「preload.js」の内容をコピーして貼り付け、修正します。「preload-require.js」も「266-ol3ex-require.js」に貼り付けます。


「266-ol3ex.html」
<!doctype html>
<html lang="en">
 <head>
  <meta charset="utf-8">
  <meta http-equiv="X-UA-Compatible" content="chrome=1">
  <meta name="viewport" content="initial-scale=1.0, user-scalable=no, width=device-width">
<!--
  <link rel="stylesheet" href="../css/ol.css" type="text/css">
  <link rel="stylesheet" href="../resources/bootstrap/css/bootstrap.min.css" type="text/css">
  <link rel="stylesheet" href="../resources/layout.css" type="text/css">
  <link rel="stylesheet" href="../resources/bootstrap/css/bootstrap-responsive.min.css" type="text/css">
-->
  <!-- ディレクトリ修正 -->
  <link rel="stylesheet" href="v3.2.1/css/ol.css" type="text/css">
  <link rel="stylesheet" href="v3.2.1/resources/bootstrap/css/bootstrap.min.css" type="text/css">
  <link rel="stylesheet" href="v3.2.1/resources/layout.css" type="text/css">
  <link rel="stylesheet" href="v3.2.1/resources/bootstrap/css/bootstrap-responsive.min.css" type="text/css">
  <title>Preload example</title>
 </head>
 <body>
  <!-- 
  bootstrap.min.css, bootstrap-responsive.min.css で設定されたセレクタを使用。
  -->
  <div class="navbar navbar-inverse navbar-fixed-top">
   <div class="navbar-inner">
    <div class="container">
     <!--
     <a class="brand" href="./"><img src="../resources/logo.png"> OpenLayers 3 Examples</a>
     -->
     <!-- ディレクトリ修正 -->
     <a class="brand" href="v3.2.1/examples/"><img src="v3.2.1/resources/logo.png"> OpenLayers 3 Examples</a>
    </div>
   </div>
  </div>
  <div class="container-fluid">
   <div class="row-fluid">
    <div class="span6 mapcontainer">
     <div id="map" class="map"></div>
    </div>
    <div class="span6 mapcontainer">
     <div id="map" class="map"></div>
    </div>
   </div>
   <div class="row-fluid">
    <div class="span12">
     <h4 id="title">Preload example </h4>
     <p id="shortdesc">Example of tile preloading.</p>
     <div id="docs">
      <p>The map on the left preloads low resolution tiles.  
       The map on the right does not use any preloading.   
       Try zooming out and panning to see the difference.</p>
      <!--
      See the <a href="preload.js" target="_blank">preload.js source</a> to see how this is done.</p>
      -->
      <!-- ファイル修正 -->
      See the <a href="266-ol3ex.js" target="_blank">266-ol3ex.js source</a> to see how this is done.</p>
     </div>
     <div id="tags">preload, bing</div>
    </div>
   </div>
  </div>
  <!--
  <script src="../resources/jquery.min.js" type="text/javascript"></script>
  <script src="../resources/example-behaviour.js" type="text/javascript"></script>
  -->
  <!-- ディレクトリ修正
   jQuery Minified版と
   example-behaviour.js(Examples用 JSコード[文字コードなど])
  -->
  <script src="v3.2.1/resources/jquery.min.js" type="text/javascript"></script>
  <script src="v3.2.1/resources/example-behaviour.js" type="text/javascript"></script>
  <!--
  <script src="loader.js?id=preload" type="text/javascript"></script>
  -->
  <!-- ファイル修正 -->  <!-- ディレクトリ修正 -->
  <script src="loader.js?id=266-ol3ex" type="text/javascript"></script>
 </body>
</html>

2 - ol3.2ex 65b -Move end example 2

「moveend.js(265-ol3ex.js)」は、マップを表示するための JavaScript ファイルです。

「265-ol3ex.js」
var map = new ol.Map({
 layers: [
  new ol.layer.Tile({
  /** ol.layer.Tile 
   * For layer sources that provide pre-rendered, tiled 
   * images in grids that are organized by zoom levels for 
   * specific resolutions. 
   * プリレンダリング(事前描画)を提供するレイヤソースのための、
   * 特定の解像度でのズームレベルによって編成されているグリッドの
   * タイルイメージ。(ol3 API)
   */
   source: new ol.source.OSM()
   /** ol.source.OSM 
    * Layer source for the OpenStreetMap tile server.
    * OpenStreetMap タイルサーバのレイヤソース。(ol3 API)
    */
  })
 ],
 renderer: exampleNS.getRendererFromQueryString(),
 //'example-behavior.js' により URL にある renderer を返します
 target: 'map',
 controls: ol.control.defaults({
 /** controls
  * Controls initially added to the map. 
  * If not specified, ol.control.defaults() is used.
  * 初期設定で、マップに追加されたコントロール。
  * 明示されていなければ、ol.control.defaults() が使用されます。
  * (ol3 API)
  */
 /** ol.control.defaults()
  * デフォルトでは、マップに含まコントロールのセット。
  * 特に設定しない限り、これは、以下の各コントロールの
  * インスタンスを含むコレクションを返します。(ol3 API)
  * ol.control.Zoom, ol.control.Rotate, ol.control.Attribution
  */
  attributionOptions: /** @type {olx.control.AttributionOptions} */ ({
  /** @type 
   * 値のタイプ(型)の説明 - 式などで表示
   * (@use JSDoc[http://usejsdoc.org/]より)
   */
   collapsible: false // 折りたたみ
  })
 }),
 view: new ol.View({
  center: [0, 0],
  zoom: 2
 })
});
function display(id, value) {
 document.getElementById(id).value = value.toFixed(2);
 /** Number.prototype.toFixed()
  * The toFixed() method formats a number using 
  * fixed-point notation.
  * toFixed() メソッドは、固定小数点表記を使用して数値を
  * フォーマットします。
  * (MDN[https://developer.mozilla.org/en-US/docs/Web/
  * JavaScript/Reference/Global_Objects/Number/toFixed])
  */
}
function wrapLon(value) {
 var worlds = Math.floor((value + 180) / 360);
 /** Math.floor()
  * The Math.floor() function returns the largest 
  * integer less than or equal to a given number.
  * Math.floor() 関数は、指定された数以下の最大の整数、
  * または、等しい数を返します。
  * (MDN[https://developer.mozilla.org/en-US/docs/Web/
  * JavaScript/Reference/Global_Objects/Math/floor])
  */
 return value - (worlds * 360);
}
function onMoveEnd(evt) {
 var map = evt.map;
 var extent = map.getView().calculateExtent(map.getSize());
 /** getView()
  * Get the view associated with this map. A view 
  * manages properties such as center and resolution.
  * このマップと関連するビューを取得します。ビューは、
  * 中心や解像度のような属性を管理します。
  * Return: The view that controls this map.(ol3 API)
  */
 /** calculateExtent
  * Calculate the extent for the current view state and 
  * the passed `size`. `size` is the size in pixels of 
  * the box into which the calculated extent should fit. 
  * In most cases you want to get the extent of the 
  * entire map, that is `map.getSize()`. 
  * 現在のビューステートと渡された`size`の範囲を計算します。 
  * `size`は、計算された範囲に収まるボックスのピクセル単位
  * のサイズです。ほとんどの場合、マップ全体の範囲を取得しま
  * すが、それは`map.getSize()`です。(ol/ol/view.js)
  */
 /** getSize()
  * Get the size of this map.
  * Returns: The size in pixels of the map in the DOM.
  * マップのサイズを取得。(ol3 API)
  */
 var bottomLeft = ol.proj.transform(ol.extent.getBottomLeft(extent),
 /** ol.proj.transform(coordinate, source, destination)
  * Transforms a coordinate from source projection to 
  * destination projection. This returns a new coordinate 
  * (and does not modify the original).
  * ソース投影から変換先投影に座標変換します。これは、新しい座標
  * を返します(オリジナルを変更しません)。(ol3 API)
  */
 /** ol.extent.getBottomLeft
  * Return: Bottom Left coordinate.(ol3 API)
  */
  'EPSG:3857', 'EPSG:4326');
 var topRight = ol.proj.transform(ol.extent.getTopRight(extent),
 /** ol.extent.getTopRight
  * Return: Top Right coordinate.(ol3 API)
  */
  'EPSG:3857', 'EPSG:4326');
 display('left', wrapLon(bottomLeft[0]));
 display('bottom', bottomLeft[1]);
 display('right', wrapLon(topRight[0]));
 display('top', topRight[1]);
}
map.on('moveend', onMoveEnd);
/** on
 * Listen for a certain type of event.
 * あるタイプのイベントをリッスンします。(ol3 API)
 */

2 - ol3.2ex 65a - Move end example 1

「Move end example (moveend.html)」を参考に地図を表示してみます。説明に次のようにあります。

Use of the moveend event.
In this example, a listener is registered for the map's moveend event. Whenever this listener is called, it updates the inputs below with the map extent in decimal degrees.

moveend イベントの使用。
この例では、リスナは、マップの moveend イベントに登録されています。このリスナが呼び出されるたびに、十進数の角度のマップ範囲を使って下の入力を更新します。


HTML ファイルの作成
a Eclipse のメニューの「ファイル」->「ファイルを開く」をクリックします。


b 「ファイルを開く」ウィンドウで、「user」->「mapsite」->「ol3proj」->「v3.2.1」->「examples」->「moveend.html」をクリックして選択し、「OK」ボタンをクリックします。
同じように「moveend.js」を開きます。


c メニューの「ファイル」->「新規」 -> 「ファイル」をクリックします。


d 「ファイル」ウィンドウで「ol3proj」をクリックして選択し、「ファイル名」を「265-ol3ex.html」と入力し、「次へ」ボタンをクリックします。


e 「File Template」ウィンドウで「HTML 5 Template」をクリックして選択し、「OK」ボタンをクリックします。


f 「moveend.html」の内容をコピーして「265-ol3ex.html」に貼り付け、修正します。
g 同じように、新規に「265-ol3ex.js」ファイルを作成し、「File Template」ウィンドウで「JavaScript Template」をクリックして選択し、「完了」ボタンをクリックして、「moveend.js」の内容をコピーして貼り付け、修正します。「moveend-require.js」も「265-ol3ex-require.js」に貼り付けます。


「265-ol3ex.html」
<!doctype html>
<html lang="en">
 <head>
  <meta charset="utf-8">
  <meta http-equiv="X-UA-Compatible" content="chrome=1">
  <meta name="viewport" content="initial-scale=1.0, user-scalable=no, width=device-width">
<!--
  <link rel="stylesheet" href="../css/ol.css" type="text/css">
  <link rel="stylesheet" href="../resources/bootstrap/css/bootstrap.min.css" type="text/css">
  <link rel="stylesheet" href="../resources/layout.css" type="text/css">
  <link rel="stylesheet" href="../resources/bootstrap/css/bootstrap-responsive.min.css" type="text/css">
-->
  <!-- ディレクトリ修正 -->
  <link rel="stylesheet" href="v3.2.1/css/ol.css" type="text/css">
  <link rel="stylesheet" href="v3.2.1/resources/bootstrap/css/bootstrap.min.css" type="text/css">
  <link rel="stylesheet" href="v3.2.1/resources/layout.css" type="text/css">
  <link rel="stylesheet" href="v3.2.1/resources/bootstrap/css/bootstrap-responsive.min.css" type="text/css">
  <title>Moveend example</title>
 </head>
 <body>
  <!-- 
  bootstrap.min.css, bootstrap-responsive.min.css で設定されたセレクタを使用。
  -->
  <div class="navbar navbar-inverse navbar-fixed-top">
   <div class="navbar-inner">
    <div class="container">
     <!--
     <a class="brand" href="./"><img src="../resources/logo.png"> OpenLayers 3 Examples</a>
     -->
     <!-- ディレクトリ修正 -->
     <a class="brand" href="v3.2.1/examples/"><img src="v3.2.1/resources/logo.png"> OpenLayers 3 Examples</a>
    </div>
   </div>
  </div>
  <div class="container-fluid">
   <div class="row-fluid">
    <div class="span12 mapcontainer">
     <div id="map" class="map"></div>
    </div>
   </div>
   <div class="row-fluid">
    <div class="span12">
     <h4 id="title">Moveend example </h4>
     <p id="shortdesc">Use of the moveend event.</p>
     <div id="docs">
      <p>In this example, a listener is registered for the 
       map's <code>moveend</code> event.  Whenever this 
       listener is called, it updates the inputs below with 
       the map extent in decimal degrees.</p>
      <!--
      See the <a href="moveend.js" target="_blank">moveend.js source</a> to see how this is done.</p>
      -->
      <!-- ファイル修正 -->
      See the <a href="265-ol3ex.js" target="_blank">265-ol3ex.js source</a> to see how this is done.</p>
     </div>
     <div id="tags">moveend, map, event</div>
     <label>top</label><input type="text" id="top">
     <label>right</label><input type="text" id="right">
     <label>bottom</label><input type="text" id="bottom">
     <label>left</label><input type="text" id="left">
    </div>
   </div>
  </div>
  <!--
  <script src="../resources/jquery.min.js" type="text/javascript"></script>
  <script src="../resources/example-behaviour.js" type="text/javascript"></script>
  -->
  <!-- ディレクトリ修正
   jQuery Minified版と
   example-behaviour.js(Examples用 JSコード[文字コードなど])
  -->
  <script src="v3.2.1/resources/jquery.min.js" type="text/javascript"></script>
  <script src="v3.2.1/resources/example-behaviour.js" type="text/javascript"></script>
  <!--
  <script src="loader.js?id=moveend" type="text/javascript"></script>
  -->
  <!-- ファイル修正 -->  <!-- ディレクトリ修正 -->
  <script src="loader.js?id=265-ol3ex" type="text/javascript"></script>
 </body>
</html>

2 - ol3.2ex 64b -Min/max resolution example 2

「min-max-resolution.js(264-ol3ex.js)」は、マップを表示するための JavaScript ファイルです。

「264-ol3ex.js」
/**
 * Create the map.
 */
var map = new ol.Map({
 layers: [
  new ol.layer.Tile({
  /** ol.layer.Tile 
   * For layer sources that provide pre-rendered, tiled 
   * images in grids that are organized by zoom levels for 
   * specific resolutions. 
   * プリレンダリング(事前描画)を提供するレイヤソースのための、
   * 特定の解像度でのズームレベルによって編成されているグリッドの
   * タイルイメージ。(ol3 API)
   */
   source: new ol.source.OSM(),
   /** ol.source.OSM 
    * Layer source for the OpenStreetMap tile server.
    * OpenStreetMap タイルサーバのレイヤソース。(ol3 API)
    */
   minResolution: 200,
   maxResolution: 2000
  }),
  new ol.layer.Tile({
   source: new ol.source.TileJSON({
   /** ol.source.TileJSON 
    * Layer source for tile data in TileJSON format.
    * TileJSON フォーマットのタイルデータのためのレイヤソース。
    *(ol3 API)
    */
    url: 'http://api.tiles.mapbox.com/v3/' +
     'mapbox.natural-earth-hypso-bathy.jsonp',
    crossOrigin: 'anonymous'
 /** crossOrigin
  * The crossOrigin attribute for loaded images. Note 
  * that you must provide a crossOrigin value if you 
  * are using the WebGL renderer or if you want to 
  * access pixel data with the Canvas renderer. See 
  * https://developer.mozilla.org/en-US/docs/Web/HTML/
  * CORS_enabled_image for more detail.
  * ロードされたイメージの crossOrigin属性。WebGLのレンダラー
  * を使用している場合、または、キャンバスレンダラでピクセルデー
  * タにアクセスする場合、crossOrigin 値を提供なければならない
  * ことに注意してください。詳細は 
  * https://developer.mozilla.org/en-US/docs/Web/HTML/
  * CORS_enabled_image を参照してください。(ol3 API)
  */
   }),
   minResolution: 2000,
   maxResolution: 20000
  })
 ],
 renderer: exampleNS.getRendererFromQueryString(),
 //'example-behavior.js' により URL にある renderer を返します
 target: 'map',
 controls: ol.control.defaults({
 /** controls
  * Controls initially added to the map. 
  * If not specified, ol.control.defaults() is used.
  * 初期設定で、マップに追加されたコントロール。
  * 明示されていなければ、ol.control.defaults() が使用されます。
  * (ol3 API)
  */
 /** ol.control.defaults()
  * デフォルトでは、マップに含まコントロールのセット。
  * 特に設定しない限り、これは、以下の各コントロールの
  * インスタンスを含むコレクションを返します。(ol3 API)
  * ol.control.Zoom, ol.control.Rotate, ol.control.Attribution
  */
  attributionOptions: /** @type {olx.control.AttributionOptions} */ ({
  /** @type 
   * 値のタイプ(型)の説明 - 式などで表示
   * (@use JSDoc[http://usejsdoc.org/]より)
   */
   collapsible: false // 折りたたみ
  })
 }),
 view: new ol.View({
  center: [653600, 5723680],
  zoom: 5
 })
});

2 - ol3.2ex 64a - Min/max resolution example 1

「Min/max resolution example (min-max-resolution.html)」を参考に地図を表示してみます。
説明に次のようにあります。

Show/hide layers depending on current view resolution.
Zoom in twice: the MapBox layer should hide whereas the OSM layer should be shown.
If you continue to zoom in, you'll see the OSM layer also disappear.
The rendering of the layers are here controlled using minResolution and maxResolution options.

現在のビューの解像度に応じた表示/非表示レイヤ。
ズームイン2回で:MapBox レイヤが非表示になり、それに替えて OSM レイヤが表示されます。
ズームインし続けると、OSM レイヤも消えます。
レイヤのレンダリングは、ここでは minResolution と maxResolution オプションを使用して制御しています。

HTML ファイルの作成
a Eclipse のメニューの「ファイル」->「ファイルを開く」をクリックします。


b 「ファイルを開く」ウィンドウで、「user」->「mapsite」->「ol3proj」->「v3.2.1」->「examples」->「min-max-resolution.html」をクリックして選択し、「OK」ボタンをクリックします。
同じように「min-max-resolution.js」を開きます。


c メニューの「ファイル」->「新規」 -> 「ファイル」をクリックします。


d 「ファイル」ウィンドウで「ol3proj」をクリックして選択し、「ファイル名」を「264-ol3ex.html」と入力し、「次へ」ボタンをクリックします。


e 「File Template」ウィンドウで「HTML 5 Template」をクリックして選択し、「OK」ボタンをクリックします。


f 「min-max-resolution.html」の内容をコピーして「264-ol3ex.html」に貼り付け、修正します。
g 同じように、新規に「264-ol3ex.js」ファイルを作成し、「File Template」ウィンドウで「JavaScript Template」をクリックして選択し、「完了」ボタンをクリックして、「min-max-resolution.js」の内容をコピーして貼り付け、修正します。「min-max-resolution-require.js」も「264-ol3ex-require.js」に貼り付けます。


「264-ol3ex.html」
<!doctype html>
<html lang="en">
 <head>
  <meta charset="utf-8">
  <meta http-equiv="X-UA-Compatible" content="chrome=1">
  <meta name="viewport" content="initial-scale=1.0, user-scalable=no, width=device-width">
<!--
  <link rel="stylesheet" href="../css/ol.css" type="text/css">
  <link rel="stylesheet" href="../resources/bootstrap/css/bootstrap.min.css" type="text/css">
  <link rel="stylesheet" href="../resources/layout.css" type="text/css">
  <link rel="stylesheet" href="../resources/bootstrap/css/bootstrap-responsive.min.css" type="text/css">
-->
  <!-- ディレクトリ修正 -->
  <link rel="stylesheet" href="v3.2.1/css/ol.css" type="text/css">
  <link rel="stylesheet" href="v3.2.1/resources/bootstrap/css/bootstrap.min.css" type="text/css">
  <link rel="stylesheet" href="v3.2.1/resources/layout.css" type="text/css">
  <link rel="stylesheet" href="v3.2.1/resources/bootstrap/css/bootstrap-responsive.min.css" type="text/css">
  <title>Min/max resolution example</title>
 </head>
 <body>
  <!-- 
  bootstrap.min.css, bootstrap-responsive.min.css で設定されたセレクタを使用。
  -->
  <div class="navbar navbar-inverse navbar-fixed-top">
   <div class="navbar-inner">
    <div class="container">
     <!--
     <a class="brand" href="./"><img src="../resources/logo.png"> OpenLayers 3 Examples</a>
     -->
     <!-- ディレクトリ修正 -->
     <a class="brand" href="v3.2.1/examples/"><img src="v3.2.1/resources/logo.png"> OpenLayers 3 Examples</a>
    </div>
   </div>
  </div>
  <div class="container-fluid">
   <div class="row-fluid">
    <div class="span12 mapcontainer">
     <div id="map" class="map"></div>
    </div>
   </div>
   <div class="row-fluid">
    <div class="span12">
     <h4 id="title">Min/max resolution example </h4>
     <p id="shortdesc">Show/hide layers depending on current 
      view resolution.</p>
     <div id="docs">
      <p>Zoom in twice: the MapBox layer should hide whereas 
       the OSM layer should be shown.</p>
      <p>If you continue to zoom in, you'll see the OSM layer 
       also disappear.</p>
      <p>The rendering of the layers are here controlled
       using minResolution and maxResolution options.</p>
      <!--
      See the <a href="min-max-resolution.js" target="_blank">min-max-resolution.js source</a> to see how this is done.</p>
      -->
      <!-- ファイル修正 -->
      See the <a href="264-ol3ex.js" target="_blank">264-ol3ex.js source</a> to see how this is done.</p>
     </div>
     <div id="tags">minResolution, maxResolution, resolution</div>
    </div>
   </div>
  </div>
  <!--
  <script src="../resources/jquery.min.js" type="text/javascript"></script>
  <script src="../resources/example-behaviour.js" type="text/javascript"></script>
  -->
  <!-- ディレクトリ修正
   jQuery Minified版と
   example-behaviour.js(Examples用 JSコード[文字コードなど])
  -->
  <script src="v3.2.1/resources/jquery.min.js" type="text/javascript"></script>
  <script src="v3.2.1/resources/example-behaviour.js" type="text/javascript"></script>
  <!--
  <script src="loader.js?id=min-max-resolution" type="text/javascript"></script>
  -->
  <!-- ファイル修正 -->  <!-- ディレクトリ修正 -->
  <script src="loader.js?id=264-ol3ex" type="text/javascript"></script>
 </body>
</html>