ラベル drag and drop の投稿を表示しています。 すべての投稿を表示

2018年9月26日水曜日

OpenLayers5 Workshop - 2.2 Drag and drop

2 Vector Data
2.2 Drag and drop
ドラッグ・アンド・ドロップ

For our feature editor, we want users to be able to import their own data for editing. We'll use the DragAndDrop interaction for this. As before, we'll stick with the GeoJSON format for parsing features, but the interaction can be configured to work with any number of feature formats.

フィーチャエディタのために、ユーザが編集用の固有のデータをインポートできるようにします。このために DragAndDrop インタラクションを使います。従来通りに、フィーチャをパース(構文解析)するために GeoJSON フォーマットで差し込みますが、インタラクションはいくつかのフィーチャフォーマットで動作するように設定されます。

First of all, we need to assign the map to a constant, so we can access it from other components we're going to add in this exercise:

まず第一に、マップを定数(constant)に割り当てる必要があり、それで、この演習に追加する他のコンポーネントからアクセスできるようにします:

const map = new Map({

Import the drag and drop interaction into your main.js:

main.js にドラッグ・アンド・ドロップインタラクションをインポートします:
import DragAndDrop from 'ol/interaction/DragAndDrop';
Next, we'll create a vector source with no initial data. Instead of loading data from a remote location as in the previous example, this source will store features that the user drags and drops onto the map.

次に、初期値データのないベクタソースを作成します。前述の例と同じように離れた位置からデータをロードするかわりに、このソースは、ユーザがマップ上にドラッグ・アンド・ドロップするフィーチャを格納します。

const source = new VectorSource();

Now, remove the old layers list from the map, create a new layer with our empty vector source, and add it to the map.

では、マップから古いレイヤリストを削除し、空のベクタソースで新しいレイヤを作成し、マップにそれを追加します。
const layer = new VectorLayer({
 source: source
});
map.addLayer(layer);
Finally, we'll create a drag and drop interaction, configure it to work with our vector source, and add it to the map:

最後に、ドラッグ・アンド・ドロップインタラクションを作成し、ベクタソースで動作するためにそれを設定し、マップに追加します:
map.addInteraction(new DragAndDrop({
 source: source,
 formatConstructors: [GeoJSON]
}));
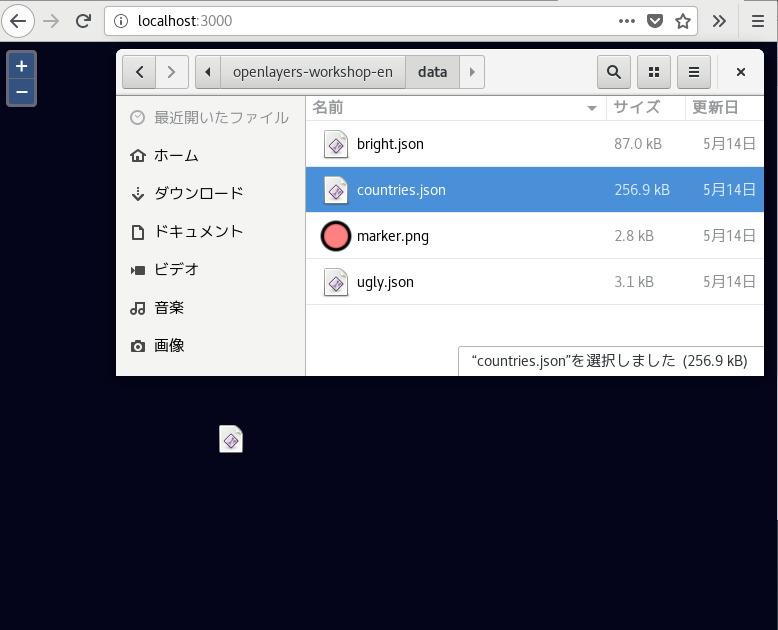
Now you should be able to drag and drop GeoJSON files onto the map and see them rendered.

それでは、GeoJSON ファイルをドラッグ・アンド・ドロップさせてそれらが描画されるのを確認します。

■□ Debian9 で試します■□
前回使用した main.js のバックアップを保存して次のように修正します。

user@deb9-vmw:~/openlayers-workshop-en$  cp main.js main.js_geojson user@deb9-vmw:~/openlayers-workshop-en$ vim main.js
import 'ol/ol.css';
import GeoJSON from 'ol/format/GeoJSON':
import Map from 'ol/Map';
import VectorLayer from 'ol/layer/Vector';
import VectorSource from 'ol/source/Vector';
import View from 'ol/View';
import DragAndDrop from 'ol/interaction/DragAndDrop';
import sync from 'ol-hashed';
const map = new Map({
 target: 'map-container',
 view: new View({
  center: [0, 0],
  zoom: 2
 })
}); 
sync(map);

const source = new VectorSource();

const layer = new VectorLayer({
 source: source
});
map.addLayer(layer);

map.addInteraction(new DragAndDrop({
 source: source,
 formatConstructors: [GeoJSON]
}));
http://localhost:3000/ とブラウザでマップを開きます。(もし開かなければ、'npm start' を実行してください。


■□ここまで■□

2015年2月9日月曜日

2 - ol3.1ex 57b - Drag-and-Drop image vector example 2

「drag-and-drop-image-vector.js(257-ol3ex.js)」は、マップを表示するための JavaScript ファイルです。
GeoJSON ファイルをマップ上にドラッグアンドドロップすると、データが表示されます。そのとき、倍率が変わってしまいました。
「257-ol3ex.js」
var defaultStyle = {
 'Point': [new ol.style.Style({
 /** ol.style.Style 
  * Base class for vector feature rendering styles.
  * ベクタフィーチャがスタイルを描画するための基本クラス。
  * (ol3 API)
  */
  image: new ol.style.Circle({
  /** ol.style.Circle
   * Set circle style for vector features.
   * ベクタフィーチャの円のスタイルを設定。(ol3 API)
   */
   fill: new ol.style.Fill({
   /** ol.style.Fill 
    * Set fill style for vector features.
    * ベクタフィーチャの塗りつぶしスタイルを設定。(ol3 API)
    */
    color: 'rgba(255,255,0,0.5)'
   }),
   radius: 5,
   stroke: new ol.style.Stroke({
   /** ol.style.Stroke 
    * Set stroke style for vector features. 
    * Note that the defaults given are the Canvas defaults, 
    * which will be used if option is not defined. 
    * The get functions return whatever was entered 
    * in the options;  they will not return the default.
    * ベクタフィーチャのためのストロークスタイルの設定。
    * デフォルトは、オプションが定義されていない場合に使用される
    * Canvas のデフォルトを与えられることに注意してください。 
    * GET関数は、オプションで入力されたものはすべて返します。
    * それらはデフォルトを返しません。(ol3 API)
    */
    color: '#ff0',
    width: 1
   })
  })
 })],
 'LineString': [new ol.style.Style({
  stroke: new ol.style.Stroke({
   color: '#f00',
   width: 3
  })
 })],
 'Polygon': [new ol.style.Style({
  fill: new ol.style.Fill({
   color: 'rgba(0,255,255,0.5)'
  }),
  stroke: new ol.style.Stroke({
   color: '#0ff',
   width: 1
  })
 })],
 'MultiPoint': [new ol.style.Style({
  image: new ol.style.Circle({
   fill: new ol.style.Fill({
    color: 'rgba(255,0,255,0.5)'
   }),
   radius: 5,
   stroke: new ol.style.Stroke({
    color: '#f0f',
    width: 1
   })
  })
 })],
 'MultiLineString': [new ol.style.Style({
  stroke: new ol.style.Stroke({
   color: '#0f0',
   width: 3
  })
 })],
 'MultiPolygon': [new ol.style.Style({
  fill: new ol.style.Fill({
   color: 'rgba(0,0,255,0.5)'
  }),
  stroke: new ol.style.Stroke({
   color: '#00f',
   width: 1
  })
 })]
};
var styleFunction = function(feature, resolution) {
 var featureStyleFunction = feature.getStyleFunction();
 /** getStyleFunction()
  * Get the style function
  * Returns: Layer style function.(ol3 API)
  */
 if (featureStyleFunction) {
  return featureStyleFunction.call(feature, resolution);
  /** Function.prototype.call()
   * The call() method calls a function with a given 
   * this value and arguments provided individually.
   * call メソッドは、与えられた this 値とここに与えられ
   * た引数とともに、関数を呼び出します。
   * (MDN[https://developer.mozilla.org/en-US/docs/Web/
   * JavaScript/Reference/Global_Objects/Function/call])
   */
 } else {
  return defaultStyle[feature.getGeometry().getType()];
  /** getGeometry()
   *  Returns the Geometry associated with this feature 
   * using the current geometry name property. By default, 
   * this is geometry but it may be changed by calling 
   * setGeometryName.
   * 現在のジオメトリネームプロパティを使用して、このフィーチャ
   * に関連したジオメトリを返します。デフォルトでは、ジオメトリ
   * ですが、setGeometryName を呼び出すことによって変更するこ
   * とができます。(ol3 API)
   */
  /** getType()
   * Get the type of this geometry. 
   * ジオメトリの型を取得。(ol3 API)
   */
 }
};
var dragAndDropInteraction = new ol.interaction.DragAndDrop({
/** ol.interaction.DragAndDrop 
 * Handles input of vector data by drag and drop.
 * ドラッグアンドドロップによってベクタデータの入力を取り扱いま
 * す。(ol3 API)
 */
 formatConstructors: [
  ol.format.GPX,
  /** ol.format.GPX 
   * Feature format for reading and writing data 
   * in the GPX format.
   * GPX フォーマットでデータを読み書きするためのフィー
   * チャのフォーマット。(ol3 API)
   */
  ol.format.GeoJSON,
  /** ol.format.GeoJSON 
   * Feature format for reading and writing data 
   * in the GeoJSON format.
   * GeoJSON フォーマットのデータを読み書きするための
   * フィーチャフォーマット。(ol3 API)
   */
  ol.format.IGC,
  /** ol.format.IGC 
   * Feature format for *.igc flight recording 
   * files.
   * *.igc フライト記録ファイル用のフィーチャフォーマット。
   * (ol3 API)
   */
  ol.format.KML,
  /** ol.format.KML 
   * Feature format for reading and writing data 
   * in the KML format.
   * KML フォーマットでデータを読み書きするためのフィー
   * チャのフォーマット。(ol3 API)
   */
  ol.format.TopoJSON
  /** ol.format.TopoJSON 
   * Feature format for reading and writing data 
   * in the TopoJSON format.
   * TopoJSON フォーマットでデータを読み書きするためのフィー
   * チャのフォーマット。(ol3 API)
   */
 ]
});
var map = new ol.Map({
 interactions: ol.interaction.defaults().extend([dragAndDropInteraction]),
 /** ol.interaction.defaults
  * Set of interactions included in maps by default. 
  * Specific interactions can be excluded by setting 
  * the appropriate option to false in the constructor 
  * options, but the order of the interactions is fixed. 
  * If you want to specify a different order for 
  * interactions, you will need to create your own 
  * ol.interaction.Interaction instances and insert 
  * them into a ol.Collection in the order you want 
  * before creating your ol.Map instance.
  * デフォルトでマップに含まれるインターラクションのセット。
  * 具体的なインターラクションは、コンストラクタのオプションで適切
  * なオプションをfalseに設定することで除外することができますが、
  * インターラクションの順番は固定されています。インターラクション
  * に対して別の順番を指定したい場合は、独自の 
  * ol.interaction.Interaction インスタンスを作成し、ol.Map イ
  * ンスタンスを作成する前に、望む順番で ol.Collection にそれ
  * らを挿入する必要があります。(ol3 API)
  *  (訳注:インターラクションの順番は、API を参照してください。)
  */
  layers: [
  new ol.layer.Tile({
  /** ol.layer.Tile 
   * For layer sources that provide pre-rendered, tiled 
   * images in grids that are organized by zoom levels for 
   * specific resolutions. 
   * プリレンダリング(事前描画)を提供するレイヤソースのための、
   * 特定の解像度でのズームレベルによって編成されているグリッドの
   * タイルイメージ。(ol3 API)
   */
   source: new ol.source.BingMaps({
   /** ol.source.BingMaps
    * Layer source for Bing Maps tile data.
    * Bing Maps タイルデータのレイヤソース。(ol3 API)
    */
    imagerySet: 'Aerial',
    key: 'Ak-dzM4w...(省略)'
   })
  })
 ],
 renderer: exampleNS.getRendererFromQueryString(),
 //'example-behavior.js' により URL にある renderer を返します
 target: 'map',
 view: new ol.View({
  center: [0, 0],
  zoom: 2
 })
});
dragAndDropInteraction.on('addfeatures', function(event) {
/** on()
 * Listen for a certain type of event.
 * あるタイプのイベントをリッスンします。
 * Returns: Unique key for the listener.(ol3 API)
 */
 var vectorSource = new ol.source.Vector({
 /** ol.source.Vector 
  * Provides a source of features for vector layers.
  * ベクタレイヤのフィーチャのソースを提供します。(ol3 API)
  */
  features: event.features,
  projection: event.projection
 });
 map.getLayers().push(new ol.layer.Image({
 /** getLayers()
  * Get the collection of layers associated with 
  * this map.
  * このマップと関連するレイヤのコレクションを取得します。
  * (ol3 API)
  */
 /** push(elem)
  * Insert the provided element at the end of the 
  * collection.
  * コレクションの最後に供給されたエレメントに挿入します。
  * Name: elem, Type: T, Description: Element
  * (ol3 API)
  */
 /** ol.layer.Image
  * Server-rendered images that are available for arbitrary 
  * extents and resolutions. 
  * 任意の範囲と解像度で利用可能な server-rendered イメージ。
  * (ol3 API)
  */
  source: new ol.source.ImageVector({
  /** ol.source.ImageVector 
   * An image source whose images are canvas elements 
   * into which vector features read from a vector source 
   * (ol.source.Vector) are drawn. An ol.source.ImageVector 
   * object is to be used as the source of an image layer 
   * (ol.layer.Image). Image layers are rotated, scaled, 
   * and translated, as opposed to being re-rendered, 
   * during animations and interactions. So, like any 
   * other image layer, an image layer configured with 
   * an ol.source.ImageVector will exhibit this behaviour. 
   * This is in contrast to a vector layer, where vector 
   * features are re-drawn during animations and interactions.
   * ベクタソース(ol.source.Vector)から読み込まれたベクタ
   * フィーチャがキャンバスエレメントに描画されたイメージのイ
   * メージソース。ol.source.ImageVectorオブジェクトは、
   * イメージレイヤのソース(ol.layer.Image)として使用さ
   * れます。イメージレイヤは、アニメーションとインターラクショ
   * ンの間に、再レンダリングされるのではなく、回転、拡大縮小、
   * および変換されています。それで、他のイメージレイヤと同様に、
   * ol.source.ImageVector で設定されたイメージレイヤは、
   * この動作を表します。これは、ベクタフィーチャがアニメーショ
   * ンとインターラクションの間に再描画されるベクタレイヤとは
   * 対照的です。(ol3 API)
   */
   source: vectorSource,
   style: styleFunction
  })
 }));
 var view = map.getView();
 /** getView()
  * Get the view associated with this map. A view 
  * manages properties such as center and resolution.
  * このマップと関連するビューを取得します。ビューは、
  * 中心や解像度のような属性を管理します。
  * Return: The view that controls this map.(ol3 API)
  */
 view.fitExtent(
 /** fitExtent()
  * Fit the map view to the passed `extent` and 
  * `size`. `size` is the size in pixels of the 
  * box to fit the extent into. In most cases you 
  * will want to use the map size, that is 
  * `map.getSize()`.
  * マップビューを渡された`extent`と` size`に合わせます。
  *  `size`は、範囲に合わせるためボックスのピクセル単位の
  * サイズです。ほとんどの場合は、マップのサイズを使用します
  * が、それは`map.getSizeです()`。
  * (v3.1.1/ol/ol/view.js)
  */
  vectorSource.getExtent(), /** @type {ol.Size} */ (map.getSize()));
  /** getExtent()
   * Return: The layer extent.(ol3 API)
   */
  /** @type 
   * 値のタイプ(型)の説明 - 式などで表示
   * (@use JSDoc[http://usejsdoc.org/]より)
   */
 /** getSize()
  * Get the size of this map.
  * Returns: The size in pixels of the map in the DOM.
  * マップのサイズを取得。(ol3 API)
  */
});

var displayFeatureInfo = function(pixel) {
 var features = [];
 map.forEachFeatureAtPixel(pixel, function(feature, layer) {
 /** forEachFeatureAtPixel
  * Detect features that intersect a pixel on the viewport, 
  * and execute a callback with each intersecting feature. 
  * Layers included in the detection can be configured 
  * through opt_layerFilter. Feature overlays will always 
  * be included in the detection.
  * ビューポート上のピクセルと交差するフィーチャを検出し、
  * 各交差するフィーチャとコールバックを実行します。
  * 検出に含まれるレイヤが opt_layerFilter を通じて
  * 設定することができます。フィーチャーオーバーレイは
  * 常に検出に含まれます。(ol3 API)
  */
  features.push(feature);
 });
 if (features.length > 0) {
  var info = [];
  var i, ii;
  for (i = 0, ii = features.length; i < ii; ++i) {
   info.push(features[i].get('name'));
  /** Array.push
   * 与えられた要素を追加することによって配列を変異させ、
   * その配列の新しい長さを返します。
   * (MDN [https://developer.mozilla.org/ja/docs/Web/
   * JavaScript/Reference/Global_Objects/Array/push])
   */
  /** get(key)
   * Gets a value.
   * (ol3 API[説明は Stable Only のチェックを外すと表示])
   */
  }
  document.getElementById('info').innerHTML = info.join(', ') || '&nbsp';
  /** element.innerHTML
   * innerHTML は、与えられた要素に含まれる全てのマークアップ
   * と内容を設定または取得します。
   * (MDN[https://developer.mozilla.org/ja/docs/Web/
   * API/element.innerHTML])
   */
  /** Array.join
   * 配列の全ての要素を繋いで文字列にします。
   * (MDN [https://developer.mozilla.org/ja/docs/Web/
   * JavaScript/Reference/Global_Objects/Array/join])
   */
 } else {
  document.getElementById('info').innerHTML = '&nbsp;';
 }
};
$(map.getViewport()).on('mousemove', function(evt) {
/** getViewport()
 * Return: Viewport (ol3 API)
 */
/** jQuery on イベント */
 var pixel = map.getEventPixel(evt.originalEvent);
 /** getEventPixel
  * Returns the map pixel position for a browser event.
  * ブラウザイベントに対して、マップのピクセル位置を返します。
  * (ol3 API)
  */
 displayFeatureInfo(pixel);
});
map.on('click', function(evt) {
/** on
 * Listen for a certain type of event.
 * あるタイプのイベントをリッスンします。(ol3 API)
 */
  displayFeatureInfo(evt.pixel);
});

2 - ol3.1ex 57a - Drag-and-Drop image vector example 1

「Drag-and-Drop image vector example(drag-and-drop-image-vector.html)」を参考に地図を表示してみます。

HTML ファイルの作成
a Eclipse のメニューの「ファイル」->「ファイルを開く」をクリックします。


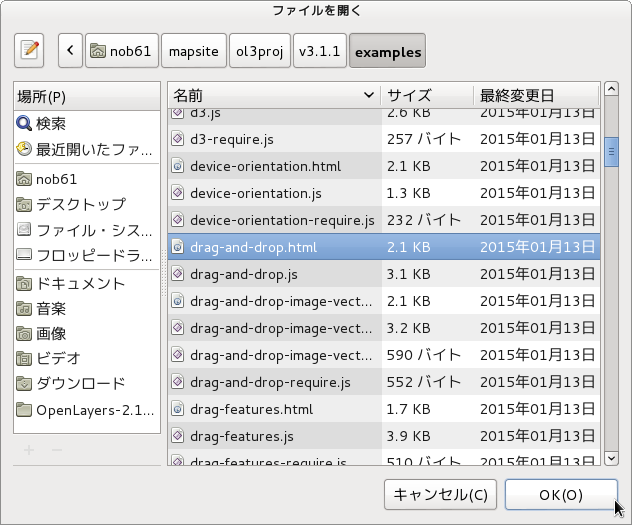
b 「ファイルを開く」ウィンドウで、「user」->「mapsite」->「ol3proj」->「v3.1.1」->「examples」->「drag-and-drop-image-vector.html」をクリックして選択し、「OK」ボタンをクリックします。
同じように「drag-and-drop-image-vector.js」を開きます。


c メニューの「ファイル」->「新規」 -> 「ファイル」をクリックします。


d 「ファイル」ウィンドウで「ol3proj」をクリックして選択し、「ファイル名」を「257-ol3ex.html」と入力し、「次へ」ボタンをクリックします。


e 「File Template」ウィンドウで「HTML 5 Template」をクリックして選択し、「OK」ボタンをクリックします。


f 「drag-and-drop-image-vector.html」の内容をコピーして「257-ol3ex.html」に貼り付け、修正します。
g 同じように、新規に「257-ol3ex.js」ファイルを作成し、「File Template」ウィンドウで「JavaScript Template」をクリックして選択し、「完了」ボタンをクリックして、「drag-and-drop-image-vector.js」の内容をコピーして貼り付け、修正します。「drag-and-drop-image-vector-require.js」も「257-ol3ex-require.js」に貼り付けます。


「257-ol3ex.html」
<!doctype html>
<html lang="en">
 <head>
  <meta charset="utf-8">
  <meta http-equiv="X-UA-Compatible" content="chrome=1">
  <meta name="viewport" content="initial-scale=1.0, user-scalable=no, width=device-width">
<!--
  <link rel="stylesheet" href="../css/ol.css" type="text/css">
  <link rel="stylesheet" href="../resources/bootstrap/css/bootstrap.min.css" type="text/css">
  <link rel="stylesheet" href="../resources/layout.css" type="text/css">
  <link rel="stylesheet" href="../resources/bootstrap/css/bootstrap-responsive.min.css" type="text/css">
-->
  <!-- ディレクトリ修正 -->
  <link rel="stylesheet" href="v3.1.1/css/ol.css" type="text/css">
  <link rel="stylesheet" href="v3.1.1/resources/bootstrap/css/bootstrap.min.css" type="text/css">
  <link rel="stylesheet" href="v3.1.1/resources/layout.css" type="text/css">
  <link rel="stylesheet" href="v3.1.1/resources/bootstrap/css/bootstrap-responsive.min.css" type="text/css">
  <title>Drag-and-Drop image vector example</title>
 </head>
 <body>
  <!-- 
  bootstrap.min.css, bootstrap-responsive.min.css で設定されたセレクタを使用。
  -->
  <div class="navbar navbar-inverse navbar-fixed-top">
   <div class="navbar-inner">
    <div class="container">
     <!--
     <a class="brand" href="./"><img src="../resources/logo.png"> OpenLayers 3 Examples</a>
     -->
      <!-- ディレクトリ修正 -->
     <a class="brand" href="v3.1.1/examples/"><img src="v3.1.1/resources/logo.png"> OpenLayers 3 Examples</a>
    </div>
   </div>
  </div>
  <div class="container-fluid">
   <div class="row-fluid">
    <div class="span12">
     <div id="map" class="map"></div>
    </div>
   </div>
   <div class="row-fluid">
    <div class="span12">
     <h4 id="title">Drag-and-Drop image vector example</h4>
     <p id="shortdesc">Example of using the drag-and-drop interaction 
      with a ol.source.ImageVector.
      Drag and drop GPX, GeoJSON, IGC, KML, or TopoJSON files on to the map. 
      Each file is rendered to an image on the client.</p>
     <div id="docs">
      <!--
      See the <a href="drag-and-drop-image-vector.js" target="_blank">drag-and-drop-image-vector.js source</a> to see how this is done.</p>
      -->
      <!-- ファイル修正 -->
      See the <a href="257-ol3ex.js" target="_blank">257-ol3ex.js source</a> to see how this is done.</p>
     </div>
     <div id="tags">drag-and-drop-image-vector, gpx, geojson, igc, kml, topojson, vector, image</div>
    </div>
    <div class="span4 offset4">
     <div id="info" class="alert alert-success">
      &nbsp;
     </div>
    </div>
   </div>
  </div>
  <!--
  <script src="../resources/jquery.min.js" type="text/javascript"></script>
  <script src="../resources/example-behaviour.js" type="text/javascript"></script>
  -->
  <!-- ディレクトリ修正
   jQuery Minified版と
   example-behaviour.js(Examples用 JSコード[文字コードなど])
  -->
  <script src="v3.1.1/resources/jquery.min.js" type="text/javascript"></script>
  <script src="v3.1.1/resources/example-behaviour.js" type="text/javascript"></script>
  <!--
  <script src="loader.js?id=drag-and-drop-image-vector" type="text/javascript"></script>
  -->
  <!-- ファイル修正 -->  <!-- ディレクトリ修正 -->
  <script src="loader.js?id=257-ol3ex" type="text/javascript"></script>
 </body>
</html>

2 - ol3.1ex 56b - Drag-and-Drop example 2

「drag-and-drop.js(256-ol3ex.js)」は、マップを表示するための JavaScript ファイルです。
GeoJSON ファイルをマップ上にドラッグアンドドロップすると、データが表示されます。そのとき、倍率が変わってしまいました。

「256-ol3ex.js」
var defaultStyle = {
 'Point': [new ol.style.Style({
 /** ol.style.Style 
  * Base class for vector feature rendering styles.
  * ベクタフィーチャがスタイルを描画するための基本クラス。
  * (ol3 API)
  */
  image: new ol.style.Circle({
  /** ol.style.Circle
   * Set circle style for vector features.
   * ベクタフィーチャの円のスタイルを設定。(ol3 API)
   */
   fill: new ol.style.Fill({
   /** ol.style.Fill 
    * Set fill style for vector features.
    * ベクタフィーチャの塗りつぶしスタイルを設定。(ol3 API)
    */
    color: 'rgba(255,255,0,0.5)'
   }),
   radius: 5,
   stroke: new ol.style.Stroke({
   /** ol.style.Stroke 
    * Set stroke style for vector features. 
    * Note that the defaults given are the Canvas defaults, 
    * which will be used if option is not defined. 
    * The get functions return whatever was entered 
    * in the options;  they will not return the default.
    * ベクタフィーチャのためのストロークスタイルの設定。
    * デフォルトは、オプションが定義されていない場合に使用される
    * Canvas のデフォルトを与えられることに注意してください。 
    * GET関数は、オプションで入力されたものはすべて返します。
    * それらはデフォルトを返しません。(ol3 API)
    */
    color: '#ff0',
    width: 1
   })
  })
 })],
 'LineString': [new ol.style.Style({
  stroke: new ol.style.Stroke({
   color: '#f00',
   width: 3
  })
 })],
 'Polygon': [new ol.style.Style({
  fill: new ol.style.Fill({
   color: 'rgba(0,255,255,0.5)'
  }),
  stroke: new ol.style.Stroke({
   color: '#0ff',
   width: 1
  })
 })],
 'MultiPoint': [new ol.style.Style({
  image: new ol.style.Circle({
   fill: new ol.style.Fill({
    color: 'rgba(255,0,255,0.5)'
   }),
   radius: 5,
   stroke: new ol.style.Stroke({
    color: '#f0f',
    width: 1
   })
  })
 })],
 'MultiLineString': [new ol.style.Style({
  stroke: new ol.style.Stroke({
   color: '#0f0',
   width: 3
  })
 })],
 'MultiPolygon': [new ol.style.Style({
  fill: new ol.style.Fill({
   color: 'rgba(0,0,255,0.5)'
  }),
  stroke: new ol.style.Stroke({
   color: '#00f',
   width: 1
  })
 })]
};
var styleFunction = function(feature, resolution) {
 var featureStyleFunction = feature.getStyleFunction();
 /** getStyleFunction()
  * Get the style function
  * Returns: Layer style function.(ol3 API)
  */
 if (featureStyleFunction) {
  return featureStyleFunction.call(feature, resolution);
  /** Function.prototype.call()
   * The call() method calls a function with a given 
   * this value and arguments provided individually.
   * call メソッドは、与えられた this 値とここに与えられ
   * た引数とともに、関数を呼び出します。
   * (MDN[https://developer.mozilla.org/en-US/docs/Web/
   * JavaScript/Reference/Global_Objects/Function/call])
   */
 } else {
  return defaultStyle[feature.getGeometry().getType()];
  /** getGeometry()
   *  Returns the Geometry associated with this feature 
   * using the current geometry name property. By default, 
   * this is geometry but it may be changed by calling 
   * setGeometryName.
   * 現在のジオメトリネームプロパティを使用して、このフィーチャ
   * に関連したジオメトリを返します。デフォルトでは、ジオメトリ
   * ですが、setGeometryName を呼び出すことによって変更するこ
   * とができます。(ol3 API)
   */
  /** getType()
   * Get the type of this geometry. 
   * ジオメトリの型を取得。(ol3 API)
   */
 }
};
var dragAndDropInteraction = new ol.interaction.DragAndDrop({
/** ol.interaction.DragAndDrop 
 * Handles input of vector data by drag and drop.
 * ドラッグアンドドロップによってベクタデータの入力を取り扱いま
 * す。(ol3 API)
 */
 formatConstructors: [
  ol.format.GPX,
  /** ol.format.GPX 
   * Feature format for reading and writing data 
   * in the GPX format.
   * GPX フォーマットでデータを読み書きするためのフィー
   * チャのフォーマット。(ol3 API)
   */
  ol.format.GeoJSON,
  /** ol.format.GeoJSON 
   * Feature format for reading and writing data 
   * in the GeoJSON format.
   * GeoJSON フォーマットのデータを読み書きするための
   * フィーチャフォーマット。(ol3 API)
   */
  ol.format.IGC,
  /** ol.format.IGC 
   * Feature format for *.igc flight recording 
   * files.
   * *.igc フライト記録ファイル用のフィーチャフォーマット。
   * (ol3 API)
   */
  ol.format.KML,
  /** ol.format.KML 
   * Feature format for reading and writing data 
   * in the KML format.
   * KML フォーマットでデータを読み書きするためのフィー
   * チャのフォーマット。(ol3 API)
   */
  ol.format.TopoJSON
  /** ol.format.TopoJSON 
   * Feature format for reading and writing data 
   * in the TopoJSON format.
   * TopoJSON フォーマットでデータを読み書きするためのフィー
   * チャのフォーマット。(ol3 API)
   */
 ]
});
var map = new ol.Map({
 interactions: ol.interaction.defaults().extend([dragAndDropInteraction]),
 /** ol.interaction.defaults
  * Set of interactions included in maps by default. 
  * Specific interactions can be excluded by setting 
  * the appropriate option to false in the constructor 
  * options, but the order of the interactions is fixed. 
  * If you want to specify a different order for 
  * interactions, you will need to create your own 
  * ol.interaction.Interaction instances and insert 
  * them into a ol.Collection in the order you want 
  * before creating your ol.Map instance.
  * デフォルトでマップに含まれるインターラクションのセット。
  * 具体的なインターラクションは、コンストラクタのオプションで適切
  * なオプションをfalseに設定することで除外することができますが、
  * インターラクションの順番は固定されています。インターラクション
  * に対して別の順番を指定したい場合は、独自の 
  * ol.interaction.Interaction インスタンスを作成し、ol.Map イ
  * ンスタンスを作成する前に、望む順番で ol.Collection にそれ
  * らを挿入する必要があります。(ol3 API)
  *  (訳注:インターラクションの順番は、API を参照してください。)
  */
  layers: [
  new ol.layer.Tile({
  /** ol.layer.Tile 
   * For layer sources that provide pre-rendered, tiled 
   * images in grids that are organized by zoom levels for 
   * specific resolutions. 
   * プリレンダリング(事前描画)を提供するレイヤソースのための、
   * 特定の解像度でのズームレベルによって編成されているグリッドの
   * タイルイメージ。(ol3 API)
   */
   source: new ol.source.BingMaps({
   /** ol.source.BingMaps
    * Layer source for Bing Maps tile data.
    * Bing Maps タイルデータのレイヤソース。(ol3 API)
    */
    imagerySet: 'Aerial',
    key: 'Ak-dzM4w...(省略)'
   })
  })
 ],
 target: 'map',
 view: new ol.View({
  center: [0, 0],
  zoom: 2
 })
});
dragAndDropInteraction.on('addfeatures', function(event) {
/** on()
 * Listen for a certain type of event.
 * あるタイプのイベントをリッスンします。
 * Returns: Unique key for the listener.(ol3 API)
 */
 var vectorSource = new ol.source.Vector({
 /*: ol.source.Vector 
  * Provides a source of features for vector layers.
  * ベクタレイヤのフィーチャのソースを提供します。(ol3 API)
  */
  features: event.features,
  projection: event.projection
 });
 map.getLayers().push(new ol.layer.Vector({
 /** getLayers()
  * Get the collection of layers associated with 
  * this map.
  * このマップと関連するレイヤのコレクションを取得します。
  * (ol3 API)
  */
 /** push(elem)
  * Insert the provided element at the end of the 
  * collection.
  * コレクションの最後に供給されたエレメントに挿入します。
  * Name: elem, Type: T, Description: Element
  * (ol3 API)
  */
 /** ol.layer.Vector
  * Vector data that is rendered client-side.
  * クライアント側で描画されたベクタデータ。(ol3 API)
  */
  source: vectorSource,
  style: styleFunction
 }));
 var view = map.getView();
 /** getView()
  * Get the view associated with this map. A view 
  * manages properties such as center and resolution.
  * このマップと関連するビューを取得します。ビューは、
  * 中心や解像度のような属性を管理します。
  * Return: The view that controls this map.(ol3 API)
  */
 view.fitExtent(
 /** fitExtent()
  * Fit the map view to the passed `extent` and 
  * `size`. `size` is the size in pixels of the 
  * box to fit the extent into. In most cases you 
  * will want to use the map size, that is 
  * `map.getSize()`.
  * マップビューを渡された`extent`と` size`に合わせます。
  *  `size`は、範囲に合わせるためボックスのピクセル単位の
  * サイズです。ほとんどの場合は、マップのサイズを使用します
  * が、それは`map.getSizeです()`。
  * (v3.1.1/ol/ol/view.js)
  */
  vectorSource.getExtent(), /** @type {ol.Size} */ (map.getSize()));
  /** getExtent()
   * Return: The layer extent.(ol3 API)
   */
  /** @type 
   * 値のタイプ(型)の説明 - 式などで表示
   * (@use JSDoc[http://usejsdoc.org/]より)
   */
 /** getSize()
  * Get the size of this map.
  * Returns: The size in pixels of the map in the DOM.
  * マップのサイズを取得。(ol3 API)
  */
});

var displayFeatureInfo = function(pixel) {
 var features = [];
 map.forEachFeatureAtPixel(pixel, function(feature, layer) {
 /** forEachFeatureAtPixel
  * Detect features that intersect a pixel on the viewport, 
  * and execute a callback with each intersecting feature. 
  * Layers included in the detection can be configured 
  * through opt_layerFilter. Feature overlays will always 
  * be included in the detection.
  * ビューポート上のピクセルと交差するフィーチャを検出し、
  * 各交差するフィーチャとコールバックを実行します。
  * 検出に含まれるレイヤが opt_layerFilter を通じて
  * 設定することができます。フィーチャーオーバーレイは
  * 常に検出に含まれます。(ol3 API)
  */
  features.push(feature);
 });
 if (features.length > 0) {
  var info = [];
  var i, ii;
  for (i = 0, ii = features.length; i < ii; ++i) {
   info.push(features[i].get('name'));
  /** Array.push
   * 与えられた要素を追加することによって配列を変異させ、
   * その配列の新しい長さを返します。
   * (MDN [https://developer.mozilla.org/ja/docs/Web/
   * JavaScript/Reference/Global_Objects/Array/push])
   */
  /** get(key)
   * Gets a value.
   * (ol3 API[説明は Stable Only のチェックを外すと表示])
   */
  }
  document.getElementById('info').innerHTML = info.join(', ') || '&nbsp';
  /** element.innerHTML
   * innerHTML は、与えられた要素に含まれる全てのマークアップ
   * と内容を設定または取得します。
   * (MDN[https://developer.mozilla.org/ja/docs/Web/
   * API/element.innerHTML])
   */
  /** Array.join
   * 配列の全ての要素を繋いで文字列にします。
   * (MDN [https://developer.mozilla.org/ja/docs/Web/
   * JavaScript/Reference/Global_Objects/Array/join])
   */
 } else {
  document.getElementById('info').innerHTML = '&nbsp;';
 }
};
$(map.getViewport()).on('mousemove', function(evt) {
/** getViewport()
 * Return: Viewport (ol3 API)
 */
/** jQuery on イベント */
 var pixel = map.getEventPixel(evt.originalEvent);
 /** getEventPixel
  * Returns the map pixel position for a browser event.
  * ブラウザイベントに対して、マップのピクセル位置を返します。
  * (ol3 API)
  */
 displayFeatureInfo(pixel);
});
map.on('click', function(evt) {
/** on
 * Listen for a certain type of event.
 * あるタイプのイベントをリッスンします。(ol3 API)
 */
  displayFeatureInfo(evt.pixel);
});
2 - ol3.1ex 56a - Drag-and-Drop example 1

「Drag-and-Drop example(drag-and-drop.html)」を参考に地図を表示してみます。

HTML ファイルの作成
a Eclipse のメニューの「ファイル」->「ファイルを開く」をクリックします。


b 「ファイルを開く」ウィンドウで、「user」->「mapsite」->「ol3proj」->「v3.1.1」->「examples」->「drag-and-drop.html」をクリックして選択し、「OK」ボタンをクリックします。
同じように「drag-and-drop.js」を開きます。


c メニューの「ファイル」->「新規」 -> 「ファイル」をクリックします。


d 「ファイル」ウィンドウで「ol3proj」をクリックして選択し、「ファイル名」を「256-ol3ex.html」と入力し、「次へ」ボタンをクリックします。


e 「File Template」ウィンドウで「HTML 5 Template」をクリックして選択し、「OK」ボタンをクリックします。


f 「drag-and-drop.html」の内容をコピーして「256-ol3ex.html」に貼り付け、修正します。
g 同じように、新規に「256-ol3ex.js」ファイルを作成し、「File Template」ウィンドウで「JavaScript Template」をクリックして選択し、「完了」ボタンをクリックして、「drag-and-drop.js」の内容をコピーして貼り付け、修正します。「drag-and-drop-require.js」も「256-ol3ex-require.js」に貼り付けます。


「256-ol3ex.html」
<!doctype html>
<html lang="en">
 <head>
  <meta charset="utf-8">
  <meta http-equiv="X-UA-Compatible" content="chrome=1">
  <meta name="viewport" content="initial-scale=1.0, user-scalable=no, width=device-width">
<!--
  <link rel="stylesheet" href="../css/ol.css" type="text/css">
  <link rel="stylesheet" href="../resources/bootstrap/css/bootstrap.min.css" type="text/css">
  <link rel="stylesheet" href="../resources/layout.css" type="text/css">
  <link rel="stylesheet" href="../resources/bootstrap/css/bootstrap-responsive.min.css" type="text/css">
-->
  <!-- ディレクトリ修正 -->
  <link rel="stylesheet" href="v3.1.1/css/ol.css" type="text/css">
  <link rel="stylesheet" href="v3.1.1/resources/bootstrap/css/bootstrap.min.css" type="text/css">
  <link rel="stylesheet" href="v3.1.1/resources/layout.css" type="text/css">
  <link rel="stylesheet" href="v3.1.1/resources/bootstrap/css/bootstrap-responsive.min.css" type="text/css">
  <title>Drag-and-Drop example</title>
 </head>
 <body>
  <!-- 
  bootstrap.min.css, bootstrap-responsive.min.css で設定されたセレクタを使用。
  -->
  <div class="navbar navbar-inverse navbar-fixed-top">
   <div class="navbar-inner">
    <div class="container">
     <!--
     <a class="brand" href="./"><img src="../resources/logo.png"> OpenLayers 3 Examples</a>
     -->
      <!-- ディレクトリ修正 -->
     <a class="brand" href="v3.1.1/examples/"><img src="v3.1.1/resources/logo.png"> OpenLayers 3 Examples</a>
    </div>
   </div>
  </div>
  <div class="container-fluid">
   <div class="row-fluid">
    <div class="span12">
     <div id="map" class="map"></div>
    </div>
   </div>
   <div class="row-fluid">
    <div class="span12">
     <h4 id="title">Drag-and-Drop example</h4>
     <p id="shortdesc">Example of using the drag-and-drop interaction. 
      Drag and drop GPX, GeoJSON, IGC, KML, or TopoJSON files on to the map. 
      There is no projection transform support, so this will only work with 
       data in EPSG:4326 and EPSG:3857.</p>
     <div id="docs">
      <!--
      See the <a href="drag-and-drop.js" target="_blank">drag-and-drop.js source</a> to see how this is done.</p>
      -->
      <!-- ファイル修正 -->
      See the <a href="256-ol3ex.js" target="_blank">256-ol3ex.js source</a> to see how this is done.</p>
     </div>
     <div id="tags">drag-and-drop, gpx, geojson, igc, kml, topojson</div>
    </div>
    <div class="span4 offset4">
     <div id="info" class="alert alert-success">
      &nbsp;
     </div>
    </div>
   </div>
  </div>
  <!--
  <script src="../resources/jquery.min.js" type="text/javascript"></script>
  <script src="../resources/example-behaviour.js" type="text/javascript"></script>
  -->
  <!-- ディレクトリ修正
   jQuery Minified版と
   example-behaviour.js(Examples用 JSコード[文字コードなど])
  -->
  <script src="v3.1.1/resources/jquery.min.js" type="text/javascript"></script>
  <script src="v3.1.1/resources/example-behaviour.js" type="text/javascript"></script>
  <!--
  <script src="loader.js?id=drag-and-drop" type="text/javascript"></script>
  -->
  <!-- ファイル修正 -->  <!-- ディレクトリ修正 -->
  <script src="loader.js?id=256-ol3ex" type="text/javascript"></script>
 </body>
</html>