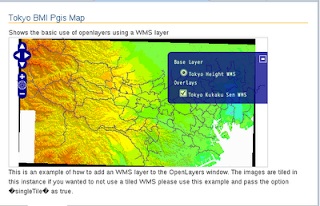
Eclipse を起動して Example フォルダないの wms.html をコピーして tokyo_bmi_pgis_img.html ファイルを作成します。
0 wms.htmlをダブルクリックして開きます。
1 プロジェクトビューのopenlayersTokyoprojフォルダを右クリックして、新規->HTMLファイルをクリックします。
2 HTMLファイルウィンドウでファイル名をtokyo_bmi_pgis_img.htmlと入力し、完了ボタンをクリックします。
3 エディタのタブをエディタビュー内の下へドラッグすると2段になってみやすくなります。
4 charsetをUTF-8にして、<title>をTokyo BMI Pgis Mapにします。
5 wms.html の内容ををコピーしてtokyo_bmi_pgis_img.html ファイルに貼り付けます。
6 javascriptの一部を次のように修正します。
style.cssとOpenLayers.jsのパスを変えます。
OpenLayers.Map のオプションに
maxResolution: 'auto',
units: 'meters',
maxExtent: new OpenLayers.Bounds(-279000,1054000,-185000, 1104000)
を追加します。
---
<link rel="stylesheet" href="./theme/default/style.css" type="text/css" />
<link rel="stylesheet" href="./examples/style.css" type="text/css" /><!-- ここを追加 -->
<script src="./lib/OpenLayers.js"></script>
<script type="text/javascript">
 var map, layer1, layer2;
 function init(){
  map = new OpenLayers.Map('map',  {
   projection: new OpenLayers.Projection("EPSG:2456"),
   displayProjection: new OpenLayers.Projection("EPSG:4326"),
   maxResolution: 'auto',
   units: 'meters',
   maxExtent: new OpenLayers.Bounds(-279000,1054000,-185000, 1104000)
  });
 layer1 = new OpenLayers.Layer.WMS( "Tokyo Height WMS",
    "http://localhost/cgi-bin/mapserv?",
  {
    map: '/home/user/mapfile/tokyo_bmi_pgis_img.map',
    layers: 'height',
    format: 'image/png'
  });

 layer2 = new OpenLayers.Layer.WMS( "Tokyo Kukaku Sen WMS",
    "http://localhost/cgi-bin/mapserv?",
  {
    map: '/home/user/mapfile/tokyo_bmi_pgis_img.map',
    layers: 'kukaku',
    transparent: true,
    format: 'image/png'
  });
 map.addLayers([layer1, layer2]);
 map.addControl(new OpenLayers.Control.LayerSwitcher());
 map.zoomToMaxExtent();
 }
</script>
---


0 件のコメント:
コメントを投稿