ラベル vector tiles の投稿を表示しています。 すべての投稿を表示

2018年10月31日水曜日

OpenLayers5 Workshop - 3.4 Making things look bright

3 Vector Tile
3.4 Making things look bright
ものを明るく見せる

There have been many attempts to create tools and formats for styling maps. The most popular formats were probably SLD and CartoCSS. A graphical tool that comes to mind is Atlas Styler. But none of these format or tools were really convenient to use.

マップをスタイルするためにツールとフォーマットを作成する試みがたくさんあります。最も一般的なフォーマットは、おそらく、SLD と CartoCSS です。頭に浮かぶグラフィカルツールは、Atlas Styler です。これらのフォーマット、または、ツールは、使うのに本当に便利ではありません。

Mapbox finally came up with Mapbox Studio, a very user friendly style editor, and the Mapbox Style format. The Mapbox Style format is supported by a growing number of applications, and a graphical Open Source editor, Maputnik, is available for creating and modifying Mapbox Style files.

Mapbox は、とても使いやすいスタイルエディタ、Mapbox Studio と Mapbox Style フォーマットをついに出しました。Mapbox Style フォーマットは、増え続けるアプリケーションによって支援され、グラフィカル Open Source エディタ Maputnik は、Mapbox Style ファイルを作成し編集することに利用できます。

The ol-mapbox-style package adds support for the Mapbox Style format to OpenLayers. Let's see if we can get a nicer looking map than the one from the previous exercise.

ol-mapbox-style パッケージは、OpenLayers に Mapbox Style フォーマットのためのサポートを追加します。前回の演習からより見栄えの良いマップを取得できるかみてみます。

Creating Mapbox Style files in Maputnik
Maputnik で Mapbox Style ファイルを作成

You can play with a live instance of Maputnik at https://maputnik.github.io/editor/, or download and install it locally. I have created a file with our ugly style. You can download that file, ugly.json, and open it in Maputnik to verify it looks just as ugly there as it does in our OpenLayers application:

https://maputnik.github.io/editor/ にあるか、または、ローカルでダウンロードしインストールして Maputnik のインスタンス化で楽しめます。私は ugly スタイルでファイルを作成しています。あなたはそのファイル、ugly.json をダウンロードし、OpenLayers アプリケーションで実行するのと同じようにそこで ugly かを確かめるために Maputnik で開きます。

Ugly style in Maputnik

Create a map from a Mapbox Style in OpenLayers
OpenLayers で Mapbox Style からマップを作成

We'll import the apply function from the ol-mapbox-style package, so we can simply have a map with all the contents from a style file rendered into our map-container. But first we need to install the package:

ol-mapbox-style から apply ファンクションをインポートすると、map-container に描画されたスタイルファイルからすべてのコンテンツと一緒にマップを簡単に持つことができます。しかし、最初にパッケージをインストールする必要があります:

npm install ol-mapbox-style@beta

(訳注:実施には npm install ol-mapbox-style)

Now we can import the function into our main.js:

main.js にファンクションをインポートします:

import {apply} from 'ol-mapbox-style';

We can also remove all other imports except for these two:

これら2つを除いて他のインポートすべても削除します:
import 'ol/ol.css';
import Overlay from 'ol/Overlay';
While we are at cleaning up, we can also delete the key, map, layer definitions. And we can – of course – remove all the style code. Finally, in index.html, we can remove the line that adds the Open Sans font, and the background-color for the map.

クリーンアップの間、key、map、layer 定義も削除できます。そして、もちろん、スタイルコードをすべて削除できます。最後に、index.html で Open Sans ファンとを追加するラインとマップの background-color を削除します。

Instead of the previous map code, we need a single line to create a map from our ugly Mapbox style, which we insert below our imports:

前述のマップコードのかわりに、ugly Mapbox スタイルからマップを作成するための1つのラインが必要で、import の下に挿入します:

const map = apply('map-container', './data/ugly.json');

This should give us the same ugly map as before, just with less application code. But hey, we wanted to make things look bright, and not look at an ugly map again. So let's open the 'OSM Bright' from Maputnik's Gallery Styles, and use that. I have prepared it already, and made the result available as http://localhost:3000/data/bright.json. So let's change the apply() line to

これは前回と同じ ugly map を、より少ないアプリケーションコードで、与えます。しかし、おい、明るく見せたいし、また、 ugly(見苦しい)マップを見たくありません。それでは、Maputnik's Gallery Styles から 'OSM Bright' を開き、それを使います。それはすでに準備されていて、http://localhost:3000/data/bright.json として結果を利用できます。それでは、 apply() ラインを変更します:

const map = apply('map-container', './data/bright.json');

What a relief. Finally we can enjoy a nice looking world map, and zoom to Boston!

ホッとしました。最後に、見栄えの良い世界地図を楽しみ、ボストンにズームインします。

A bright map of Boston

And note that our map is still interactive, meaning you get an info popup when you click on any geometry.

このマップは、まだ、インタラクティブな状態で、ジオメトリをクリックしたとき情報ポッパップを取得することに注意してください。


■□ Debian9 で試します■□
「Interact with VectorTile features」の例を表示します。 最初に、ol-mapbox-style パッケージをインストールします。

nob61@deb9-vmw:~/openlayers-workshop-en$ npm install ol-mapbox-style@beta
npm WARN extract-text-webpack-plugin@3.0.2 requires a peer of webpack@^3.1.0 but none is installed. You must install peer dependencies yourself.

+ ol-mapbox-style@3.0.0-beta.9
added 2 packages from 1 contributor, removed 16 packages, updated 3 packages and audited 7504 packages in 10.782s found 0 vulnerabilities

「Styling a VectorTile layer」で使用した index.html のバックアップを保存して次のように修正します。

user@deb9-vmw:~/openlayers-workshop-en$ cp index.html index.html_styling
user@deb9-vmw:~/openlayers-workshop-en$ vim index.html
<!DOCTYPE html>
<html>
 <head>
  <meta charset="utf-8">
  <title>OpenLayers</title>
  <style>
   html, body, #map-container {
    margin: 0;
    height: 100%;
    width: 100%;
    font-family: sans-serif;
    background-color: rgb(248, 244, 240);
   }
   .arrow_box {
    position: relative;
    background: #000;
    border: 1px solid #003c88;
   }
   .arrow_box:after, .arrow_box:before {
    top: 100%;
    left: 50%;
    border: solid transparent;
    content: " ";
    height: 0;
    width: 0;
    position: absolute;
    pointer-events: none;
   }
   .arrow_box:after {
    border-color: rgba(0, 0, 0, 0);
    border-top-color: #000;
    border-width: 10px;
    margin-left: -10px;
   }
   .arrow_box:before {
    border-color: rgba(0, 60, 136, 0);
    border-top-color: #003c88;
    border-width: 11px; 
    margin-left: -11px; 
   } 
   .arrow_box { 
    border-radius: 5px; 
    padding: 10px; 
    opacity: 0.8; 
    background-color: black; 
    color: white; 
   }
   #popup-content { 
    max-height: 200px; 
    overflow: auto; 
   } 
   #popup-content th { 
    text-align: left; 
    width: 125px; 
   }
  </style>
 </head>
 <body>
  <div id="map-container"></div>
  <div class="arrow_box" id="popup-container"> 
   <div id="popup-content"></div>
  </div>
 </body>
</html>
「Styling a VectorTile layer」」で使用した main.js のバックアップを保存して次のように修正します。削除するインポート(import)、key、layer、map の定義などは、ugly.json ファイルに記述されています。

user@deb9-vmw:~/openlayers-workshop-en$ cp main.js main.js_styling
user@deb9-vmw:~/openlayers-workshop-en$ vim main.js
import 'ol/ol.css';
import Overlay from 'ol/Overlay';
import {apply} from 'ol-mapbox-style'; 
const map = apply('map-container', './data/ugly.json'); 
const overlay = new Overlay({
 element: document.getElementById('popup-container'),
 positioning: 'bottom-center',
 offset: [0, -10],
 autoPan: true
});
map.addOverlay(overlay);
overlay.getElement().addEventListener('click', function() {
 overlay.setPosition();
});
map.on('click', function(e) {
 let markup = '';
 map.forEachFeatureAtPixel(e.pixel, function(feature) {
  markup += `${markup && '<hr>'}<table>`;
  const properties = feature.getProperties();
  for (const property in properties) {
   markup += `<tr><th>${property}</th><td>${properties[property]}</td></tr>`;
  }
  markup += '</table>';
 }, {hitTolerance: 1});
 if (markup) {
  document.getElementById('popup-content').innerHTML = markup;
  overlay.setPosition(e.coordinate);
 }
});
'npm start' を実行すると次のようなメッセージが表示され、コンパイルできませんました。

nob61@deb9-vmw:~/openlayers-workshop-en$ npm start
$gt; ol-workshop@0.0.0 start /home/nob61/openlayers-workshop-en
$gt; webpack-dev-server --mode=development

ℹ 「wds」: Project is running at http://localhost:3000/
ℹ 「wds」: webpack output is served from /
✖ 「wdm」: 
ERROR in ./node_modules/@mapbox/mapbox-gl-style-spec/util/color.js
Module parse failed: Unexpected token (17:5)
You may need an appropriate loader to handle this file type.
|  */
| class Color {
|     r: number;
|     g: number;
|     b: number;
 @ ./node_modules/ol-mapbox-style/index.js 23:0-60 190:38-43
 @ ./main.js
 @ multi (webpack)-dev-server/client?http://localhost:3000 ./main.js
---
ℹ 「wdm」: Failed to compile.

OpenLayers5 Workshop - 3.3 Styling a VectorTile layer

3 Vector Tile
3.3 Styling a VectorTile layer
VectorTile レイヤをスタイルする

Styling a vector tile layer works exactly the same way as styling a vector layer. We will now try to style our world map so it actually looks like a world map is supposed to look.

ベクタタイルレイヤをスタイルすることは、ベクタレイヤをスタイルするのと全く同じ方法で動作します。実際に見るはずの世界地図のように見えるよう世界地図をスタイルしてみます。

Load fonts
フォントをロードする

Let's say we want to use a nicer font for labels in our map. I decided to use the Open Sans font family, which can easily be loaded with an additional stylesheet in the <head> of our index.html:

マップでラベルに見た目が良いフォントを使いたいとします。Open Sans フォントファミリを使うことを決めましたが、index.html の <head> に追加のスタイルシートを使って簡単にロードできます。

<link href="https://fonts.googleapis.com/css?family=Open+Sans" rel="stylesheet">

Set a map background
マップの背景を設定する

A common style element in vector tile maps is a background color, which the user sees in places that are not covered by any geometries. Like we already saw in the vector exercise, this can be done by simply setting a background color in a <style> for the #map-container:

ベクタタイルマップで一般的なスタイルエレメントは背景色(background color)ですが、どのジオメトリにも覆われていない場所に見られます。すでにベクタ演習で見られたように、これは #map-container の <style> に背景色を単純に設定することによって実行できます。

background-color: rgb(248, 244, 240);

Style the layer with a style function
style ファンクションを使ってレイヤをスタイルする

Now we are going to add some application code to main.js.

では、main.js にいくつかアプリケーションコードを追加します。

First, we'll need imports for the styles we are going to use:

最初に、使うスタイルのインポートが必要です:

import {Style, Fill, Stroke, Circle, Text} from 'ol/style';
// import {createDefaultStyle} from 'ol/style/Style';
The style function is a bit long:

style ファンクションは少し長いです:
layer.setStyle(function(feature, resolution) {
 const properties = feature.getProperties();
 // Water polygons
 if (properties.layer == 'water') {
  return new Style({
   fill: new Fill({
    color: 'rgba(0, 0, 255, 0.7)'
   })
  });
 }
 // Boundary lines
 if (properties.layer == 'boundary' && properties.admin_level == 2) {
  return new Style({
   stroke: new Stroke({
    color: 'gray'
   })
  });
 }
 // Continent labels
 if (properties.layer == 'place' && properties.class == 'continent') {
  return new Style({
   text: new Text({
    text: properties.name,
    font: 'bold 16px Open Sans',
    fill: new Fill({
     color: 'black'
    }),
    stroke: new Stroke({
     color: 'white'
    })
   })
  });
 }
 // Country labels
 if (properties.layer == 'place' && properties.class == 'country' &&
  resolution < map.getView().getResolutionForZoom(5)) {
   return new Style({
    text: new Text({
     text: properties.name,
     font: 'normal 13px Open Sans',
     fill: new Fill({
      color: 'black'
     }),
     stroke: new Stroke({
      color: 'white'
     })
    })
   });
 }
 // Capital icons and labels
 if (properties.layer == 'place' && properties.capital) {
  const point = new Style({
   image: new Circle({
    radius: 5,
    fill: new Fill({
     color: 'black'
    }),
    stroke: new Stroke({
     color: 'gray'
    })
   })
  });
  if (resolution < map.getView().getResolutionForZoom(6)) {
   point.setText(new Text({
    text: properties.name,
    font: 'italic 12px Open Sans',
    offsetY: -12,
     fill: new Fill({
      color: '#013'
     }),
     stroke: new Stroke({
      color: 'white'
     })
   }));
  }
  return point;
 }
 // return createDefaultStyle(feature, resolution);
});
I think you will agree that we have not reached our goal of creating a beautiful world map:

美しい世界地図を作成する最終目的に達していないと考えていると思います:

An ugly world map

There is much more effort involved in styling a world map appropriately, and writing a style function in JavaScript is probably not the right tool. In the next exercise, we will learn a different way of loading and styling vector tile layers.

適切に世界地図をスタイリングするものに含まれているもっとたくさんの効果があり、JavaScript に style ファンクションを書くことは、おそらく正しいツールではありません。この演習で、ベクタタイルレイヤをロードしスタイリングする難しい方法を学びます。

■□ Debian9 で試します■□
「Interact with VectorTile features」の例を表示します。「The VectorTile layer」で使用した index.html のバックアップを保存して次のように修正します。

user@deb9-vmw:~/openlayers-workshop-en$ cp index.html index.html_interact
user@deb9-vmw:~/openlayers-workshop-en$ vim index.html
<!DOCTYPE html>
<html>
 <head>
  <meta charset="utf-8">
  <title>OpenLayers</title>
  <link href="https://fonts.googleapis.com/css?family=Open+Sans" rel="stylesheet"> 
  <style>
   html, body, #map-container {
    margin: 0;
    height: 100%;
    width: 100%;
    font-family: sans-serif;
    background-color: rgb(248, 244, 240);
   }
   .arrow_box {
    position: relative;
    background: #000;
    border: 1px solid #003c88;
   }
   .arrow_box:after, .arrow_box:before {
    top: 100%;
    left: 50%;
    border: solid transparent;
    content: " ";
    height: 0;
    width: 0;
    position: absolute;
    pointer-events: none;
   }
   .arrow_box:after {
    border-color: rgba(0, 0, 0, 0);
    border-top-color: #000;
    border-width: 10px;
    margin-left: -10px;
   }
   .arrow_box:before {
    border-color: rgba(0, 60, 136, 0);
    border-top-color: #003c88;
    border-width: 11px; 
    margin-left: -11px; 
   } 
   .arrow_box { 
    border-radius: 5px; 
    padding: 10px; 
    opacity: 0.8; 
    background-color: black; 
    color: white; 
   }
   #popup-content { 
    max-height: 200px; 
    overflow: auto; 
   } 
   #popup-content th { 
    text-align: left; 
    width: 125px; 
   }
  </style>
 </head>
 <body>
  <div id="map-container"></div>
  <div class="arrow_box" id="popup-container"> 
   <div id="popup-content"></div>
  </div>
 </body>
</html>
「The VectorTile layer」」で使用した main.js のバックアップを保存して次のように修正します。

user@deb9-vmw:~/openlayers-workshop-en$ cp main.js main.js_interact
user@deb9-vmw:~/openlayers-workshop-en$ vim main.js
import 'ol/ol.css';
import Map from 'ol/Map';
import View from 'ol/View';
import MVT from 'ol/format/MVT';
import VectorTileLayer from 'ol/layer/VectorTile';
import VectorTileSource from 'ol/source/VectorTile';
import Overlay from 'ol/Overlay';
// See https://openmaptiles.com/hosting/ for terms and access key
const key = '<your-access-key-here>';
const map = new Map({
 target: 'map-container',
 view: new  View({
  center: [0, 0],
  zoom: 2
 })
});
const layer = new VectorTileLayer({
 source: new VectorTileSource({
  attributions: [
   '<a href="http://www.openmaptiles.org/" target="_blank">&copy; OpenMapTiles</a>',
   '<a href="http://www.openstreetmap.org/about/" target="_blank">&copy; OpenStreetMap contributors</a>'
  ],
  format: new MVT(),
  url: `https://free-{1-3}.tilehosting.com/data/v3/{z}/{x}/{y}.pbf.pict?key=${key}`,
  maxZoom: 14
 })
});
map.addLayer(layer); 
const overlay = new Overlay({
 element: document.getElementById('popup-container'),
 positioning: 'bottom-center',
 offset: [0, -10],
 autoPan: true
});
map.addOverlay(overlay);
overlay.getElement().addEventListener('click', function() {
 overlay.setPosition();
});
map.on('click', function(e) {
 let markup = '';
 map.forEachFeatureAtPixel(e.pixel, function(feature) {
  markup += `${markup && '<hr>'}<table>`;
  const properties = feature.getProperties();
  for (const property in properties) {
   markup += `<tr><th>${property}</th><td>${properties[property]}</td></tr>`;
  }
  markup += '</table>';
 }, {hitTolerance: 1});
 if (markup) {
  document.getElementById('popup-content').innerHTML = markup;
  overlay.setPosition(e.coordinate);
 } else {
  overlay.setPosition();
 }
});
layer.setStyle(function(feature, resolution) {
 const properties = feature.getProperties();
 // Water polygons
 if (properties.layer == 'water') {
  return new Style({
   fill: new Fill({
    color: 'rgba(0, 0, 255, 0.7)'
   })
  });
 }
 // Boundary lines
 if (properties.layer == 'boundary' && properties.admin_level == 2) {
  return new Style({
   stroke: new Stroke({
    color: 'gray'
   })
  });
 }
 // Continent labels 
 if (properties.layer == 'place' && properties.class == 'continent') {
  return new Style({
   text: new Text({
    text: properties.name,
    font: 'bold 16px Open Sans',
    fill: new Fill({
     color: 'black'
    }),
    stroke: new Stroke({
     color: 'white'
    })
   })
  });
 }
 // Country labels 
 if (properties.layer == 'place' && properties.class == 'country' &&
     resolution < map.getView().getResolutionForZoom(5)) {
  return new Style({
   text: new Text({
    text: properties.name,
    font: 'normal 13px Open Sans',
    fill: new Fill({
     color: 'black'
    }),
    stroke: new Stroke({
     color: 'white'
    })
   })
  });
 }
 // Capital icons and labels 
 if (properties.layer == 'place' && properties.capital) {
  const point = new Style({
   image: new Circle({
    radius: 5,
    fill: new Fill({
     color: 'black'
    }),
    stroke: new Stroke({
     color: 'gray'
    })
   })
  });
  if (resolution < map.getView().getResolutionForZoom(6)) {
   point.setText(new Text({
    text: properties.name,
    font: 'italic 12px Open Sans',
    offsetY: -12,
    fill: new Fill({
     color: '#013'
    }),
    stroke: new Stroke({
     color: 'white'
    })
   }));
  }
  return point;
 }
 // return createDefaultStyle(feature, resolution);
});
http://localhost:3000/ とブラウザでマップを開きます。(もし開かなければ、'npm start' を実行してください。


OpenLayers5 Workshop - 3.2 Interact with VectorTile features

3 Vector Tile
3.2 Interact with VectorTile features
VectorTile フィーチャを使ってインタラクション

If we want to style the layer we just created, it would be nice to get some information about each geometry we see on the map. The nice thing about vector tile layers is that we can interact with them just like with vector layers. So it is easy to add a listener for clicks to the map, query the features at the clicked position, and display a popup with the attributes of each feature.

今、作成されたレイヤをスタイル(装飾)したいなら、マップ上に見える個々のジオメトリについて情報を取得することは良いことです。ベクタタイルレイヤについて良いことは、ベクタレイヤと同じくそれらを情報交換できるということです。マップにクリックリスナを追加することは簡単なので、クリックされた場所のフィーチャに問い合わせ、個々のフィーチャの属性と一緒にポップアップを表示します。

Adding a popup
ポップアップを追加

We create a popup style by going to http://www.cssarrowplease.com/. I decided to choose a darker popup. The css is added to the <style> section of our index.html:

http://www.cssarrowplease.com/ に行ってポップアップを作成します。ここでは、暗いポップアップを選ぶことにしました。css は、index.html の <style> セクションに追加します:
.arrow_box {
 position: relative;
 background: #000;
 border: 1px solid #003c88;
}
.arrow_box:after, .arrow_box:before {
 top: 100%;
 left: 50%;
 border: solid transparent;
 content: " ";
 height: 0;
 width: 0;
 position: absolute;
 pointer-events: none;
}
.arrow_box:after {
 border-color: rgba(0, 0, 0, 0);
 border-top-color: #000;
 border-width: 10px;
 margin-left: -10px;
}
.arrow_box:before {
 border-color: rgba(0, 60, 136, 0);
 border-top-color: #003c88;
 border-width: 11px;
 margin-left: -11px;
}
.arrow_box {
 border-radius: 5px;
 padding: 10px;
 opacity: 0.8;
 background-color: black;
 color: white;
}
We are going to render scrollable HTML tables into our popup, so our markup for the popup also needs a <div> for the popup content:

ポップアップにスクロールできる HTML テーブル(表)を描画するので、ポップアップのためのマークアップにもポップアップコンテンツに <div> が必要です:
<div class="arrow_box" id="popup-container">
 <div id="popup-content"></div>
</div>
To style the tables, we add some more style to the <style> section of index.html:

テーブルをスタイルするために、index.html の <style> セクションにいくつかさらにスタイルを追加します。
#popup-content {
  max-height: 200px;
  overflow: auto;
}
#popup-content th {
  text-align: left;
  width: 125px;
}
In the application's main.js import the Overlay class:

アプリケーションの main.js に Overlay クラスをインポートします:

import Overlay from 'ol/Overlay';

Again in the application's main.js, we can now append the code for the popup's Overlay:

もう一度、アプリケーションの main.js に、ポップアップの Overlay に対するコードを、直ちに、追加できます:

const overlay = new Overlay({
 element: document.getElementById('popup-container'),
 positioning: 'bottom-center',
 offset: [0, -10],
 autoPan: true
});
map.addOverlay(overlay);
To make it easy to close the popup so it does not cover other features we might want to click, we add a click listener to the overlay, so it closes when we click on it:

クリックしたい他のフィーチャを覆わないようにポップアップを閉じるのを簡単にするために、クリックリスナをオーバレイに追加し、それにより、クリックしたときそれが閉じます。
overlay.getElement().addEventListener('click', function() {
 overlay.setPosition();
});
Calling setPosition() on an overlay sets an undefined position, which causes the overlay to disappear.

オーバレイ上の setPosition() を呼び出すことは、定義されていない場所を設定し、オーバレイを消します。

Fill the popup with feature attributes
ポップアップをフィーチャ属性で満たす

Now it is time to connect the popup to a click listener on the map. We append more code at the bottom of main.js:

今、マップ上のポップアップをクリックリスナに接続するときです。main.js の下部にさらに多くのコードを追加します:
map.on('click', function(e) {
 let markup = '';
 map.forEachFeatureAtPixel(e.pixel, function(feature) {
  markup += `${markup && '<hr>'}<table>`;
  const properties = feature.getProperties();
  for (const property in properties) {
   markup += `<tr><th>${property}</th><td>${properties[property]}</td></tr>`;
  }
  markup += '</table>';
 }, {hitTolerance: 1});
 if (markup) {
  document.getElementById('popup-content').innerHTML = markup;
  overlay.setPosition(e.coordinate);
 } else {
  overlay.setPosition();
 }
});
By iterating through all the features we get at the clicked position (map.forEachFeatureAtPixel), we build a separate table for each feature. With each feature, we iterate through its properties (feature.getProperties()), and add a table row (<tr>) for each property. We also set a hitTolerance of 1 pixel to make it easier to click on lines.

すべてのフィーチャに渡って繰り返すことによって、クリックされた位置を取得し(map.forEachFeatureAtPixel)、個々のフィーチャに対する分かれたテーブルを構築します。個々のフィーチャで、そのプロパティに渡って繰り返し(feature.getProperties())、個々のプロパティに対してテーブルロー(列)を追加します。線上をクリックするのを簡単にするために1ピクセルの hitTolerance の設定もします。

Using the interactivity to build a style for our map
インタラクティビティをマップのスタイルを構築するために使う

Now we can click on any geometry in the map, and use the information we get in the popup to create styles in the next exercise. Note that vector tile features have a special layer property, which indicates the source layer (i.e. the layer the feature belongs to in the vector tile's structure, which is a layer -> feature hierarchy).

現在、マップのすべてのジオメトリ上をクリックでき、次の演習でスタイルを作成するためにポップアップで取得する情報を使います。ベクタタイルフィーチャは特別なレイヤプロパティを持ち、それは、ソースレイヤを示します(例えば、フィーチャが所属しているベクタタイル構造のレイヤで、それは レイヤ -> フィーチャヒエラルキです)。

Getting feature information

■□ Debian9 で試します■□
「Interact with VectorTile features」の例を表示します。「The VectorTile layer」で使用した index.html のバックアップを保存して次のように修正します。

user@deb9-vmw:~/openlayers-workshop-en$ cp index.html index.html_vectortile
user@deb9-vmw:~/openlayers-workshop-en$ vim index.html
<!DOCTYPE html>
<html>
 <head>
  <meta charset="utf-8">
  <title>OpenLayers</title>
  <style>
   html, body, #map-container {
    margin: 0;
    height: 100%;
    width: 100%;
    font-family: sans-serif;
   }
   .arrow_box {
    position: relative;
    background: #000;
    border: 1px solid #003c88;
   }
   .arrow_box:after, .arrow_box:before {
    top: 100%;
    left: 50%;
    border: solid transparent;
    content: " ";
    height: 0;
    width: 0;
    position: absolute;
    pointer-events: none;
   }
   .arrow_box:after {
    border-color: rgba(0, 0, 0, 0);
    border-top-color: #000;
    border-width: 10px;
    margin-left: -10px;
   }
   .arrow_box:before {
    border-color: rgba(0, 60, 136, 0);
    border-top-color: #003c88;
    border-width: 11px; 
    margin-left: -11px; 
   } 
   .arrow_box { 
    border-radius: 5px; 
    padding: 10px; 
    opacity: 0.8; 
    background-color: black; 
    color: white; 
   }
   #popup-content { 
    max-height: 200px; 
    overflow: auto; 
   } 
   #popup-content th { 
    text-align: left; 
    width: 125px; 
   }
  </style>
 </head>
 <body>
  <div id="map-container"></div>
  <div class="arrow_box" id="popup-container"> 
   <div id="popup-content"></div>
  </div>
 </body>
</html>
「The VectorTile layer」」で使用した main.js のバックアップを保存して次のように修正します。

user@deb9-vmw:~/openlayers-workshop-en$ cp main.js main.js_vectortile
user@deb9-vmw:~/openlayers-workshop-en$ vim main.js
import 'ol/ol.css';
import Map from 'ol/Map';
import View from 'ol/View';
import MVT from 'ol/format/MVT';
import VectorTileLayer from 'ol/layer/VectorTile';
import VectorTileSource from 'ol/source/VectorTile';
import Overlay from 'ol/Overlay';
// See https://openmaptiles.com/hosting/ for terms and access key
const key = '<your-access-key-here>';
const map = new Map({
 target: 'map-container',
 view: new  View({
  center: [0, 0],
  zoom: 2
 })
});
const layer = new VectorTileLayer({
 source: new VectorTileSource({
  attributions: [
   '<a href="http://www.openmaptiles.org/" target="_blank">&copy; OpenMapTiles</a>',
   '<a href="http://www.openstreetmap.org/about/" target="_blank">&copy; OpenStreetMap contributors</a>'
  ],
  format: new MVT(),
  url: `https://free-{1-3}.tilehosting.com/data/v3/{z}/{x}/{y}.pbf.pict?key=${key}`,
  maxZoom: 14
 })
});
map.addLayer(layer); 
const overlay = new Overlay({
 element: document.getElementById('popup-container'),
 positioning: 'bottom-center',
 offset: [0, -10],
 autoPan: true
});
map.addOverlay(overlay);
overlay.getElement().addEventListener('click', function() {
 overlay.setPosition();
});
map.on('click', function(e) {
 let markup = '';
 map.forEachFeatureAtPixel(e.pixel, function(feature) {
  markup += `${markup && '<hr>'}<table>`;
  const properties = feature.getProperties();
  for (const property in properties) {
   markup += `<tr><th>${property}</th><td>${properties[property]}</td></tr>`;
  }
  markup += '</table>';
 }, {hitTolerance: 1});
 if (markup) {
  document.getElementById('popup-content').innerHTML = markup;
  overlay.setPosition(e.coordinate);
 } else {
  overlay.setPosition();
 }
});
http://localhost:3000/ とブラウザでマップを開きます。(もし開かなければ、'npm start' を実行してください。


OpenLayers5 Workshop - 3.1 The VectorTile layer

3 Vector Tile

Beautiful maps with vector tiles

In this module we will learn everything about the VectorTile layer in OpenLayers, and bring in the ol-mapbox-style utility to work with Mapbox Style files.

このモジュールでは、OpenLayers の VectorTile レイヤについてすべてを学習し、Mapbox Style ファイルで動作するために ol-mapbox-style ユーティリティを導入します。

● The VectorTile layer
● Interact with VectorTile features
● Styling a VectorTile layer
● Making things look bright

● VectorTile レイヤ
● VectorTile フィーチャを使ってインタラクション
● VectorTile レイヤをスタイルする
● ものを明るく見せる


3.1 The VectorTile layer
VectorTile レイヤ

We now know how to load tiled images, and we have seen different ways to load and render vector data. But what if we could have tiles that are fast to transfer to the browser, and can be styled on the fly? Well, this is what vector tiles were made for. OpenLayers supports vector tiles through the VectorTile layer.

現在、タイル化した画像をロードする方法を知っていて、ベクタデータをロードし描画する違う方法を確認します。しかし、ブラウザに転送するのが速い、そしてスタイルできるタイルがここにあるならどうしますか。ところで、これはベクタタイル向きです。OpenLayers は、VectorTile レイヤを通してベクタタイルをサポートします。

A world map rendered from vector data
ベクタデータから描画された世界地図

We'll start with the same markup in index.html as in the Basics exercise.

Basics 演習と同じ index.html で同じマークアップで始めます。
<!DOCTYPE html>
<html>
 <head>
  <meta charset="utf-8">
  <title>OpenLayers</title>
  <style>
   html, body, #map-container {
    margin: 0;
    height: 100%;
    width: 100%;
    font-family: sans-serif;
   }
  </style>
 </head>
 <body>
  <div id="map-container"></div>
 </body>
</html>
As usual, we save index.html in the root of our workshop folder.

いつもの通り、ワークショップフォルダのルートに index.html を保存します。

For the application, we'll start with a fresh main.js in the root of the workshop folder, and add the required imports:

アプリケーションのために、ワークショップフォルダのルートに新しい main.js で始め、必要とされる import を追加します:
import 'ol/ol.css';
import Map from 'ol/Map';
import View from 'ol/View';
import MVT from 'ol/format/MVT';
import VectorTileLayer from 'ol/layer/VectorTile';
import VectorTileSource from 'ol/source/VectorTile';
The data source we are going to use requires an access key. Please read the terms at https://openmaptiles.com/hosting/, where you can also get your own key. The code below assigns the key to a constant we're going to use later:

使おうとしているデータソースは、アクセスキーが必要です。自身のキーも取得できる https://openmaptiles.com/hosting/ で項目を読みます。コードの下部にキーをあとで使う定数(const)に割り当てます:
// See https://openmaptiles.com/hosting/ for terms and access key
const key = '<your-access-key-here>';
The map we're going to create here is the same that we have used in previous exercises:

ここに作成するマップは、前回の演習で使われたのと同じです:
const map = new Map({
 target: 'map-container',
 view: new  View({
  center: [0, 0],
  zoom: 2
 })
});
The layer type we are going to use now is VectorTileLayer, with a VectorTileSource:

今、使うレイヤタイプは VectorTileLayer で、VectorTileSource と一緒に使います:
const layer = new VectorTileLayer({
 source: new VectorTileSource({
  attributions: [
   '<a href="http://www.openmaptiles.org/" target="_blank">&copy; OpenMapTiles</a>',
   '<a href="http://www.openstreetmap.org/about/" target="_blank">&copy; OpenStreetMap contributors</a>'
  ],
  format: new MVT(),
  url: `https://free-{1-3}.tilehosting.com/data/v3/{z}/{x}/{y}.pbf.pict?key=${key}`,
  maxZoom: 14
 })
});
map.addLayer(layer);
Our data source provides only zoom levels 0 to 14, so we need to configure custom tile grid. Vector tile layers are usually optimized for a tile size of 512 pixels, which we also configured with the tile grid. The data provider also requires us to display some attributions.

データソースは、ズームレベル 0 から 14 までだけ提供するので、カスタムタイルグリッドを設定する必要があります。ベクタタイルレイヤは、通常、512 ピクセルのタイルサイズに最適化され、タイルグリッドで設定もされます。データプロバイダ(提供者)も出典(attribution)を表示するために必要です。

As you can see, a VectorTileSource is configured with a format and a url, just like a VectorLayer. The MVT format parses Mapbox Vector Tiles.

見た通り、VectorTileSource は、VectorLayer のように、format と url で設定します。

The working example at http://localhost:3000/ shows an unstyled vector map like this:

http://localhost:3000/ で演習例は、このようなスタイルされていないベクタマップを表示します:

A world map without style

■□ Debian9 で試します■□
「The VectorTile layer」の例を表示します。「Vector Data」で使用した index.html のバックアップを保存して次のように修正します。

user@deb9-vmw:~/openlayers-workshop-en$ cp index.html index.html_vectordata
user@deb9-vmw:~/openlayers-workshop-en$ vim index.html
<!DOCTYPE html>
<html>
 <head>
  <meta charset="utf-8">
  <title>OpenLayers</title>
  <style>
   html, body, #map-container {
    margin: 0;
    height: 100%;
    width: 100%;
    font-family: sans-serif;
   }
  </style>
 </head>
 <body>
  <div id="map-container"></div>
 </body>
</html>
「Vector Data」で使用した main.js のバックアップを保存して次のように修正します。

user@deb9-vmw:~/openlayers-workshop-en$ cp main.js main.js_style
user@deb9-vmw:~/openlayers-workshop-en$ vim main.js
import 'ol/ol.css';
import Map from 'ol/Map';
import View from 'ol/View';
import MVT from 'ol/format/MVT';
import VectorTileLayer from 'ol/layer/VectorTile';
import VectorTileSource from 'ol/source/VectorTile';
// See https://openmaptiles.com/hosting/ for terms and access key
const key = '<your-access-key-here>';
const map = new Map({
 target: 'map-container',
 view: new  View({
  center: [0, 0],
  zoom: 2
 })
});
const layer = new VectorTileLayer({
 source: new VectorTileSource({
  attributions: [
   '<a href="http://www.openmaptiles.org/" target="_blank">&copy; OpenMapTiles</a>',
   '<a href="http://www.openstreetmap.org/about/" target="_blank">&copy; OpenStreetMap contributors</a>'
  ],
  format: new MVT(),
  url: `https://free-{1-3}.tilehosting.com/data/v3/{z}/{x}/{y}.pbf.pict?key=${key}`,
  maxZoom: 14
 })
});
map.addLayer(layer); 
「MapTiler CLOUD」のアクセスキーを取得するためにホームページ(https://cloud.maptiler.com/)右上の「Sign in」をクリックします。
「Sign in or create account」ページのアカウント作成方法のうち、Google アカウントがあったので、「Sign in with Google」をクリックします。
Google のログインページが表示されるので、ログインします。
「Get started」ページが表示されるので、左側の「Account」をクリックします。
「Account」の「Settings」ページが表示されるので、左側の「key」をクリックして、「Key」を確認します。
const key = '<your-access-key-here>'; に key を入力します。

http://localhost:3000/ とブラウザでマップを開きます。(もし開かなければ、'npm start' を実行してください。


2015年12月31日木曜日

2 - ol3.12ex 141b - OSM Vector Tiles 2

「osm-vector-tiles.js(2141-ol3ex.js)」は、マップを表示するための JavaScript ファイルです。

「2141-ol3ex.js」
var format = new ol.format.TopoJSON();
/** ol.format.TopoJSON 
 * Feature format for reading and writing data 
 * in the TopoJSON format.
 * TopoJSON フォーマットでデータを読み書きするためのフィー
 * チャのフォーマット。(ol3 API)
 */
var tileGrid = ol.tilegrid.createXYZ({ maxZoom: 19 });
/** ol.tilegrid.createXYZ(opt_options)
  * Creates a tile grid with a standard XYZ tiling 
  * scheme.
  * 標準のXYZタイルスキーマを持つタイルグリッドを作成します。
 * (ol3 API[説明は Stable Only のチェックを外すと表示])
  */
 /** maxZoom:
  * Maximum zoom. The default is ol.DEFAULT_MAX_ZOOM. 
  * This determines the number of levels in the grid 
  * set. For example, a maxZoom of 21 means there are 
  * 22 levels in the grid set.
  * 最大ズーム。デフォルトはol.DEFAULT_MAX_ZOOMです。これは、
  * グリッドのセット内のレベルの数を決定します。たとえば、21 
  * のmaxZoom は、グリッドセット内に 22 のレベルがあることを
  * 意味します。
 * (ol3 API[説明は Stable Only のチェックを外すと表示])
  */
var roadStyleCache = {};
var roadColor = {
 'major_road': '#776',
 'minor_road': '#ccb',
 'highway': '#f39'
};
var landuseStyleCache = {};
var buildingStyle = new ol.style.Style({
/** ol.style.Style 
 * Container for vector feature rendering styles. Any 
 * changes made to the style or its children through 
 * set*() methods will not take effect until the feature 
 * or layer that uses the style is re-rendered.
 * ベクタフィーチャがスタイルを描画するためのコンテナ。
 * スタイルや set*() メソッドを通じてその子に加えられた変
 * 更は、スタイルを使用するフィーチャまたはレイヤが再レン
 * ダリングされるまで有効になりません。
 * (ol3 API[説明は Stable Only のチェックを外すと表示])
 */
 fill: new ol.style.Fill({
 /** ol.style.Fill 
  * Set fill style for vector features.
  * ベクタフィーチャの塗りつぶしスタイルを設定。(ol3 API)
  */
  color: '#666',
  opacity: 0.4
 }),
 stroke: new ol.style.Stroke({
 /** ol.style.Stroke 
  * Set stroke style for vector features. 
  * Note that the defaults given are the Canvas defaults, 
  * which will be used if option is not defined. 
  * The get functions return whatever was entered in the 
  * options;  they will not return the default.
  * ベクタフィーチャのためのストロークスタイルの設定。
  * デフォルトは、オプションが定義されていない場合に使用され
  * る Canvas のデフォルトを与えられることに注意してください。
  * GET 関数は、オプションで入力されたものはすべて返します。
  * それらはデフォルトを返しません。
  * (ol3 API[説明は Stable Only のチェックを外すと表示])
  */
  color: '#444',
  /** color:
   * Color. See ol.color for possible formats. Default 
   * null; if null, the Canvas/renderer default black 
   * will be used.
   * 色。可能なフォーマットについては ol.color を参照してくださ
   * い。デフォルトは null; null の場合、Canvas/renderer デ
   * フォルトの黒が使用されます。
   * (ol3 API[説明は Stable Only のチェックを外すと表示])
   */
  width: 1
 })
});
var map = new ol.Map({
 layers: [
  new ol.layer.VectorTile({
  /** ol.layer.VectorTile
   * Layer for vector tile data that is rendered client-side.
   * クライアント側でレンダリングされるベクタタイルデータのレイ
   * ヤ。
   * (ol3 API[説明は Stable Only のチェックを外すと表示])
   */
   source: new ol.source.VectorTile({
   /** ol.source.VectorTile
    * Class for layer sources providing vector data 
    * divided into a tile grid, to be used with 
    * ol.layer.VectorTile. Although this source receives 
    * tiles with vector features from the server, it is 
    * not meant for feature editing. Features are optimized 
    * for rendering, their geometries are clipped at or 
    * near tile boundaries and simplified for a view 
    * resolution. See ol.source.Vector for vector sources 
    * that are suitable for feature editing. 
    * ol.layer.VectorTile を使用するために、タイルのグリッドに
    * 分割されたベクタデータを提供するレイヤソースのクラス。この
    * ソースは、サーバからのベクタフィーチャと共にタイルを受信し
    * ますが、それはフィーチャ編集のためのものではありません。
    * フィーチャは、レンダリングのために最適化され、そのジオメト
    * リはタイルに、または、その境界付近にクリップされ、ビューの
    * 解像度のために簡略化されます。フィーチャの編集に適したベク
    * タソースための ol.source.Vector を参照してください。
    * (ol3 API[説明は Stable Only のチェックを外すと表示])
    */
    format: format,
    /** format:
     * Feature format for tiles. Used and required by the 
     * default tileLoadFunction.
     * タイルのフィーチャフォーマット。デフォルトの 
     * tileLoadFunction によって使用され必要とされます。
     * (ol3 API[説明は Stable Only のチェックを外すと表示])
     */
    tileGrid: tileGrid,
    url: 'http://{a-c}.tile.openstreetmap.us/' +
     'vectiles-water-areas/{z}/{x}/{y}.topojson'
   }),
   style: new ol.style.Style({
    fill: new ol.style.Fill({
     color: '#9db9e8'
    })
   })
  }),
  new ol.layer.VectorTile({
   source: new ol.source.VectorTile({
    format: format,
    tileGrid: tileGrid,
    url: 'http://{a-c}.tile.openstreetmap.us/' +
     'vectiles-highroad/{z}/{x}/{y}.topojson'
   }),
   style: function(feature, resolution) {
   /** style:
    * Layer style. See ol.style for default style which 
    * will be used if this is not defined.
    * レイヤースタイル。これが定義されていない場合に使用される
    * デフォルトスタイルの ol.style を参照してください。
    * (ol3 API)
    */
    var kind = feature.get('kind');
    /** get(key)
     * Gets a value.Gets a value.(ol3 API)
     */
    var railway = feature.get('railway');
    var sort_key = feature.get('sort_key');
    var styleKey = kind + '/' + railway + '/' + sort_key;
    var style = roadStyleCache[styleKey];
    if (!style) {
     var color, width;
     if (railway) {
      color = '#7de';
      width = 1;
     } else {
      color = roadColor[kind];
      width = kind == 'highway' ? 1.5 : 1;
      /** 条件演算子 condition ? expr1 : expr2 
       * condition: true か false かを評価する条件文です。
       * expr1, expr2: 各々の値の場合に実行する式です。
       * condition が true の場合、演算子は expr1 の値を
       * 選択します。そうでない場合は expr2 の値を選択します。
       * (MDN[https://developer.mozilla.org/ja/docs/Web/
       * JavaScript/Guide/Expressions_and_Operators])
       */
     }
     style = new ol.style.Style({
      stroke: new ol.style.Stroke({
       color: color,
       width: width
      }),
      zIndex: sort_key
     });
     roadStyleCache[styleKey] = style;
    }
    return style;
   }
  }),
  new ol.layer.VectorTile({
   source: new ol.source.VectorTile({
    format: format,
    tileGrid: tileGrid,
    url: 'http://{a-c}.tile.openstreetmap.us/' +
     'vectiles-buildings/{z}/{x}/{y}.topojson'
   }),
   style: function(f, resolution) {
    return (resolution < 10) ? buildingStyle : null;
   }
  }),
  new ol.layer.VectorTile({
   source: new ol.source.VectorTile({
    format: format,
    tileGrid: tileGrid,
    url: 'http://{a-c}.tile.openstreetmap.us/' +
     'vectiles-land-usages/{z}/{x}/{y}.topojson'
   }),
   visible: false,
   /** visible:
    * Visibility. Default is true (visible).
    * (ol3 API)
    */
   style: function(feature, resolution) {
    var kind = feature.get('kind');
    var styleKey = kind;
    var style = landuseStyleCache[styleKey];
    if (!style) {
     var color, width;
     color = {
      'parking': '#ddd',
      'industrial': '#aaa',
      'urban area': '#aaa',
      'park': '#76C759',
      'school': '#DA10E7',
      'garden': '#76C759',
      'pitch': '#D58F8D',
      'scrub': '#3E7D28',
      'residential': '#4C9ED9'
     }[kind];
     width = kind == 'highway' ? 1.5 : 1;
     style = new ol.style.Style({
      stroke: new ol.style.Stroke({
       color: color,
       width: width
      }),
      fill: new ol.style.Fill({
       color: color,
       opacity: 0.5
      })
     });
     landuseStyleCache[styleKey] = style;
    }
    return style;
   }
  })
 ],
 target: 'map',
 view: new ol.View({
  center: ol.proj.fromLonLat([-74.0064, 40.7142]),
  /** ol.proj.fromLonLat(coordinate, opt_projection)
   * Transforms a coordinate from longitude/latitude to a 
   * different projection.
   * 緯度/経度座標から異なる投影に変換します。(ol3 API)
   */
  maxZoom: 19,
  zoom: 15
 })
});

2 - ol3.12ex 141a - OSM Vector Tiles 1

「OSM Vector Tiles (osm-vector-tiles.html)」を参考に地図を表示してみます。
説明に次のようにあります。

A simple vector tiles map with OpenStreetMap vector tiles. Note: The tiles used in this example are not optimized for rendering - they clip tiles exactly at the tile boundary instead of adding a buffer, and use geographic coordinates instead of tile relative pixel coordinates in view projection.

OpenStreetMap のベクタタイルを使用する単純なベクトルタイルマップ。注意:この例は使用されるタイルがレンダリングのために最適化されていません - これらはバッファを追加する代わりに、正確にタイル境界でタイルをクリップし、ビュー投影法の相対的なピクセル座標の代わりに、タイルの地理座標を使用しています。

HTML ファイルの作成
a Eclipse のメニューの「ファイル」->「ファイルを開く」をクリックします。


b 「ファイルを開く」ウィンドウで、「user」->「mapsite」->「ol3proj」->「v3.12.1」->「examples」->「osm-vector-tiles.html」をクリックして選択し、「OK」ボタンをクリックします。
同じように「osm-vector-tiles.js」を開きます。


c メニューの「ファイル」->「新規」 -> 「ファイル」をクリックします。


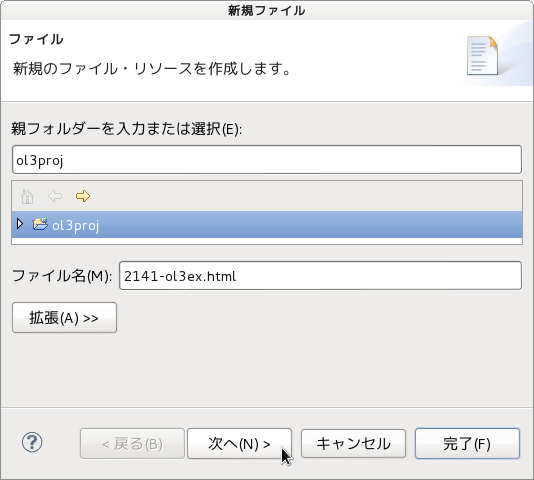
d 「ファイル」ウィンドウで「ol3proj」をクリックして選択し、「ファイル名」を「2141-ol3ex.html」と入力し、「次へ」ボタンをクリックします。


e 「File Template」ウィンドウで「HTML 5 Template」をクリックして選択し、「OK」ボタンをクリックします。


f 「osm-vector-tiles.html」の内容をコピーして「2141-ol3ex.html」に貼り付け、修正します。
g 同じように、新規に「2141-ol3ex.js」ファイルを作成し、「File Template」ウィンドウで「JavaScript Template」をクリックして選択し、「完了」ボタンをクリックして、「osm-vector-tiles.js」の内容をコピーして貼り付け、修正します。「osm-vector-tiles-require.js」も「2141-ol3ex-require.js」に貼り付けます。

「2141-ol3ex.html」
<!doctype html>
<html lang="en">
 <head>
  <meta charset="utf-8">
  <meta http-equiv="X-UA-Compatible" content="chrome=1">
  <meta name="viewport" content="initial-scale=1.0, user-scalable=no, width=device-width">
  <link rel="stylesheet" href="http://maxcdn.bootstrapcdn.com/font-awesome/4.4.0/css/font-awesome.min.css" type="text/css">
  <link rel="stylesheet" href="http://maxcdn.bootstrapcdn.com/bootstrap/3.3.5/css/bootstrap-combined.min.css" type="text/css">
  <!--
  <link rel="stylesheet" href="../css/ol.css" type="text/css">
  <link rel="stylesheet" href="./resources/layout.css" type="text/css">

  <link rel="stylesheet" href="./resources/prism/prism.css" type="text/css">
  <script src="./resources/zeroclipboard/ZeroClipboard.min.js"></script>

  <link rel="stylesheet" href="osm-vector-tiles.css">
  「resources」の位置が変わりました。
  -->
  <!-- ディレクトリ修正 -->
  <link rel="stylesheet" href="v3.12.1/css/ol.css" type="text/css">
  <link rel="stylesheet" href="v3.12.1/examples/resources/layout.css" type="text/css">

  <link rel="stylesheet" href="v3.12.1/examples/resources/prism/prism.css" type="text/css">
  <script src="v3.12.1/examples/resources/zeroclipboard/ZeroClipboard.min.js"></script>

  <link rel="stylesheet" href="v3.12.1/examples/osm-vector-tiles.css">
  <script src="https://cdn.polyfill.io/v2/polyfill.min.js?features=fetch"></script>
  <title>OSM Vector Tiles</title>
 </head>
 <body>
  <!-- 
  bootstrap-combined.min.css, ol.css, layout.css,
  CSSファイルで設定されたセレクタを使用。
  -->
  <header class="navbar" role="navigation">
   <div class="container" id="navbar-inner-container">
    <!--
    <a class="navbar-brand" href="./"><img src="./resources/logo-70x70.png"> OpenLayers 3 Examples</a>
    -->
    <!-- ディレクトリ修正 -->
    <a class="navbar-brand" href="v3.12.1/examples/"><img src="v3.12.1/examples/resources/logo-70x70.png"> OpenLayers 3 Examples</a>
   </div>
  </header>
  <div class="container-fluid">
   <div class="row-fluid">
    <div class="span12">
     <h4 id="title">OSM Vector Tiles</h4>
     <div id="map" class="map"></div>
    </div>
   </div>
   <div class="row-fluid">
    <div class="span12">
     <p id="shortdesc">Using OpenStreetMap vector tiles. </p>
     <div id="docs"><p>A simple vector tiles map with 
      OpenStreetMap vector tiles. <strong>Note</strong>: 
      The tiles used in this example are not optimized for 
      rendering - they clip tiles exactly at the tile 
      boundary instead of adding a buffer, and use geographic 
      coordinates instead of tile relative pixel coordinates 
      in view projection.</p>
     </div>
     <div id="api-links">Related API documentation: 
      <ul class="inline">
       <li>
        <!-- <a href="../apidoc/ol.Map.html" title="API documentation for ol.Map">ol.Map</a> -->
        <a href="v3.12.1/apidoc/ol.Map.html" title="API documentation for ol.Map">ol.Map</a>
       </li>,
       <li>
        <!-- <a href="../apidoc/ol.View.html" title="API documentation for ol.View">ol.View</a> -->
        <a href="v3.12.1/apidoc/ol.View.html" title="API documentation for ol.View">ol.View</a>
       </li>,
       <li>
        <!-- <a href="../apidoc/ol.format.TopoJSON.html" title="API documentation for ol.format.TopoJSON">ol.format.TopoJSON</a> -->
        <a href="v3.12.1/apidoc/ol.format.TopoJSON.html" title="API documentation for ol.format.TopoJSON">ol.format.TopoJSON</a>
       </li>,
       <li>
        <!-- <a href="../apidoc/ol.layer.VectorTile.html" title="API documentation for ol.layer.VectorTile">ol.layer.VectorTile</a> -->
        <a href="v3.12.1/apidoc/ol.layer.VectorTile.html" title="API documentation for ol.layer.VectorTile">ol.layer.VectorTile</a>
       </li>,
       <li>
        <!-- <a href="../apidoc/ol.proj.html" title="API documentation for ol.proj">ol.proj</a> -->
        <a href="v3.12.1/apidoc/ol.proj.html" title="API documentation for ol.proj">ol.proj</a>
       </li>,
       <li>
        <!-- <a href="../apidoc/ol.proj.html" title="API documentation for ol.proj">ol.proj</a> -->
        <a href="v3.12.1/apidoc/ol.proj.html" title="API documentation for ol.proj">ol.proj</a>
       </li>,
       <li>
        <!-- <a href="../apidoc/ol.source.VectorTile.html" title="API documentation for ol.source.VectorTile">ol.source.VectorTile</a> -->
        <a href="v3.12.1/apidoc/ol.source.VectorTile.html" title="API documentation for ol.source.VectorTile">ol.source.VectorTile</a>
       </li>,
       <li>
        <!-- <a href="../apidoc/ol.style.Fill.html" title="API documentation for ol.style.Fill">ol.style.Fill</a> -->
        <a href="v3.12.1/apidoc/ol.style.Fill.html" title="API documentation for ol.style.Fill">ol.style.Fill</a>
       </li>,
       <li>
        <!-- <a href="../apidoc/ol.style.Stroke.html" title="API documentation for ol.style.Stroke">ol.style.Stroke</a> -->
        <a href="v3.12.1/apidoc/ol.style.Stroke.html" title="API documentation for ol.style.Stroke">ol.style.Stroke</a>
       </li>,
       <li>
        <!-- <a href="../apidoc/ol.style.Style.html" title="API documentation for ol.style.Style">ol.style.Style</a> -->
        <a href="v3.12.1/apidoc/ol.style.Style.html" title="API documentation for ol.style.Style">ol.style.Style</a>
       </li>
      </ui>
     </div>
   </div>
  </div>
  <div class="row-fluid">
    <div id="source-controls">
     <a id="copy-button">
      <i class="fa fa-clipboard"></i> Copy
     </a>
     <a id="jsfiddle-button">
      <i class="fa fa-jsfiddle"></i> Edit
     </a>
    </div>
    <form method="POST" id="jsfiddle-form" target="_blank" action="http://jsfiddle.net/api/post/jquery/1.11.0/">
    <textarea class="hidden" name="js">
// --- 省略 ---
&lt;/html&gt;</code></pre>
   </div>
  </div>
  <!--
  <script src="./resources/common.js"></script>
  <script src="./resources/prism/prism.min.js"></script>
  -->
  <!-- ディレクトリ修正
   CommonJS と
   prism.js
 -->
  <script src="v3.12.1/examples/resources/common.js"></script>
  <script src="v3.12.1/examples/resources/prism/prism.min.js"></script>
  <!-- 
  <script src="loader.js?id=osm-vector-tiles"></script>
  -->
  <!-- ファイル修正 -->  <!-- ディレクトリ修正 -->
  <script src="loader.js?id=2141-ol3ex"></script>
  </body>
</html>


COMMONJS は

COMMONJS
http://webpack.github.io/docs/commonjs.html

に、次のようにあります。

The CommonJS group defined a module format to solve JavaScript scope issues by making sure each module is executed in its own namespace.
This is achieved by forcing modules to explicitly export those variables it wants to expose to the “universe”, and also by defining those other modules required to properly work.
To achieve this CommonJS give you two tools:
the require() function, which allows to import a given module into the current scope.
the module object, which allows to export something from the current scope.

CommonJSグループは、それ自身の名前空間内で実行されている各モジュールを確認することによって、JavaScriptのスコープ問題を解決するためのモジュールフォーマットを定義しました。
これは、それが「universe(?)」に公開したい変数を明示的にエクスポートするモジュールを強制することによって、同じように、正常に動作するのに必要な他のモジュールを定義することによって、達成されます。
この CommonJS を達成するために2つのツールを与えます:
require()関数、指定したモジュールを現在のスコープにインポートすることができます。
モジュールオブジェクト、現在のスコープからエクスポートすることができます。


Prism は、

Prism
http://prismjs.com/

に、次のようにあります。

Prism is a lightweight, extensible syntax highlighter, built with modern web standards in mind. It’s a spin-off from Dabblet and is tested there daily by thousands.
Prismは、最新のWeb標準に構築されたことを考慮し軽量で拡張可能なシンタックスハイライトです。それは Dabblet からスピンオフで、何千人も日々そこで試験されています。


ZeroClipboard は

ZeroClipboard v2.x
http://zeroclipboard.org/

に、次のようにあります。

The ZeroClipboard library provides an easy way to copy text to the clipboard using an invisible Adobe Flash movie and a JavaScript interface.
ZeroClipboard ライブラリは、見えない Adobe Flash ムービーとJavaScript のインターフェイスを使用してテキストをクリップボードにコピーする簡単な方法を提供します。

Debian 8 では動作しませんでした。ボタンを右クリックしたときに flash のコンテキストメニューが表示されると動作しています。

2015年11月30日月曜日

2 - ol3.11ex 136b - Advanced Mapbox vector tiles example 2

「mapbox-vector-tiles-advanced.js(2136-ol3ex.js)」は、マップを表示するための JavaScript ファイルです。

「2136-ol3ex.js」
var key = 'pk.eyJ...(省略)';
// For how many zoom levels do we want to use the same 
// vector tiles?  1 means "use tiles from all zoom levels". 
// 2 means "use the same tiles for 2 subsequent zoom 
// levels".
// どのくらいのズームレベル数で同じベクトルのタイルを使用したい
// ですか? 1 は「すべてのズームレベルからタイル使用する」こと
// を意味します。 2 は「2 以降のズームレベルに同じタイルを使用
// する」を意味します。
var reuseZoomLevels = 2;
// Offset of loaded tiles from web mercator zoom level 0.
// 0 means "At map zoom level 0, use tiles from zoom 
// level 0". 1 means "At map zoom level 0, use tiles 
// from zoom level 1".
// ウェブメルカトルズームレベル 0 からロードされたタイルのオフ
// セット。0 は「マップのズームレベル 0 では、ズームレベル 0 か
// らのタイルを使用する」ことを意味します。1 は「マップのズーム
// レベル 0 では、ズームレベル1  からタイルを使用する」ことを意
// 味します。
var zoomOffset = 1;
// Calculation of tile urls
var resolutions = [];
for (var z = zoomOffset / reuseZoomLevels; z <= 22 / reuseZoomLevels; ++z) {
 resolutions.push(156543.03392804097 / Math.pow(2, z * reuseZoomLevels));
 /** Array.push
  * 与えられた要素を追加することによって配列を変異させ、
  * その配列の新しい長さを返します。
  * (MDN [https://developer.mozilla.org/ja/docs/Web/
  * JavaScript/Reference/Global_Objects/Array/push])
  */
 /** Math.pow(base, exponent)
  * base を exponent 乗した値、つまり、base^exponent の値を返
  * します。
  * (MDN[https://developer.mozilla.org/ja/docs/Web/
  * JavaScript/Reference/Global_Objects/Math/pow])
  */
}
function tileUrlFunction(tileCoord) {
 return ('http://{a-d}.tiles.mapbox.com/v4/mapbox.mapbox-streets-v6/' +
  '{z}/{x}/{y}.vector.pbf?access_token=' + key)
   .replace('{z}', String(tileCoord[0] * reuseZoomLevels + zoomOffset))
   /** replace [メソッド]
    * 指定された URL に現在の文書を置き換えます。 assign() メ
    * ソッドとの違いは、replace() を用いた後、現在のページは、
    * セッションの履歴には保持されないことです。つまり、ユーザ
    * は、置き換え前のページに戻るために、戻るボタンを使うこと
    * ができません。
    * (MDN[https://developer.mozilla.org/ja/docs/Web/API/
    * Window/location])
    */
   .replace('{x}', String(tileCoord[1]))
   .replace('{y}', String(-tileCoord[2] - 1))
   .replace('{a-d}', 'abcd'.substr(
    ((tileCoord[1] << tileCoord[0]) + tileCoord[2]) % 4, 1));
}
var map = new ol.Map({
 layers: [
  new ol.layer.VectorTile({
  /** ol.layer.VectorTile
   * Layer for vector tile data that is rendered client-side.
   * クライアント側でレンダリングされるベクタタイルデータのレイ
   * ヤ。
   * (ol3 API[説明は Stable Only のチェックを外すと表示])
   */
   preload: Infinity,
   /** preload (Observable Properties)
    * The level to preload tiles up to.
    * タイルをプリロードするための最大レベル。
    * (ol3 API[説明は Stable Only のチェックを外すと表示])
    */
   source: new ol.source.VectorTile({
   /** ol.source.VectorTile
    * Class for layer sources providing vector data 
    * divided into a tile grid, to be used with 
    * ol.layer.VectorTile. Although this source receives 
    * tiles with vector features from the server, it is 
    * not meant for feature editing. Features are optimized 
    * for rendering, their geometries are clipped at or 
    * near tile boundaries and simplified for a view 
    * resolution. See ol.source.Vector for vector sources 
    * that are suitable for feature editing. 
    * ol.layer.VectorTile を使用するために、タイルのグリッドに
    * 分割されたベクタデータを提供するレイヤソースのクラス。この
    * ソースは、サーバからのベクタフィーチャと共にタイルを受信し
    * ますが、それはフィーチャ編集のためのものではありません。
    * フィーチャは、レンダリングのために最適化され、そのジオメト
    * リはタイルに、または、その境界付近にクリップされ、ビューの
    * 解像度のために簡略化されます。フィーチャの編集に適したベク
    * タソースための ol.source.Vector を参照してください。
    * (ol3 API[説明は Stable Only のチェックを外すと表示])
    */
    attributions: [new ol.Attribution({
    /** ol.Attribution
     * An attribution for a layer source.
     * レイヤソースの属性(ol3 API)
     */
     html: '© <a href="https://www.mapbox.com/map-feedback/">Mapbox</a> ' +
      '© <a href="http://www.openstreetmap.org/copyright">' +
      'OpenStreetMap contributors</a>'
    })],
    format: new ol.format.MVT(),
    /** ol.format.MVT
     * Feature format for reading data in the Mapbox MVT 
     * format.
     * Mapbox MVT フォーマットでデータを描画するためのフィーチャ
     * フォーマット。
    * (ol3 API[説明は Stable Only のチェックを外すと表示])
     */
    tileGrid: new ol.tilegrid.TileGrid({
    /** ol.tilegrid.TileGrid
     * Base class for setting the grid pattern for 
     * sources accessing tiled-image servers.
     * タイル画像サーバにアクセスするソースのグリッドパターンを
     * 設定するための基本クラス。(ol3 API)
     */
     extent: ol.proj.get('EPSG:3857').getExtent(),
     /** extent
      * Extent for the tile grid. No tiles outside this 
      * extent will be requested by ol.source.Tile sources. 
      * When no origin or origins are configured, the 
      * origin will be set to the top-left corner of the 
      * extent.
      * タイルグリッドの範囲。この範囲外ではタイルは 
      * ol.source.Tile ソースによって要求されません。何の原点
      * または原点が構成されていない場合には、原点は範囲の左上
      * 隅に設定されます。
     * (ol3 API[説明は Stable Only のチェックを外すと表示])
      */
     resolutions: resolutions
    }),
    tilePixelRatio: 16,
    /** tilePixelRatio
     * The pixel ratio used by the tile service. For 
     * example, if the tile service advertizes 256px by 
     * 256px tiles but actually sends 512px by 512px 
     * tiles (for retina/hidpi devices) then 
     * tilePixelRatio should be set to 2. Default is 1.
     * タイルサービスによって使用されるピクセル比。たとえば、タ
     * イルサービスが 256px x 256px タイルを通知する場合、実際
     * には 512px x 512px  タイル(retina / hidpiデバイス用)
     * を送信し、それから、タイル Pixel Ratio は 2 に設定しな
     * ければなりません。デフォルトは 1 です。
    * (ol3 API[説明は Stable Only のチェックを外すと表示])
     */
    tileUrlFunction: tileUrlFunction
    /** tileUrlFunction
     * Optional function to get tile URL given a tile 
     * coordinate and the projection.
     * タイル座標と投影法を指定されたタイル URL を取得するための
     * オプション関数。
     * (ol3 API[説明は Stable Only のチェックを外すと表示])
     */
   }),
   style: createMapboxStreetsV6Style()
   /** style
    * Layer style. See ol.style for default style which 
    * will be used if this is not defined.
    * レイヤスタイル。これが定義されていない場合に使用されるデ
    * フォルトのスタイルのための ol.style を参照してください。
    * (ol3 API[説明は Stable Only のチェックを外すと表示])
    */
  })
 ],
 target: 'map',
 view: new ol.View({
  center: [0, 0],
  minZoom: 1,
  zoom: 2
 })
});
// ol.style.Fill, ol.style.Icon, ol.style.Stroke, 
// ol.style.Style and ol.style.Text are required for 
// createMapboxStreetsV6Style()

2 - ol3.11ex 136a - Advanced Mapbox vector tiles example 1

「Advanced Mapbox vector tiles example (mapbox-vector-tiles-advanced.html)」を参考に地図を表示してみます。
説明に次のようにあります。

A vector tiles map which reuses the same tiles for subsequent zoom levels to save bandwith on mobile devices. Note: No map will be visible when the access token has expired.  
次のズームレベルのためモバイルデバイス上で帯域幅を保存するため同じタイルを再利用するベクタタイルマップ。注意:アクセストークンの有効期限が切れているときにマップが表示されなくなります。

HTML ファイルの作成
a Eclipse のメニューの「ファイル」->「ファイルを開く」をクリックします。


b 「ファイルを開く」ウィンドウで、「user」->「mapsite」->「ol3proj」->「v3.11.2」->「examples」->「mapbox-vector-tiles-advanced.html」をクリックして選択し、「OK」ボタンをクリックします。
同じように「mapbox-vector-tiles-advanced.js」を開きます。


c メニューの「ファイル」->「新規」 -> 「ファイル」をクリックします。


d 「ファイル」ウィンドウで「ol3proj」をクリックして選択し、「ファイル名」を「2136-ol3ex.html」と入力し、「次へ」ボタンをクリックします。


e 「File Template」ウィンドウで「HTML 5 Template」をクリックして選択し、「OK」ボタンをクリックします。


f 「mapbox-vector-tiles-advanced.html」の内容をコピーして「2136-ol3ex.html」に貼り付け、修正します。
g 同じように、新規に「2136-ol3ex.js」ファイルを作成し、「File Template」ウィンドウで「JavaScript Template」をクリックして選択し、「完了」ボタンをクリックして、「mapbox-vector-tiles-advanced.js」の内容をコピーして貼り付け、修正します。「mapbox-vector-tiles-advanced-require.js」も「2136-ol3ex-require.js」に貼り付けます。

「2136-ol3ex.html」
<!doctype html>
<html lang="en">
 <head>
  <meta charset="utf-8">
  <meta http-equiv="X-UA-Compatible" content="chrome=1">
  <meta name="viewport" content="initial-scale=1.0, user-scalable=no, width=device-width">
  <link rel="stylesheet" href="http://maxcdn.bootstrapcdn.com/font-awesome/4.4.0/css/font-awesome.min.css" type="text/css">
  <link rel="stylesheet" href="http://maxcdn.bootstrapcdn.com/bootstrap/3.3.5/css/bootstrap-combined.min.css" type="text/css">
  <!--
  <link rel="stylesheet" href="../css/ol.css" type="text/css">
  <link rel="stylesheet" href="./resources/layout.css" type="text/css">

  <link rel="stylesheet" href="./resources/prism/prism.css" type="text/css">
  <script src="./resources/zeroclipboard/ZeroClipboard.min.js"></script>
  「resources」の位置が変わりました。
  -->
  <!-- ディレクトリ修正 -->
  <link rel="stylesheet" href="v3.11.2/css/ol.css" type="text/css">
  <link rel="stylesheet" href="v3.11.2/examples/resources/layout.css" type="text/css">

  <link rel="stylesheet" href="v3.11.2/examples/resources/prism/prism.css" type="text/css">
  <script src="v3.11.2/examples/resources/zeroclipboard/ZeroClipboard.min.js"></script>
  <!--
  <link rel="stylesheet" href="mapbox-vector-tiles-advanced.css">
  <script src="./resources/mapbox-streets-v6-style.js"></script>
  -->
  <!-- ディレクトリ修正 -->
  <link rel="stylesheet" href="v3.11.2/examples/mapbox-vector-tiles.css">
  <script src="v3.11.2/examples/resources/mapbox-streets-v6-style.js"></script>
  <title&gtAdvanced Mapbox vector tiles example</title>
 </head>
 <body>
  <!-- 
  bootstrap-combined.min.css, ol.css, layout.css,
  CSSファイルで設定されたセレクタを使用。
  -->
  <header class="navbar" role="navigation">
   <div class="container" id="navbar-inner-container">
    <!--
    <a class="navbar-brand" href="./"><img src="./resources/logo-70x70.png"> OpenLayers 3 Examples</a>
    -->
    <!-- ディレクトリ修正 -->
    <a class="navbar-brand" href="v3.11.2/examples/"><img src="v3.11.2/examples/resources/logo-70x70.png"> OpenLayers 3 Examples</a>
   </div>
  </header>
  <div class="container-fluid">
   <div class="row-fluid">
    <div class="span12">
     <div id="map" class="map"></div>
    </div>
   </div>
   <div class="row-fluid">
    <div class="span12">
     <h4 id="title">Advanced Mapbox vector tiles example</h4>
     <p id="shortdesc">Example of a Mapbox vector tiles
       map with custom tile grid.</p>
     <div id="docs"><p>A vector tiles map which reuses the 
      same tiles for subsequent zoom levels to save  
      bandwith on mobile devices. <strong>Note</strong>: 
      No map will be visible when the access token has 
      expired.</p>
     </div>
     <div id="tags">mapbox, vector, tiles, mobile</div>
     <div id="api-links">Related API documentation: 
      <ul class="inline">
       <li>
        <!-- <a href="../apidoc/ol.Attribution.html" title="API documentation for ol.Attribution">ol.Attribution</a> -->
        <a href="v3.11.2/apidoc/ol.Attribution.html" title="API documentation for ol.Attribution">ol.Attribution</a>
       </li>,
       <li>
       <!-- <a href="../apidoc/ol.Map.html" title="API documentation for ol.Map">ol.Map</a> -->
        <a href="v3.11.2/apidoc/ol.Map.html" title="API documentation for ol.Map">ol.Map</a>
       </li>,
       <li>
       <!-- <a href="../apidoc/ol.View.html" title="API documentation for ol.View">ol.View</a> -->
        <a href="v3.11.2/apidoc/ol.View.html" title="API documentation for ol.View">ol.View</a>
       </li>,
       <li>
        <!-- <a href="../apidoc/ol.format.MVT.html" title="API documentation for ol.format.MVT">ol.format.MVT</a> -->
        <a href="v3.11.2/apidoc/ol.format.MVT.html" title="API documentation for ol.format.MVT">ol.format.MVT</a>
       </li>,
       <li>
        <!-- <a href="../apidoc/ol.layer.VectorTile.html" title="API documentation for ol.layer.VectorTile">ol.layer.VectorTile</a> -->
        <a href="v3.11.2/apidoc/ol.layer.VectorTile.html" title="API documentation for ol.layer.VectorTile">ol.layer.VectorTile</a>
       </li>,
       <li>
        <!-- <a href="../apidoc/ol.source.VectorTile.html" title="API documentation for ol.source.VectorTile">ol.source.VectorTile</a> -->
        <a href="v3.11.2/apidoc/ol.source.VectorTile.html" title="API documentation for ol.source.VectorTile">ol.source.VectorTile</a>
       </li>,
       <li>
        <!-- <a href="../apidoc/ol.style.Fill.html" title="API documentation for ol.style.Fill">ol.style.Fill</a> -->
        <a href="v3.11.2/apidoc/ol.style.Fill.html" title="API documentation for ol.style.Fill">ol.style.Fill</a>
       </li>,
       <li>
        <!-- <a href="../apidoc/ol.style.Icon.html" title="API documentation for ol.style.Icon">ol.style.Icon</a> -->
        <a href="v3.11.2/apidoc/ol.style.Icon.html" title="API documentation for ol.style.Icon">ol.style.Icon</a>
       </li>,
       <li>
        <!-- <a href="../apidoc/ol.style.Stroke.html" title="API documentation for ol.style.Stroke">ol.style.Stroke</a> -->
        <a href="v3.11.2/apidoc/ol.style.Stroke.html" title="API documentation for ol.style.Stroke">ol.style.Stroke</a>
       </li>,
       <li>
        <!-- <a href="../apidoc/ol.style.Style.html" title="API documentation for ol.style.Style">ol.style.Style</a> -->
        <a href="v3.11.2/apidoc/ol.style.Style.html" title="API documentation for ol.style.Style">ol.style.Style</a>
       </li>,
       <li>
        <!-- <a href="../apidoc/ol.style.Text.html" title="API documentation for ol.style.Text">ol.style.Text</a> -->
        <a href="v3.11.2/apidoc/ol.style.Text.html" title="API documentation for ol.style.Text">ol.style.Text</a>
       </li>,
       <li>
       <!-- <a href="../apidoc/ol.proj.html" title="API documentation for ol.proj">ol.proj</a> -->
        <a href="v3.11.2/apidoc/ol.proj.html" title="API documentation for ol.proj">ol.proj</a>
       </li>,
       <li>
       <!-- <a href="../apidoc/ol.tilegrid.TileGrid.html" title="API documentation for ol.tilegrid.TileGrid">ol.tilegrid.TileGrid</a> -->
        <a href="v3.11.2/apidoc/ol.tilegrid.TileGrid.html" title="API documentation for ol.tilegrid.TileGrid">ol.tilegrid.TileGrid</a>
       </li>
      </ui>
     </div>
   </div>
  </div>
  <div class="row-fluid">
    <div id="source-controls">
     <a id="copy-button">
      <i class="fa fa-clipboard"></i> Copy
     </a>
     <a id="jsfiddle-button">
      <i class="fa fa-jsfiddle"></i> Edit
     </a>
    </div>
    <form method="POST" id="jsfiddle-form" target="_blank" action="http://jsfiddle.net/api/post/jquery/1.11.0/">
    <textarea class="hidden" name="js">
// --- 省略 ---
&lt;/html&gt;</code></pre>
   </div>
  </div>
  <script src="http://code.jquery.com/jquery-1.11.2.min.js"></script>
  <script src="http://maxcdn.bootstrapcdn.com/bootstrap/3.3.5/js/bootstrap.min.js"></script>
  <!--
  <script src="./resources/common.js"></script>
  <script src="./resources/prism/prism.min.js"></script>
  -->
  <!-- ディレクトリ修正
   CommonJS と
   prism.js
 -->
  <script src="v3.11.2/examples/resources/common.js"></script>
  <script src="v3.11.2/examples/resources/prism/prism.min.js"></script>
  <!-- 
  <script src="loader.js?id=mapbox-vector-tiles-advanced"></script>
  -->
  <!-- ファイル修正 -->  <!-- ディレクトリ修正 -->
  <script src="loader.js?id=2136-ol3ex"></script>
  </body>
</html>


COMMONJS は

COMMONJS
http://webpack.github.io/docs/commonjs.html

に、次のようにあります。

The CommonJS group defined a module format to solve JavaScript scope issues by making sure each module is executed in its own namespace.
This is achieved by forcing modules to explicitly export those variables it wants to expose to the “universe”, and also by defining those other modules required to properly work.
To achieve this CommonJS give you two tools:
the require() function, which allows to import a given module into the current scope.
the module object, which allows to export something from the current scope.

CommonJSグループは、それ自身の名前空間内で実行されている各モジュールを確認することによって、JavaScriptのスコープ問題を解決するためのモジュールフォーマットを定義しました。
これは、それが「universe(?)」に公開したい変数を明示的にエクスポートするモジュールを強制することによって、同じように、正常に動作するのに必要な他のモジュールを定義することによって、達成されます。
この CommonJS を達成するために2つのツールを与えます:
require()関数、指定したモジュールを現在のスコープにインポートすることができます。
モジュールオブジェクト、現在のスコープからエクスポートすることができます。


Prism は、

Prism
http://prismjs.com/

に、次のようにあります。

Prism is a lightweight, extensible syntax highlighter, built with modern web standards in mind. It’s a spin-off from Dabblet and is tested there daily by thousands.
Prismは、最新のWeb標準に構築されたことを考慮し軽量で拡張可能なシンタックスハイライトです。それは Dabblet からスピンオフで、何千人も日々そこで試験されています。


ZeroClipboard は

ZeroClipboard v2.x
http://zeroclipboard.org/

に、次のようにあります。

The ZeroClipboard library provides an easy way to copy text to the clipboard using an invisible Adobe Flash movie and a JavaScript interface.
ZeroClipboard ライブラリは、見えない Adobe Flash ムービーとJavaScript のインターフェイスを使用してテキストをクリップボードにコピーする簡単な方法を提供します。

Debian 8 では動作しませんでした。ボタンを右クリックしたときに flash のコンテキストメニューが表示されると動作しています。

2 - ol3.11ex 135b - Mapbox vector tiles example 2

「mapbox-vector-tiles.js(2135-ol3ex.js)」は、マップを表示するための JavaScript ファイルです。

「2135-ol3ex.js」
var key = 'pk.eyJ...(省略)';
var map = new ol.Map({
 layers: [
  new ol.layer.VectorTile({
  /** ol.layer.VectorTile
   * Layer for vector tile data that is rendered 
   * client-side. 
   * クライアント側でレンダリングされるベクタタイルデータのレイ
   * ヤ。
   * (ol3 API[説明は Stable Only のチェックを外すと表示])
   */
   source: new ol.source.VectorTile({
   /** ol.source.VectorTile
    * Class for layer sources providing vector data 
    * divided into a tile grid, to be used with 
    * ol.layer.VectorTile. Although this source receives 
    * tiles with vector features from the server, it is 
    * not meant for feature editing. Features are 
    * optimized for rendering, their geometries are 
    * clipped at or near tile boundaries and simplified 
    * for a view resolution. See ol.source.Vector for 
    * vector sources that are suitable for feature 
    * editing.
    * ol.layer.VectorTile を使用するために、タイルのグリッド
    * に分割されたベクタデータを提供するレイヤソースのクラス。
    * このソースは、サーバからのベクタフィーチャと共にタイルを
    * 受信しますが、それはフィーチャ編集のためのものではありま
    * せん。フィーチャは、レンダリングのために最適化され、その
    * ジオメトリはタイルに、または、その境界付近にクリップされ、
    * ビューの解像度のために簡略化されます。フィーチャの編集に
    * 適したベクタソースための ol.source.Vector を参照してく
    * ださい。
    * (ol3 API[説明は Stable Only のチェックを外すと表示])
    */
    attributions: [new ol.Attribution({
    /** ol.Attribution
     * An attribution for a layer source.
     * レイヤソースの属性(ol3 API)
     */
     html: '© <a href="https://www.mapbox.com/map-feedback/">Mapbox</a> ' +
      '© <a href="http://www.openstreetmap.org/copyright">' +
      'OpenStreetMap contributors</a>'
    })],
    format: new ol.format.MVT(),
    /** ol.format.MVT
     * Feature format for reading data in the Mapbox MVT 
     * format.
     * Mapbox MVT フォーマットでデータを描画するためのフィーチャ
     * フォーマット。
    * (ol3 API[説明は Stable Only のチェックを外すと表示])
     */
    tileGrid: ol.tilegrid.createXYZ({maxZoom: 22}),
    /** ol.tilegrid.createXYZ(opt_options)
     * Creates a tile grid with a standard XYZ tiling 
     * scheme.
     * 標準のXYZタイルスキーマを持つタイルグリッドを作成します。
    * (ol3 API[説明は Stable Only のチェックを外すと表示])
     */
    /** maxZoom
     * Maximum zoom. The default is ol.DEFAULT_MAX_ZOOM. 
     * This determines the number of levels in the grid 
     * set. For example, a maxZoom of 21 means there are 
     * 22 levels in the grid set.
     * 最大ズーム。デフォルトはol.DEFAULT_MAX_ZOOMです。これは、
     * グリッドのセット内のレベルの数を決定します。たとえば、21 
     * のmaxZoom は、グリッドセット内に 22 のレベルがあることを
     * 意味します。
    * (ol3 API[説明は Stable Only のチェックを外すと表示])
     */
    tilePixelRatio: 16,
    /** tilePixelRatio
     * The pixel ratio used by the tile service. For 
     * example, if the tile service advertizes 256px by 
     * 256px tiles but actually sends 512px by 512px 
     * tiles (for retina/hidpi devices) then 
     * tilePixelRatio should be set to 2. Default is 1.
     * タイルサービスによって使用されるピクセル比。たとえば、タ
     * イルサービスが 256px x 256px タイルを通知する場合、実際
     * には 512px x 512px  タイル(retina / hidpiデバイス用)
     * を送信し、それから、タイル Pixel Ratio は 2 に設定しな
     * ければなりません。デフォルトは 1 です。
    * (ol3 API[説明は Stable Only のチェックを外すと表示])
     */
    url: 'http://{a-d}.tiles.mapbox.com/v4/mapbox.mapbox-streets-v6/' +
     '{z}/{x}/{y}.vector.pbf?access_token=' + key
   }),
   style: createMapboxStreetsV6Style()
   /** style
    * Layer style. See ol.style for default style which 
    * will be used if this is not defined.
    * レイヤスタイル。これが定義されていない場合に使用されるデ
    * フォルトのスタイルのための ol.style を参照してください。
   * (ol3 API[説明は Stable Only のチェックを外すと表示])
    */
  })
 ],
 target: 'map',
 view: new ol.View({
  center: [0, 0],
  zoom: 2
 })
});
// ol.style.Fill, ol.style.Icon, ol.style.Stroke, 
// ol.style.Style and ol.style.Text are required for 
// createMapboxStreetsV6Style()

2 - ol3.11ex 135a - Mapbox vector tiles example 1

「Mapbox vector tiles example (mapbox-vector-tiles.html)」を参考に地図を表示してみます。
説明に次のようにあります。

A simple vector tiles map. Note: Make sure to get your own Mapbox API key when using this example. No map will be visible when the API key has expired.
単純なベクトルタイルマップ。注意:この例を使用する際に、独自の Mapbox API キーを取得することを確認してください。 API キーの期限が切れたときに地図が表示されなくなります。
HTML ファイルの作成
a Eclipse のメニューの「ファイル」->「ファイルを開く」をクリックします。


b 「ファイルを開く」ウィンドウで、「user」->「mapsite」->「ol3proj」->「v3.11.2」->「examples」->「mapbox-vector-tiles.html」をクリックして選択し、「OK」ボタンをクリックします。
同じように「mapbox-vector-tiles.js」を開きます。


c メニューの「ファイル」->「新規」 -> 「ファイル」をクリックします。


d 「ファイル」ウィンドウで「ol3proj」をクリックして選択し、「ファイル名」を「2135-ol3ex.html」と入力し、「次へ」ボタンをクリックします。


e 「File Template」ウィンドウで「HTML 5 Template」をクリックして選択し、「OK」ボタンをクリックします。


f 「mapbox-vector-tiles.html」の内容をコピーして「2135-ol3ex.html」に貼り付け、修正します。
g 同じように、新規に「2135-ol3ex.js」ファイルを作成し、「File Template」ウィンドウで「JavaScript Template」をクリックして選択し、「完了」ボタンをクリックして、「mapbox-vector-tiles.js」の内容をコピーして貼り付け、修正します。「mapbox-vector-tiles-require.js」も「2135-ol3ex-require.js」に貼り付けます。

「2135-ol3ex.html」
<!doctype html>
<html lang="en">
 <head>
  <meta charset="utf-8">
  <meta http-equiv="X-UA-Compatible" content="chrome=1">
  <meta name="viewport" content="initial-scale=1.0, user-scalable=no, width=device-width">
  <link rel="stylesheet" href="http://maxcdn.bootstrapcdn.com/font-awesome/4.4.0/css/font-awesome.min.css" type="text/css">
  <link rel="stylesheet" href="http://maxcdn.bootstrapcdn.com/bootstrap/3.3.5/css/bootstrap-combined.min.css" type="text/css">
  <!--
  <link rel="stylesheet" href="../css/ol.css" type="text/css">
  <link rel="stylesheet" href="./resources/layout.css" type="text/css">

  <link rel="stylesheet" href="./resources/prism/prism.css" type="text/css">
  <script src="./resources/zeroclipboard/ZeroClipboard.min.js"></script>
  「resources」の位置が変わりました。
  -->
  <!-- ディレクトリ修正 -->
  <link rel="stylesheet" href="v3.11.2/css/ol.css" type="text/css">
  <link rel="stylesheet" href="v3.11.2/examples/resources/layout.css" type="text/css">

  <link rel="stylesheet" href="v3.11.2/examples/resources/prism/prism.css" type="text/css">
  <script src="v3.11.2/examples/resources/zeroclipboard/ZeroClipboard.min.js"></script>
  <!--
  <link rel="stylesheet" href="mapbox-vector-tiles.css">
  <script src="./resources/mapbox-streets-v6-style.js"></script>
  -->
  <!-- ディレクトリ修正 -->
  <link rel="stylesheet" href="v3.11.2/examples/mapbox-vector-tiles.css">
  <script src="v3.11.2/examples/resources/mapbox-streets-v6-style.js"></script>
  <title&gtMapbox vector tiles example</title>
 </head>
 <body>
  <!-- 
  bootstrap-combined.min.css, ol.css, layout.css,
  CSSファイルで設定されたセレクタを使用。
  -->
  <header class="navbar" role="navigation">
   <div class="container" id="navbar-inner-container">
    <!--
    <a class="navbar-brand" href="./"><img src="./resources/logo-70x70.png"> OpenLayers 3 Examples</a>
    -->
    <!-- ディレクトリ修正 -->
    <a class="navbar-brand" href="v3.11.2/examples/"><img src="v3.11.2/examples/resources/logo-70x70.png"> OpenLayers 3 Examples</a>
   </div>
  </header>
  <div class="container-fluid">
   <div class="row-fluid">
    <div class="span12">
     <div id="map" class="map"></div>
    </div>
   </div>
   <div class="row-fluid">
    <div class="span12">
     <h4 id="title">Mapbox vector tiles example</h4>
     <p id="shortdesc">Example of a Mapbox vector tiles
       map  </p>
     <div id="docs"><p>A simple vector tiles map. 
      <strong>Note</strong>: Make sure to get your own 
      Mapbox API key when using this example. No map will be 
      visible when the API key has expired.</p>
     </div>
     <div id="tags">simple, mapbox, vector, tiles</div>
     <div id="api-links">Related API documentation: 
      <ul class="inline">
       <li>
        <!-- <a href="../apidoc/ol.Attribution.html" title="API documentation for ol.Attribution">ol.Attribution</a> -->
        <a href="v3.11.2/apidoc/ol.Attribution.html" title="API documentation for ol.Attribution">ol.Attribution</a>
       </li>,
       <li>
       <!-- <a href="../apidoc/ol.Map.html" title="API documentation for ol.Map">ol.Map</a> -->
        <a href="v3.11.2/apidoc/ol.Map.html" title="API documentation for ol.Map">ol.Map</a>
       </li>,
       <li>
       <!-- <a href="../apidoc/ol.View.html" title="API documentation for ol.View">ol.View</a> -->
        <a href="v3.11.2/apidoc/ol.View.html" title="API documentation for ol.View">ol.View</a>
       </li>,
       <li>
        <!-- <a href="../apidoc/ol.format.MVT.html" title="API documentation for ol.format.MVT">ol.format.MVT</a> -->
        <a href="v3.11.2/apidoc/ol.format.MVT.html" title="API documentation for ol.format.MVT">ol.format.MVT</a>
       </li>,
       <li>
        <!-- <a href="../apidoc/ol.layer.VectorTile.html" title="API documentation for ol.layer.VectorTile">ol.layer.VectorTile</a> -->
        <a href="v3.11.2/apidoc/ol.layer.VectorTile.html" title="API documentation for ol.layer.VectorTile">ol.layer.VectorTile</a>
       </li>,
       <li>
        <!-- <a href="../apidoc/ol.source.VectorTile.html" title="API documentation for ol.source.VectorTile">ol.source.VectorTile</a> -->
        <a href="v3.11.2/apidoc/ol.source.VectorTile.html" title="API documentation for ol.source.VectorTile">ol.source.VectorTile</a>
       </li>,
       <li>
        <!-- <a href="../apidoc/ol.style.Fill.html" title="API documentation for ol.style.Fill">ol.style.Fill</a> -->
        <a href="v3.11.2/apidoc/ol.style.Fill.html" title="API documentation for ol.style.Fill">ol.style.Fill</a>
       </li>,
       <li>
        <!-- <a href="../apidoc/ol.style.Icon.html" title="API documentation for ol.style.Icon">ol.style.Icon</a> -->
        <a href="v3.11.2/apidoc/ol.style.Icon.html" title="API documentation for ol.style.Icon">ol.style.Icon</a>
       </li>,
       <li>
        <!-- <a href="../apidoc/ol.style.Stroke.html" title="API documentation for ol.style.Stroke">ol.style.Stroke</a> -->
        <a href="v3.11.2/apidoc/ol.style.Stroke.html" title="API documentation for ol.style.Stroke">ol.style.Stroke</a>
       </li>,
       <li>
        <!-- <a href="../apidoc/ol.style.Style.html" title="API documentation for ol.style.Style">ol.style.Style</a> -->
        <a href="v3.11.2/apidoc/ol.style.Style.html" title="API documentation for ol.style.Style">ol.style.Style</a>
       </li>,
       <li>
        <!-- <a href="../apidoc/ol.style.Text.html" title="API documentation for ol.style.Text">ol.style.Text</a> -->
        <a href="v3.11.2/apidoc/ol.style.Text.html" title="API documentation for ol.style.Text">ol.style.Text</a>
       </li>,
      </ui>
     </div>
   </div>
  </div>
  <div class="row-fluid">
    <div id="source-controls">
     <a id="copy-button">
      <i class="fa fa-clipboard"></i> Copy
     </a>
     <a id="jsfiddle-button">
      <i class="fa fa-jsfiddle"></i> Edit
     </a>
    </div>
    <form method="POST" id="jsfiddle-form" target="_blank" action="http://jsfiddle.net/api/post/jquery/1.11.0/">
    <textarea class="hidden" name="js">
// --- 省略 ---
&lt;/html&gt;</code></pre>
   </div>
  </div>
  <script src="http://code.jquery.com/jquery-1.11.2.min.js"></script>
  <script src="http://maxcdn.bootstrapcdn.com/bootstrap/3.3.5/js/bootstrap.min.js"></script>
  <!--
  <script src="./resources/common.js"></script>
  <script src="./resources/prism/prism.min.js"></script>
  -->
  <!-- ディレクトリ修正
   CommonJS と
   prism.js
 -->
  <script src="v3.11.2/examples/resources/common.js"></script>
  <script src="v3.11.2/examples/resources/prism/prism.min.js"></script>
  <!-- 
  <script src="loader.js?id=mapbox-vector-tiles"></script>
  -->
  <!-- ファイル修正 -->  <!-- ディレクトリ修正 -->
  <script src="loader.js?id=2135-ol3ex"></script>
  </body>
</html>


COMMONJS は

COMMONJS
http://webpack.github.io/docs/commonjs.html

に、次のようにあります。

The CommonJS group defined a module format to solve JavaScript scope issues by making sure each module is executed in its own namespace.
This is achieved by forcing modules to explicitly export those variables it wants to expose to the “universe”, and also by defining those other modules required to properly work.
To achieve this CommonJS give you two tools:
the require() function, which allows to import a given module into the current scope.
the module object, which allows to export something from the current scope.

CommonJSグループは、それ自身の名前空間内で実行されている各モジュールを確認することによって、JavaScriptのスコープ問題を解決するためのモジュールフォーマットを定義しました。
これは、それが「universe(?)」に公開したい変数を明示的にエクスポートするモジュールを強制することによって、同じように、正常に動作するのに必要な他のモジュールを定義することによって、達成されます。
この CommonJS を達成するために2つのツールを与えます:
require()関数、指定したモジュールを現在のスコープにインポートすることができます。
モジュールオブジェクト、現在のスコープからエクスポートすることができます。


Prism は、

Prism
http://prismjs.com/

に、次のようにあります。

Prism is a lightweight, extensible syntax highlighter, built with modern web standards in mind. It’s a spin-off from Dabblet and is tested there daily by thousands.
Prismは、最新のWeb標準に構築されたことを考慮し軽量で拡張可能なシンタックスハイライトです。それは Dabblet からスピンオフで、何千人も日々そこで試験されています。


ZeroClipboard は

ZeroClipboard v2.x
http://zeroclipboard.org/

に、次のようにあります。

The ZeroClipboard library provides an easy way to copy text to the clipboard using an invisible Adobe Flash movie and a JavaScript interface.
ZeroClipboard ライブラリは、見えない Adobe Flash ムービーとJavaScript のインターフェイスを使用してテキストをクリップボードにコピーする簡単な方法を提供します。

Debian 8 では動作しませんでした。ボタンを右クリックしたときに flash のコンテキストメニューが表示されると動作しています。