2015年10月27日火曜日

OL3-Cesium19 14 - ol3cesium kml example 2

14-2 JavaScript ファイルの作成
「kml.js(14-ol3cesium19.js)」は、マップを表示するための JavaScript ファイルです。

OL3-Cesium API は、現在、すべて実験的(experimental)なものです。

「14-ol3cesium19.js」
var ol2d = new ol.Map({
 layers: [
  new ol.layer.Tile({
  /** ol.layer.Tile 
   * For layer sources that provide pre-rendered, tiled 
   * images in grids that are organized by zoom levels for 
   * specific resolutions. 
   * プリレンダリング(事前描画)を提供するレイヤソースのための、
   * 特定の解像度でのズームレベルによって編成されているグリッドの
   * タイルイメージ。(ol3 API)
   */
   source: new ol.source.OSM()
   /** ol.source.OSM 
    * Layer source for the OpenStreetMap tile server.
    * OpenStreetMap タイルサーバのレイヤソース。(ol3 API)
    */
  })
 ],
 controls: ol.control.defaults({
 /** controls
  * Controls initially added to the map. 
  * If not specified, ol.control.defaults() is used.
  * 初期設定で、マップに追加されたコントロール。
  * 明示されていなければ、ol.control.defaults() が使用されます。
  * (ol3 API)
  */
 /** ol.control.defaults()
  * デフォルトでは、マップに含まコントロールのセット。
  * 特に設定しない限り、これは、以下の各コントロールの
  * インスタンスを含むコレクションを返します。(ol3 API)
  * ol.control.Zoom, ol.control.Rotate, ol.control.Attribution
  */
  attributionOptions: /** @type {olx.control.AttributionOptions} */ ({
  /** @type 
   * 値のタイプ(型)の説明 - 式などで表示
   * (@use JSDoc[http://usejsdoc.org/]より)
   */
   collapsible: false // 折りたたみ
  })
 }),
 target: 'map',
 view: new ol.View({
  // スイス国内の kml データなので初期表示の中心を修正。
  // center: ol.proj.transform([25, 20], 'EPSG:4326', 'EPSG:3857'),
  center: ol.proj.transform([9, 47], 'EPSG:4326', 'EPSG:3857'),
  /** ol.proj.transform(coordinate, source, destination)
   * Transforms a coordinate from source projection to 
   * destination projection. This returns a new coordinate 
   * (and does not modify the original).
   * ソース投影から変換先投影に座標変換します。これは、新しい座標
   * を返します(オリジナルを変更しません)。(ol3 API)
   */
  // kml データの表示に時間がかかるので初期表示範囲を修正。
  // zoom: 3
  zoom: 12
 })
});
var ol3d = new olcs.OLCesium({map: ol2d});
/** new olcs.OLCesium(options)
 * map: The OpenLayers map we want to show on a Cesium scene.
 * Cesium シーンで表示したい OpenLayers マップ。
 * (OL3-Cesium API)
 */
var scene = ol3d.getCesiumScene();
/** getCesiumScene()
 * (OL3-Cesium API に説明がありませんでした。)
 */
var terrainProvider = new Cesium.CesiumTerrainProvider({
/** new CesiumTerrainProvider(options)
 * A TerrainProvider that access terrain data in a Cesium 
 * terrain format. The format is described on the Cesium 
 * wiki. 
 * セシウム地形(Cesium terrain)フォーマットの地形(terrain)
 * データにアクセスする TerrainProvider。フォーマットは、セシウ
 * ムウィキに記載されています。
 * (Cesium refdoc)
 */
 url : '//assets.agi.com/stk-terrain/world'
 /** url
  * The URL of the Cesium terrain server.
  * セシウム地形(Cesium terrain)サーバの URL。
  * (Cesium refdoc)
  */
});
scene.terrainProvider = terrainProvider;
ol3d.getDataSources().add(Cesium.KmlDataSource.load(
/** getDataSources(){Cesium.DataSourceCollection}
 * (OL3-Cesium API に説明がありませんでした。)
 */
/** KmlDataSource.load(data, options) -> Promise.
 * Creates a Promise to a new instance loaded with the 
 * provided KML data.
 * Promise を、提供された KML データと共に、挿入された新しいイン
 * スタンスに作成します。(Cesium refdoc)
 */
 'https://api3.geo.admin.ch/ogcproxy?url=' +
 'https%3A%2F%2Fdav0.bgdi.admin.ch%2Fbazl_web%2FActive_Obstacles.kmz'
));
Chromium では表示できないので、Iceweasel(Firefox)のアドレスバーに

http://localhost/~user/ol3cesiumproj/public_html/14-ol3cesium19.html

と入力して表示します。

OL3-Cesium1.9 14 - ol3cesium kml example 1

OL3-Cesium Examples
http://openlayers.org/ol3-cesium/examples/

の例をみていきます。

14 - ol3cesium kml example
「ol3cesium kml example (kml.html)」を参考に地図を表示してみます。

14-1 HTML ファイルの作成
1 NetBeans を起動します。


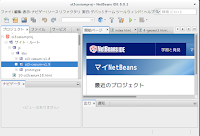
2 「プロジェクト」ペインでツリーを ol3cesiumproj -> サイト・ルート -> js -> libs -> ol3-cesium-v1.9 -> examples とクリックして展開し kml.html をダブルクリックして開きます。kml.js もダブルクリックして開きます。


3 「新規ファイル」ボタンをクリックします。

4 ステップ「1.ファイル・タイプを選択」の「カテゴリ」で「HTML5」、「ファイルタイプ」で「HTMLファイル」を選択して「次>」ボタンをクリックします。


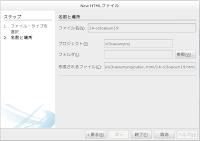
5 「new HTML ファイル」ダイアログで「ファイル名」を「13-ol3cesium18」と入力して「終了」ボタンをクリックします。


保存フォルダを変更するときは、「フォルダ」右の「参照」ボタンをクリックして「フォルダを参照」で「ol3cesiumproj-サイト・ルート」をクリックして選択し「フォルダを選択」ボタンをクリックします。


6 「kml.html」の内容をコピーして「14-ol3cesium19.html」に貼り付け、修正します。

7 同じように、「新規ファイル」ボタンをクリックし、ステップ「1.ファイル・タイプを選択」の「カテゴリ」で「HTML5」、「ファイルタイプ」で「JavaScriptファイル」をクリックして選択し「次>」ボタンをクリック。「ファイル名」を「14-ol3cesium19」と入力して「終了」ボタンをクリック。「kml.js」の内容をコピーして貼り付け、修正します。


「index.html」
<html>
 <head>
  <title>TODO supply a title</title>
  <meta charset="UTF-8">
  <meta name="viewport" content="width=device-width, initial-scale=1.0">
 </head>
 <body>
  <div>TODO write content</div>
  <div><a href="./3-ol3cesium17.html">3-ol3cesium17.html</a></div>
  <div><a href="./4-ol3cesium17.html">4-ol3cesium17.html</a></div>
  <div><a href="./5-ol3cesium17.html">5-ol3cesium17.html</a></div>
  <div><a href="./6-ol3cesium17.html">6-ol3cesium17.html</a></div>
  <div><a href="./7-ol3cesium17.html">7-ol3cesium17.html</a></div>
  <div><a href="./8-ol3cesium17.html">8-ol3cesium17.html</a></div>
  <div><a href="./9-ol3cesium17.html">9-ol3cesium17.html</a></div>
  <div><a href="./10-ol3cesium17.html">10-ol3cesium17.html</a></div>
  <div><a href="./11-ol3cesium17.html">11-ol3cesium17.html</a></div>
  <div><a href="./12-ol3cesium17.html">12-ol3cesium17.html</a></div>
  <div><a href="./13-ol3cesium18.html">13-ol3cesium18.html</a></div>
  <div><a href="./14-ol3cesium19.html">14-ol3cesium19.html</a></div>
 </body>
</html>


「14-ol3cesium19.html」
<?xml version='1.0' encoding='UTF-8'?>
<!DOCTYPE HTML>
<html xmlns="http://www.w3.org/1999/xhtml" xml:lang="en" lang="en">
 <head>
  <meta http-equiv="Content-Type" content="text/html; charset=utf-8" />
  <meta name="robots" content="index, all" />
  <title>ol3cesium kml example</title>
  <!-- ディレクトリ修正
  <link rel="stylesheet" href="../ol3/css/ol.css" type="text/css">
  -->
  <link rel="stylesheet" href="./js/libs/ol3-cesium-v1.9/ol3/css/ol.css" type="text/css">
 </head>
 <body>
  <div id="map" style="width:600px;height:400px;"></div>
  <input type="button" value="Enable/disable" onclick="javascript:ol3d.setEnabled(!ol3d.getEnabled())" />
  <!-- ディレクトリ修正
  <script src="../ol3/ol-debug.js"></script>
  <script src="../Cesium/Cesium.js"></script>
  <script src="../ol3cesium.js"></script>
  -->
  <script src="./js/libs/ol3-cesium-v1.9/ol3/ol-debug.js"></script>
  <script src="./js/libs/ol3-cesium-v1.9/Cesium/Cesium.js"></script>
  <script src="./js/libs/ol3-cesium-v1.9/ol3cesium.js"></script>
  <!-- <script src="kml.js"></script> -->
  <script src="14-ol3cesium19.js"></script>
 </body>
</html>

OL3-Cesium v1.9 がリリースされました

OL3-Cesium v1.9 がリリースされました
2015.10.22 に OL3-Cesium v1.9 がリリースされました。

ol3-cesium/CHANGES.md at master - openlayers/ol3-cesium GitHub
(https://github.com/openlayers/ol3-cesium/blob/master/CHANGES.md)より

Changelog
v1.9 - 2015-10-22

● Breaking changes
○ Port to OL 3.10.1, remove saturation, gamma and hue functions.
○ Change olcs.AbstractSynchronizer.prototype.createSingleCounterpart to return an array of counterparts instead of a unique object. This allows one OL3 layer to be transformed in several Cesium layers.
○ Rename olcs.AbstractSynchronizer.prototype.createSingleCounterpart to olcs.AbstractSynchronizer.prototype.createSingleLayerCounterparts.
○ Rename olcs.RasterSynchronizer.prototype.convertLayerToCesiumImagery to olcs.RasterSynchronizer.prototype.convertLayerToCesiumImageries.

● 重大な変更
○ OL3.10.1 にポート、彩度、ガンマ、色相の機能を削除します。
○ 固有のオブジェクトの替りに、対応の配列を返すために olcs.AbstractSynchronizer.prototype.createSingleCounterpart を変更します。これは、1つの OL3 レイヤをいくつかの Cesium(セシウム)レイヤに変換することを可能にします。
○ olcs.AbstractSynchronizer.prototype.createSingleCounterpart を olcs.AbstractSynchronizer.prototype.createSingleLayerCounterparts に名前を変更します。
○ olcs.RasterSynchronizer.prototype.convertLayerToCesiumImagery を olcs.RasterSynchronizer.prototype.convertLayerToCesiumImageriesに名前を変更します。

● Changes
○ Add the experimental method olcs.OLCesium.enableAutoRenderLoop to stop rendering the globe when idle. This is based on work from Kevin Ring.
○ Port to Cesium 1.14.
○ The olcs.AbstractSynchronizer now tries to synchronize the layer groups. Only if null is returned will it synchronize each of its children. This allows more synchronization strategies in user applications.

● 変更
○ アイドル時、地球のレンダリングを停止するための実験メソッド olcs.OLCesium.enableAutoRenderLoop を追加します。これは、ケビン・リングからの動作に基づいています。
○ セシウム1.14にポート。
○ olcs.AbstractSynchronizer は、現在、レイヤグループを同期しようとします。nullは返される場合だけ、それがその子のそれぞれを同期させます。これは、ユーザアプリケーションで複数の同期ストラテジを可能にします。

2015年10月18日日曜日

OL3-Cesium 13 - ol3cesium lazy initialization 2

13-2 JavaScript ファイルの作成
「lazy.js(13-ol3cesium18.js)」は、マップを表示するための JavaScript ファイルです。

OL3-Cesium API は、現在、すべて実験的(experimental)なものです。

「13-ol3cesium18.js」
var ol2d = new ol.Map({
 layers: [
  new ol.layer.Tile({
  /** ol.layer.Tile 
   * For layer sources that provide pre-rendered, tiled 
   * images in grids that are organized by zoom levels for 
   * specific resolutions. 
   * プリレンダリング(事前描画)を提供するレイヤソースのための、
   * 特定の解像度でのズームレベルによって編成されているグリッドの
   * タイルイメージ。(ol3 API)
   */
   source: new ol.source.OSM()
   /** ol.source.OSM 
    * Layer source for the OpenStreetMap tile server.
    * OpenStreetMap タイルサーバのレイヤソース。(ol3 API)
    */
  })
 ],
 controls: ol.control.defaults({
 /** controls
  * Controls initially added to the map. 
  * If not specified, ol.control.defaults() is used.
  * 初期設定で、マップに追加されたコントロール。
  * 明示されていなければ、ol.control.defaults() が使用されます。
  * (ol3 API)
  */
 /** ol.control.defaults()
  * デフォルトでは、マップに含まコントロールのセット。
  * 特に設定しない限り、これは、以下の各コントロールの
  * インスタンスを含むコレクションを返します。(ol3 API)
  * ol.control.Zoom, ol.control.Rotate, ol.control.Attribution
  */
  attributionOptions: /** @type {olx.control.AttributionOptions} */ ({
  /** @type 
   * 値のタイプ(型)の説明 - 式などで表示
   * (@use JSDoc[http://usejsdoc.org/]より)
   */
   collapsible: false // 折りたたみ
  })
 }),
 target: 'map',
 view: new ol.View({
  center: ol.proj.transform([25, 20], 'EPSG:4326', 'EPSG:3857'),
  /** ol.proj.transform(coordinate, source, destination)
   * Transforms a coordinate from source projection to 
   * destination projection. This returns a new coordinate 
   * (and does not modify the original).
   * ソース投影から変換先投影に座標変換します。これは、新しい座標
   * を返します(オリジナルを変更しません)。(ol3 API)
   */
  zoom: 3
 })
});

var ol3d;

function _doToggle() {
 ol3d.setEnabled(!ol3d.getEnabled());
 /** setEnabled(enable)
  * Enables/disables the Cesium. This modifies the 
  * visibility style of the container element.
  * セシウムを有効または無効にします。これは、コンテナ要素の可視
  * 性スタイルを変更します。
  * (OL3-Cesium API)
  */
 /** getEnabled()
  * (OL3-Cesium API に説明がありませんでした。)
  */
}
function toggle3D() {
 if (!ol3d) {
  var s = document.createElement("script");
  /** document.createElement
   * 指定の要素名の要素を生成します。
   * (MDN[https://developer.mozilla.org/ja/docs/Web/
   * API/document.createElement)
   */
  s.type = "text/javascript";
  // s.src = "../Cesium/Cesium.js";
  s.src = "./js/libs/ol3-cesium-v1.8/Cesium/Cesium.js";
  console.log('loading Cesium...');
  s.onload = function() {
  /** window.onload
   * window の load イベントに対応するイベントハンドラです。
   * (MDN[https://developer.mozilla.org/ja/docs/Web/API/
   * GlobalEventHandlers/onload])
   */
   init3D();
   _doToggle();
  };
  document.body.appendChild(s);
  /** Node.appendChild
   * 特定の親ノードの子ノードリストの末尾にノードを追加します。
   * 追加しようとしたノードが既に存在していたら、それは現在の
   * 親ノードから除かれ、新しい親ノードに追加されます。
   * (MDN[https://developer.mozilla.org/ja/docs/Web/
   * API/Node.appendChild])
   */
 } else {
  _doToggle();
 }
}
function init3D() {
 ol3d = new olcs.OLCesium({map: ol2d});
 /** new olcs.OLCesium(options)
  * map: The OpenLayers map we want to show on a Cesium 
  * scene.
  * Cesium シーンで表示したい OpenLayers マップ。
  * (OL3-Cesium API)
  */
 var scene = ol3d.getCesiumScene();
 /** getCesiumScene()
  * (OL3-Cesium API に説明がありませんでした。)
  */
 var terrainProvider = new Cesium.CesiumTerrainProvider({
 /** new CesiumTerrainProvider(options)
  * A TerrainProvider that access terrain data in a Cesium 
  * terrain format. The format is described on the Cesium 
  * wiki. 
  * セシウム地形(Cesium terrain)フォーマットの地形(terrain)
  * データにアクセスする TerrainProvider。フォーマットは、セシウ
  * ムウィキに記載されています。
  * (Cesium refdoc)
  */
  // url : '//cesiumjs.org/stk-terrain/tilesets/world/tiles'
  // 2015.10.2 変更
  url : '//assets.agi.com/stk-terrain/world'
  /** url
   * The URL of the Cesium terrain server.
   * セシウム地形(Cesium terrain)サーバの URL。
   * (Cesium refdoc)
   */
 });
 scene.terrainProvider = terrainProvider;
}
Chromium では表示できないので、Iceweasel(Firefox)のアドレスバーに

http://localhost/~user/ol3cesiumproj/public_html/13-ol3cesium18.html

と入力して表示します。

OL3-Cesium 13 - ol3cesium lazy initialization 1

OL3-Cesium Examples
http://openlayers.org/ol3-cesium/examples/

の例をみていきます。

13 - ol3cesium lazy initialization
「ol3cesium lazy initialization(lazy.html)」を参考に地図を表示してみます。
説明に次のようにあります。

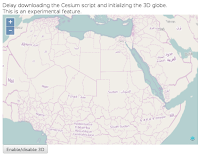
Delay downloading the Cesium script and initializing the 3D globe.
This is an experimental feature.セシウムのスクリプトをダウンロードしと 3D 地球儀の初期化を遅らせます。
これは実験的な機能です。

13-1 HTML ファイルの作成
1 NetBeans を起動します。


2 「プロジェクト」ペインでツリーを ol3cesiumproj -> サイト・ルート -> js -> libs -> ol3-cesium-v1.8 -> examples とクリックして展開し lazy.html をダブルクリックして開きます。lazy.js もダブルクリックして開きます。


3 「新規ファイル」ボタンをクリックします。

4 ステップ「1.ファイル・タイプを選択」の「カテゴリ」で「HTML5」、「ファイルタイプ」で「HTMLファイル」を選択して「次>」ボタンをクリックします。


5 「new HTML ファイル」ダイアログで「ファイル名」を「13-ol3cesium18」と入力して「終了」ボタンをクリックします。


保存フォルダを変更するときは、「フォルダ」右の「参照」ボタンをクリックして「フォルダを参照」で「ol3cesiumproj-サイト・ルート」をクリックして選択し「フォルダを選択」ボタンをクリックします。


6 「lazy.html」の内容をコピーして「13-ol3cesium18.html」に貼り付け、修正します。

7 同じように、「新規ファイル」ボタンをクリックし、ステップ「1.ファイル・タイプを選択」の「カテゴリ」で「HTML5」、「ファイルタイプ」で「JavaScriptファイル」をクリックして選択し「次>」ボタンをクリック。「ファイル名」を「13-ol3cesium18」と入力して「終了」ボタンをクリック。「lazy.js」の内容をコピーして貼り付け、修正します。


「index.html」
<html>
 <head>
  <title>TODO supply a title</title>
  <meta charset="UTF-8">
  <meta name="viewport" content="width=device-width, initial-scale=1.0">
 </head>
 <body>
  <div>TODO write content</div>
  <div><a href="./3-ol3cesium17.html">3-ol3cesium17.html</a></div>
  <div><a href="./4-ol3cesium17.html">4-ol3cesium17.html</a></div>
  <div><a href="./5-ol3cesium17.html">5-ol3cesium17.html</a></div>
  <div><a href="./6-ol3cesium17.html">6-ol3cesium17.html</a></div>
  <div><a href="./7-ol3cesium17.html">7-ol3cesium17.html</a></div>
  <div><a href="./8-ol3cesium17.html">8-ol3cesium17.html</a></div>
  <div><a href="./9-ol3cesium17.html">9-ol3cesium17.html</a></div>
  <div><a href="./10-ol3cesium17.html">10-ol3cesium17.html</a></div>
  <div><a href="./11-ol3cesium17.html">11-ol3cesium17.html</a></div>
  <div><a href="./12-ol3cesium17.html">12-ol3cesium17.html</a></div>
  <div><a href="./13-ol3cesium18.html">13-ol3cesium18.html</a></div>
 </body>
</html>


「13-ol3cesium18.html」
<?xml version='1.0' encoding='UTF-8'?>
<!DOCTYPE HTML>
<html xmlns="http://www.w3.org/1999/xhtml" xml:lang="en" lang="en">
 <head>
  <meta http-equiv="Content-Type" content="text/html; charset=utf-8" />
  <meta name="robots" content="index, all" />
  <title>ol3cesium lazy initialization</title>
  <!-- ディレクトリ修正
  <link rel="stylesheet" href="../ol3/css/ol.css" type="text/css">
  -->
  <link rel="stylesheet" href="./js/libs/ol3-cesium-v1.8/ol3/css/ol.css" type="text/css">
 </head>
 <body>
  <div>Delay downloading the Cesium script and initializing 
   the 3D globe.</div>
  <div>This is an experimental feature.</div>
  <div id="map" style="width:600px;height:400px;float:left;"></div>
  <input type="button" value="Enable/disable 3D" onclick="javascript:toggle3D()" />
  <!-- ディレクトリ修正
  <script src="../ol3/ol-debug.js"></script>
  <script src="../Cesium/Cesium.js"></script>
  <script src="../ol3cesium.js"></script>
  -->
  <script src="./js/libs/ol3-cesium-v1.8/ol3/ol-debug.js"></script>
  <script src="./js/libs/ol3-cesium-v1.8/Cesium/Cesium.js"></script>
  <script src="./js/libs/ol3-cesium-v1.8/ol3cesium.js"></script>
  <!-- <script src="lazy.js"></script> -->
  <script src="13-ol3cesium18.js"></script>
 </body>
</html>

OL3-Cesium 12 - ol3cesium synthetic vector layer example using several layers 2

12-2 JavaScript ファイルの作成
「synthvectors_batch.js(12-ol3cesium17.js)」は、マップを表示するための JavaScript ファイルです。

OL3-Cesium API は、現在、すべて実験的(experimental)なものです。

「12-ol3cesium18.js」
var total = 0;
var created = 0;
var added = 0;
var vectorLayers = [];
var addFeatures = function() {
 var then = Date.now();
 /** Date.now()
  * UTC(協定世界時)での 1970 年 1 月 1 日 00 時 00 分 00 秒 
  * から現在までの経過ミリ秒を数値で返します。
  * (MDN[https://developer.mozilla.org/ja/docs/Web/
  * JavaScript/Reference/Global_Objects/Date/now])
  */
 var count = 1000;
 var features = [];
 var e = 18000000;
 for (var i = 0; i < count; ++i) {
  var feature = new ol.Feature({
   /** ol.Feature
   * A vector object for geographic features with a geometry 
   * and other attribute properties, similar to the features 
   * in vector file formats like GeoJSON.
   * GeoJSONのようなベクトルファイル形式のフィーチャに類似した、
   * ジオメトリとその他の属性プロパティを持つ地物フィーチャのため
   * のベクトルオブジェクト。(ol3 API)
   */
   geometry: new ol.geom.Point([
   /** ol.geom.Point
    * Point geometry.(ol3 API)
    */
    2 * e * Math.random() - e,
    /** Math.random()
     * The Math.random() function returns a floating-point, 
     * pseudo-random number in the range [0, 1) that is, 
     * from 0 (inclusive) up to but not including 1 
     * (exclusive), which you can then scale to your 
     * desired range. The implementation selects the 
     * initial seed to the random number generation 
     * algorithm; it cannot be chosen or reset by the 
     * user.
     * Math.random() 関数は浮動小数点を返し、0 と 1 の範囲の
     * 擬似乱数、すなわち 0 以上 1 未満、で、任意の範囲に合わせ
     * ることができます。インプリメンテーションは、乱数発生アル
     * ゴリズムのためにイニシャルシードを選択しますが、ユーザが
     * 選んだりリセットできません。
     * (MDN[https://developer.mozilla.org/en-US/docs/Web/
     * JavaScript/Reference/Global_Objects/Math/random])
     */
    2 * e * Math.random() - e,
    e * Math.random()
   ])
  });
  var style = [new ol.style.Style({
  /** ol.style.Style 
   * Base class for vector feature rendering styles.
   * ベクタフィーチャがスタイルを描画するための基本クラス。
   * (ol3 API[説明は Stable Only のチェックを外すと表示])
   */
   image: new ol.style.Circle({
   /** ol.style.Circle
    * Set circle style for vector features.
    * ベクタフィーチャの円のスタイルを設定。(ol3 API)
    */
    radius: 2,
    fill: new ol.style.Fill({color: [
    /** ol.style.Fill 
     * Set fill style for vector features.
     * ベクタフィーチャの塗りつぶしスタイルを設定。(ol3 API)
     */
     Math.random() * 255,
     Math.random() * 255,
     Math.random() * 255,
     Math.random()
    ]})
   })
  })];
  feature.setStyle(style);
  /** setStyle(style)
   * Set the style for the feature. This can be a single 
   * style object, an array of styles, or a function that 
   * takes a resolution and returns an array of styles. If 
   * it is null the feature has no style (a null style).
   * フィーチャのスタイルを設定します。これは、単一のスタイルオ
   * ブジェクト、スタイルの配列、または解像度をとり、スタイルの
   * 配列を返す関数とすることができます。null の場合、フィーチャ
   * は、スタイルなし(null のスタイル)を持ちます。(ol3 API)
   */
  feature.setId(e * Math.random());
  /** setId(id)
   * Set the feature id. The feature id is considered stable 
   * and may be used when requesting features or comparing 
   * identifiers returned from a remote source. The feature 
   * id can be used with the ol.source.Vector#getFeatureById 
   * method.
   * フィーチャ id を設定します。フィーチャ id は、安定したとみ
   * なされ、そして、リモートソースからフィーチャを要求している
   * か、または、返された識別しを比較しているとき使用されます。
   * フィーチャ id は、ol.source.Vector の getFeatureById メ
   * ソッドと共に使用されます。(ol3 API)
   */
  features.push(feature);
  /** push(elem)
   * Insert the provided element at the end of the 
   * collection.
   * コレクションの最後に供給されたエレメントに挿入します。
   * Name: elem, Type: T, Description: Element
   * (ol3 API)
   */
 }
 var now = Date.now();
 created = now - then;
 then = now;
 var vectorSource = new ol.source.Vector({});
 /** ol.source.Vector 
  * Provides a source of features for vector layers.
  * ベクタレイヤのフィーチャのソースを提供します。(ol3 API)
  */
 var vector = new ol.layer.Vector({
 /** ol.layer.Vector
  * Vector data that is rendered client-side.
  * クライアント側で描画されたベクタデータ。(ol3 API)
  */
  source: vectorSource,
 });
 vectorSource.addFeatures(features);
 /** addFeature(feature)
  * Add a single features to the source.If you want to add a 
  * batch of features at once, call source.addFeatures() 
  * instead.
  * 単一フィーチャをソースに追加します。もし即座にフィーチャの
  * バッチを追加したいなら、替りに source.addFeatures() を呼び
  * 出します。(ol3 API)
  */
 map.addLayer(vector);
 /** addLayer(layer)
  * Adds the given layer to the top of this map. If you 
  * want to add a layer elsewhere in the stack, use 
  * getLayers() and the methods available on ol.Collection.
  * 与えられたレイヤをこのマップの一番上に追加します。あなたは、
  * スタックの他の箇所にレイヤを追加したい場合は、getLayers()と
  * ol.Collection で使用可能なメソッドを使用します。(ol3 API)
  */
 vectorLayers.push(vector);
 now = Date.now();
 added = now - then;
 total += count;
 document.getElementById('total').innerHTML = total;
 /** element.innerHTML
  * innerHTML は、与えられた要素に含まれる全てのマークアップ
  * と内容を設定または取得します。
  * (MDN[https://developer.mozilla.org/ja/docs/Web/
  * API/element.innerHTML])
  */
 document.getElementById('created').innerHTML = 'Features created in ' + created + 'ms.';
 document.getElementById('added').innerHTML = 'Features added in ' + added + 'ms.';
};
var tile = new ol.layer.Tile({
/** ol.layer.Tile 
 * For layer sources that provide pre-rendered, tiled 
 * images in grids that are organized by zoom levels for 
 * specific resolutions. 
 * プリレンダリング(事前描画)を提供するレイヤソースのための、
 * 特定の解像度でのズームレベルによって編成されているグリッドの
 * タイルイメージ。(ol3 API)
 */
 source: new ol.source.TileWMS({
 /** ol.source.TileWMS
  * Layer source for tile data from WMS servers.
  * WMS サーバからのタイルデータのレイヤソース。
  * (ol3 API)
  */
  url: 'http://demo.boundlessgeo.com/geoserver/wms',
  params: {
   'LAYERS': 'ne:NE1_HR_LC_SR_W_DR'
  }
 })
});
var map = new ol.Map({
 layers: [tile],
 target: 'map2d',
 view: new ol.View({
  center: [0, 0],
  zoom: 2
 })
});
var ol3d = new olcs.OLCesium({map: map});
/** new olcs.OLCesium(options)
 * map: The OpenLayers map we want to show on a Cesium scene.
 * Cesium シーンで表示したい OpenLayers マップ。
 * (OL3-Cesium API)
 */
var scene = ol3d.getCesiumScene();
/** getCesiumScene()
 * (OL3-Cesium API に説明がありませんでした。)
 */
var terrainProvider = new Cesium.CesiumTerrainProvider({
/** new CesiumTerrainProvider(options)
 * A TerrainProvider that access terrain data in a Cesium 
 * terrain format. The format is described on the Cesium 
 * wiki. 
 * セシウム地形(Cesium terrain)フォーマットの地形(terrain)
 * データにアクセスする TerrainProvider。フォーマットは、セシウ
 * ムウィキに記載されています。
 * (Cesium refdoc)
 */
 // url : '//cesiumjs.org/stk-terrain/tilesets/world/tiles'
 // 2015.10.2 変更
 url : '//assets.agi.com/stk-terrain/world'
 /** url
  * The URL of the Cesium terrain server.
  * セシウム地形(Cesium terrain)サーバの URL。
  * (Cesium refdoc)
  */
});
scene.terrainProvider = terrainProvider;
ol3d.setEnabled(true);
/** setEnabled(enable)
 * Enables/disables the Cesium. This modifies the visibility 
 * style of the container element.
 * セシウムを有効または無効にします。これは、コンテナ要素の可視
 * 性スタイルを変更します。
 * (OL3-Cesium API)
 */
// Show off 3D feature picking
var handler = new Cesium.ScreenSpaceEventHandler(scene.canvas);
/** new ScreenSpaceEventHandler(element)
 * Handles user input events. Custom functions can be added 
 * to be executed on when the user enters input. 
 * ユーザ input イベントを処理します。カスタム関数は、ユーザが 
 *  input を入力するときに実行されるように追加できます。
 * (Cesium refdoc)
 */
var lastPicked;
handler.setInputAction(function(movement) {
/** setInputAction(action, type, modifier)
 * Set a function to be executed on an input event. 
 * input イベントで実行される関数を設定します。
 * (Cesium refdoc)
 */
 var pickedObjects = scene.drillPick(movement.position);
 /** drillPick(windowPosition, limit)
  * Returns a list of objects, each containing a `primitive` 
  * property, for all primitives at a particular window 
  * coordinate position. Other properties may also be set 
  * depending on the type of primitive. The primitives in 
  * the list are ordered by their visual order in the scene 
  * (front to back).
  * 特定のウィンドウの座標位置で、`primitive(基本要素?)`プロ
  * パティを含む、すべてのプリミティブのためのオブジェクトのリス
  * トを返します。他のプロパティは、プリミティブの種類に応じて設
  * 定することができます。リスト内のプリミティブは、シーン(前面
  * から背面へ)での視覚的順序によって順序付けられます。 
  * (Cesium refdoc)
  */
 if (Cesium.defined(pickedObjects)) {
 /** defined(value) -> Boolean
   * Returns: Returns true if the object is defined, returns 
  * false otherwise. (Cesium refdoc)
  */
  for (i = 0; i < pickedObjects.length; ++i) {
   var picked = pickedObjects[i].primitive;
   if (picked.olFeature == lastPicked) continue;
   var carto = Cesium.Ellipsoid.WGS84.cartesianToCartographic(picked.position);
   /** Ellipsoid.WGS84
    * An Ellipsoid instance initialized to radii of (1.0, 
    * 1.0, 1.0). 
    * 半径(1.0、1.0、1.0)に初期化された楕円インスタンス。
    * (Cesium refdoc)
    */
   /** cartesianToCartographic(cartesian, result)
    * Converts the provided cartesian to cartographic 
    * representation. The cartesian is undefined at the 
    * center of the ellipsoid. 
    * 提供されたデカルトを地図製作表現にに変換します。デカルト
    * は、楕円体の中心に定義されていません。
    */
   console.log('Picked feature', picked.olFeature, ' is at ', carto);
   /** console.log
    * デバッガの Web コンソールにメッセージを出力します。
    * (MDN[https://developer.mozilla.org/ja/docs/Web/API/
    * Console/log])
    */
   lastPicked = picked.olFeature;
  }
 } else {
  lastPicked = undefined;
 }
}, Cesium.ScreenSpaceEventType.LEFT_CLICK);
/** ScreenSpaceEventType
 * This enumerated type is for classifying mouse events: 
 * down, up, click, double click, move and move while a 
 * button is held down.
 * この列挙型は、マウスイベントを分類するためのものです:ダウ
 * ン、アップ、クリック、ダブルクリック、移動、ボタンを押して
 * いる間に移動です。
 * ScreenSpaceEventType.LEFT_CLICK()
 * Represents a mouse left click event. 
 * マウスの左クリックイベントを表します。
 */
function clearFeatures() {
 vectorLayers.forEach(function(layer) {
 /** forEach(f, opt_this)
  * Iterate over each element, calling the provided callback.
  * 提供されるコールバックを呼び出して、各要素を反復処理します。
  * (ol3 API)
  */
  map.getLayers().remove(layer);
  /** getLayers()
   * Get the collection of layers associated with 
   * this map.
   * このマップと関連するレイヤのコレクションを取得します。
   * (ol3 API)
   */
  /** remove(elem)
   * Remove the first occurrence of an element from the 
   * collection.
   * コレクションから最初に出現する要素(elemnet)を削除します。
   * (ol3 API)
   */
 });
 vectorLayers.length = 0;
 total = document.getElementById('total').innerHTML = 0;
 document.getElementById('created').innerHTML = '';
 document.getElementById('added').innerHTML = '';
}
Chromium では表示できないので、Iceweasel(Firefox)のアドレスバーに

http://localhost/~user/ol3cesiumproj/public_html/12-ol3cesium18.html

と入力して表示します。

OL3-Cesium 12 - ol3cesium synthetic vector example using several layers 1

OL3-Cesium Examples
http://openlayers.org/ol3-cesium/examples/

の例をみていきます。

12 - ol3cesium synthetic vector layer example using several layers
「ol3cesium synthetic vector layer example  using several layers(synthvectors_batch.html)」を参考に地図を表示してみます。
説明に次のようにあります。

Click to add a new layer of 1000 randomly colored circles.
Other shapes or icons may be used in spite of the circles.
1000個のランダムな色の円の新しいレイヤを追加します。
他の形状やアイコンは、円にかかわらず使用することができます。


12-1 HTML ファイルの作成
1 NetBeans を起動します。


2 「プロジェクト」ペインでツリーを ol3cesiumproj -> サイト・ルート -> js -> libs -> ol3-cesium-v1.8 -> examples とクリックして展開し synthvectors_batch.html をダブルクリックして開きます。synthvectors_batch.js もダブルクリックして開きます。


3 「新規ファイル」ボタンをクリックします。

4 ステップ「1.ファイル・タイプを選択」の「カテゴリ」で「HTML5」、「ファイルタイプ」で「HTMLファイル」を選択して「次>」ボタンをクリックします。


5 「new HTML ファイル」ダイアログで「ファイル名」を「12-ol3cesium18」と入力して「終了」ボタンをクリックします。


保存フォルダを変更するときは、「フォルダ」右の「参照」ボタンをクリックして「フォルダを参照」で「ol3cesiumproj-サイト・ルート」をクリックして選択し「フォルダを選択」ボタンをクリックします。


6 「synthvectors_batch.html」の内容をコピーして「12-ol3cesium18.html」に貼り付け、修正します。

7 同じように、「新規ファイル」ボタンをクリックし、ステップ「1.ファイル・タイプを選択」の「カテゴリ」で「HTML5」、「ファイルタイプ」で「JavaScriptファイル」をクリックして選択し「次>」ボタンをクリック。「ファイル名」を「12-ol3cesium18」と入力して「終了」ボタンをクリック。「synthvectors_batch.js」の内容をコピーして貼り付け、修正します。


「index.html」
<html>
 <head>
  <title>TODO supply a title</title>
  <meta charset="UTF-8">
  <meta name="viewport" content="width=device-width, initial-scale=1.0">
 </head>
 <body>
  <div>TODO write content</div>
  <div><a href="./3-ol3cesium18.html">3-ol3cesium18.html</a></div>
  <div><a href="./4-ol3cesium18.html">4-ol3cesium18.html</a></div>
  <div><a href="./5-ol3cesium18.html">5-ol3cesium18.html</a></div>
  <div><a href="./6-ol3cesium18.html">6-ol3cesium18.html</a></div>
  <div><a href="./7-ol3cesium18.html">7-ol3cesium18.html</a></div>
  <div><a href="./8-ol3cesium18.html">8-ol3cesium18.html</a></div>
  <div><a href="./9-ol3cesium18.html">9-ol3cesium18.html</a></div>
  <div><a href="./10-ol3cesium18.html">10-ol3cesium18.html</a></div>
  <div><a href="./11-ol3cesium18.html">11-ol3cesium18.html</a></div>
  <div><a href="./12-ol3cesium18.html">12-ol3cesium18.html</a></div>
 </body>
</html>


「12-ol3cesium18.html」
<?xml version='1.0' encoding='UTF-8'?>
<!DOCTYPE HTML>
<html xmlns="http://www.w3.org/1999/xhtml" xml:lang="en" lang="en">
 <head>
  <meta http-equiv="Content-Type" content="text/html; charset=utf-8" />
  <meta name="robots" content="index, all" />
  <title>ol3cesium synthetic vector layer example using several layers</title>
  <!-- ディレクトリ修正
  <link rel="stylesheet" href="../ol3/css/ol.css" type="text/css">
  -->
  <link rel="stylesheet" href="./js/libs/ol3-cesium-v1.8/ol3/css/ol.css" type="text/css">
 </head>
 <body>
  <div id="map2d" style="width:600px;height:400px;float:left;"></div>
  <div>
   <input type="button" value="Add 1k Features" onclick="javascript:addFeatures()" />
   <span id="total"></span>
  </div>
  <div id="created"></div>
  <div id="added"></div>
  <input type="button" value="Clear" onclick="javascript:clearFeatures()" />
  <div>Click to add a new layer of 1000 randomly colored 
  circles.
  <br />Other shapes or icons may be used in spite of the 
  circles.</div>
  <!-- ディレクトリ修正
  <script src="../ol3/ol-debug.js"></script>
  <script src="../Cesium/Cesium.js"></script>
  <script src="../ol3cesium.js"></script>
  -->
  <script src="./js/libs/ol3-cesium-v1.8/ol3/ol-debug.js"></script>
  <script src="./js/libs/ol3-cesium-v1.8/Cesium/Cesium.js"></script>
  <script src="./js/libs/ol3-cesium-v1.8/ol3cesium.js"></script>
  <!-- <script src="synthvectors_batch.js"></script> -->
  <script src="12-ol3cesium18.js"></script>
 </body>
</html>

OL3-Cesium 11 - ol3cesium synthetic vector layer example 2

11-2 JavaScript ファイルの作成
「synthvectors.js(11-ol3cesium17.js)」は、マップを表示するための JavaScript ファイルです。

OL3-Cesium API は、現在、すべて実験的(experimental)なものです。

「11-ol3cesium17.js」
var total = 0;
var created = 0;
var added = 0;
var vectorSource = new ol.source.Vector({});
/** ol.source.Vector 
 * Provides a source of features for vector layers.
 * ベクタレイヤのフィーチャのソースを提供します。(ol3 API)
 */
var vector = new ol.layer.Vector({
/** ol.layer.Vector
 * Vector data that is rendered client-side.
 * クライアント側で描画されたベクタデータ。(ol3 API)
 */
 source: vectorSource,
});
var addFeatures = function() {
 var then = Date.now();
 /** Date.now()
  * UTC(協定世界時)での 1970 年 1 月 1 日 00 時 00 分 00 秒 
  * から現在までの経過ミリ秒を数値で返します。
  * (MDN[https://developer.mozilla.org/ja/docs/Web/
  * JavaScript/Reference/Global_Objects/Date/now])
  */
 var count = 1000;
 var features = [];
 var e = 18000000;
 for (var i = 0; i < count; ++i) {
  var feature = new ol.Feature({
  /** ol.Feature
   * A vector object for geographic features with a geometry 
   * and other attribute properties, similar to the features 
   * in vector file formats like GeoJSON.
   * GeoJSONのようなベクトルファイル形式のフィーチャに類似した、
   * ジオメトリとその他の属性プロパティを持つ地物フィーチャのため
   * のベクトルオブジェクト。(ol3 API)
   */
   geometry: new ol.geom.Point([
   /** ol.geom.Point
    * Point geometry.(ol3 API)
    */
    2 * e * Math.random() - e,
    /** Math.random()
     * The Math.random() function returns a floating-point, 
     * pseudo-random number in the range [0, 1) that is, 
     * from 0 (inclusive) up to but not including 1 
     * (exclusive), which you can then scale to your 
     * desired range. The implementation selects the 
     * initial seed to the random number generation 
     * algorithm; it cannot be chosen or reset by the 
     * user.
     * Math.random() 関数は浮動小数点を返し、0 と 1 の範囲の
     * 擬似乱数、すなわち 0 以上 1 未満、で、任意の範囲に合わせ
     * ることができます。インプリメンテーションは、乱数発生アル
     * ゴリズムのためにイニシャルシードを選択しますが、ユーザが
     * 選んだりリセットできません。
     * (MDN[https://developer.mozilla.org/en-US/docs/Web/
     * JavaScript/Reference/Global_Objects/Math/random])
     */
    2 * e * Math.random() - e,
    e * Math.random()
   ])
  });
  var style = [new ol.style.Style({
  /** ol.style.Style 
   * Base class for vector feature rendering styles.
   * ベクタフィーチャがスタイルを描画するための基本クラス。
   * (ol3 API[説明は Stable Only のチェックを外すと表示])
   */
   image: new ol.style.Circle({
   /** ol.style.Circle
    * Set circle style for vector features.
    * ベクタフィーチャの円のスタイルを設定。(ol3 API)
    */
    radius: 2,
    fill: new ol.style.Fill({color: [
    /** ol.style.Fill 
     * Set fill style for vector features.
     * ベクタフィーチャの塗りつぶしスタイルを設定。(ol3 API)
     */
     Math.random() * 255,
     Math.random() * 255,
     Math.random() * 255,
     Math.random()
    ]})
   })
  })];
  feature.setStyle(style);
  /** setStyle(style)
   * Set the style for the feature. This can be a single 
   * style object, an array of styles, or a function that 
   * takes a resolution and returns an array of styles. If 
   * it is null the feature has no style (a null style).
   * フィーチャのスタイルを設定します。これは、単一のスタイルオ
   * ブジェクト、スタイルの配列、または解像度をとり、スタイルの
   * 配列を返す関数とすることができます。null の場合、フィーチャ
   * は、スタイルなし(null のスタイル)を持ちます。(ol3 API)
   */
  feature.setId(e * Math.random());
  /** setId(id)
   * Set the feature id. The feature id is considered stable 
   * and may be used when requesting features or comparing 
   * identifiers returned from a remote source. The feature 
   * id can be used with the ol.source.Vector#getFeatureById 
   * method.
   * フィーチャ id を設定します。フィーチャ id は、安定したとみな
   * され、そして、リモートソースからフィーチャを要求しているか、
   * または、返された識別しを比較しているとき使用されます。フィー
   * チャ id は、ol.source.Vector の getFeatureById メソッドと
   * 共に使用されます。(ol3 API)
   */
  features.push(feature);
  /** push(elem)
   * Insert the provided element at the end of the 
   * collection.
   * コレクションの最後に供給されたエレメントに挿入します。
   * Name: elem, Type: T, Description: Element
   * (ol3 API)
   */
 }

 var now = Date.now();
 created = now - then;
 then = now;
 vectorSource.addFeatures(features);
 /** addFeature(feature)
  * Add a single features to the source.If you want to add a 
  * batch of features at once, call source.addFeatures() 
  * instead.
  * 単一フィーチャをソースに追加します。もし即座にフィーチャの
  * バッチを追加したいなら、替りに source.addFeatures() を呼び
  * 出します。(ol3 API)
  */
 now = Date.now();
 added = now - then;
 total += count;
 document.getElementById('total').innerHTML = total;
 /** element.innerHTML
  * innerHTML は、与えられた要素に含まれる全てのマークアップ
  * と内容を設定または取得します。
  * (MDN[https://developer.mozilla.org/ja/docs/Web/
  * API/element.innerHTML])
  */
 document.getElementById('created').innerHTML = 'Features created in ' + created + 'ms.';
 document.getElementById('added').innerHTML = 'Features added in ' + added + 'ms.';
};
var tile = new ol.layer.Tile({
/** ol.layer.Tile 
 * For layer sources that provide pre-rendered, tiled images 
 * in grids that are organized by zoom levels for specific 
 * resolutions. 
 * プリレンダリング(事前描画)を提供するレイヤソースのための、
 * 特定の解像度でのズームレベルによって編成されているグリッドの
 * タイルイメージ。(ol3 API)
 */
 source: new ol.source.TileWMS({
 /** ol.source.TileWMS
  * Layer source for tile data from WMS servers.
  * WMS サーバからのタイルデータのレイヤソース。
  * (ol3 API)
  */
  url: 'http://demo.boundlessgeo.com/geoserver/wms',
  params: {
   'LAYERS': 'ne:NE1_HR_LC_SR_W_DR'
  }
 })
});
var map = new ol.Map({
 layers: [tile, vector],
 target: 'map2d',
 view: new ol.View({
  center: [0, 0],
  zoom: 2
 })
});
var ol3d = new olcs.OLCesium({map: map});
/** new olcs.OLCesium(options)
 * map: The OpenLayers map we want to show on a Cesium scene.
 * Cesium シーンで表示したい OpenLayers マップ。
 * (OL3-Cesium API)
 */
var scene = ol3d.getCesiumScene();
/** getCesiumScene()
 * (OL3-Cesium API に説明がありませんでした。)
 */
var terrainProvider = new Cesium.CesiumTerrainProvider({
/** new CesiumTerrainProvider(options)
 * A TerrainProvider that access terrain data in a Cesium 
 * terrain format. The format is described on the Cesium 
 * wiki. 
 * セシウム地形(Cesium terrain)フォーマットの地形(terrain)
 * データにアクセスする TerrainProvider。フォーマットは、セシウ
 * ムウィキに記載されています。
 * (Cesium refdoc)
 */
 // url : '//cesiumjs.org/stk-terrain/tilesets/world/tiles'
 // 2015.10.2 変更
 url : '//assets.agi.com/stk-terrain/world'
 /** url
  * The URL of the Cesium terrain server.
  * セシウム地形(Cesium terrain)サーバの URL。
  * (Cesium refdoc)
  */
});
scene.terrainProvider = terrainProvider;
ol3d.setEnabled(true);
/** setEnabled(enable)
 * Enables/disables the Cesium. This modifies the visibility 
 * style of the container element.
 * セシウムを有効または無効にします。これは、コンテナ要素の可視
 * 性スタイルを変更します。
 * (OL3-Cesium API)
 */
// Show off 3D feature picking
var handler = new Cesium.ScreenSpaceEventHandler(scene.canvas);
/** new ScreenSpaceEventHandler(element)
 * Handles user input events. Custom functions can be added 
 * to be executed on when the user enters input. 
 * ユーザ input イベントを処理します。カスタム関数は、ユーザが 
 *  input を入力するときに実行されるように追加できます。
 * (Cesium refdoc)
 */
var lastPicked;
handler.setInputAction(function(movement) {
/** setInputAction(action, type, modifier)
 * Set a function to be executed on an input event. 
 * input イベントで実行される関数を設定します。
 * (Cesium refdoc)
 */
 var pickedObjects = scene.drillPick(movement.position);
 /** drillPick(windowPosition, limit)
  * Returns a list of objects, each containing a `primitive` 
  * property, for all primitives at a particular window 
  * coordinate position. Other properties may also be set 
  * depending on the type of primitive. The primitives in 
  * the list are ordered by their visual order in the scene 
  * (front to back).
  * 特定のウィンドウの座標位置で、`primitive(基本要素?)`プロ
  * パティを含む、すべてのプリミティブのためのオブジェクトのリス
  * トを返します。他のプロパティは、プリミティブの種類に応じて設
  * 定することができます。リスト内のプリミティブは、シーン(前面
  * から背面へ)での視覚的順序によって順序付けられます。 
  * (Cesium refdoc)
  */
 if (Cesium.defined(pickedObjects)) {
 /** defined(value) -> Boolean
  * Returns: Returns true if the object is defined, returns 
  * false otherwise. (Cesium refdoc)
  */
  for (i = 0; i < pickedObjects.length; ++i) {
   var picked = pickedObjects[i].primitive;
   if (picked.olFeature == lastPicked) continue;
   var carto = Cesium.Ellipsoid.WGS84.cartesianToCartographic(picked.position);
   /** Ellipsoid.WGS84
    * An Ellipsoid instance initialized to radii of (1.0, 
    * 1.0, 1.0). 
    * 半径(1.0、1.0、1.0)に初期化された楕円インスタンス。
    * (Cesium refdoc)
    */
   /** cartesianToCartographic(cartesian, result)
    * Converts the provided cartesian to cartographic 
    * representation. The cartesian is undefined at the 
    * center of the ellipsoid. 
    * 提供されたデカルトを地図製作表現にに変換します。デカルト
    * は、楕円体の中心に定義されていません。
    */
   console.log('Picked feature', picked.olFeature, ' is at ', carto);
   /** console.log
    * デバッガの Web コンソールにメッセージを出力します。
    * (MDN[https://developer.mozilla.org/ja/docs/Web/API/
    * Console/log])
    */
   lastPicked = picked.olFeature;
  }
 } else {
  lastPicked = undefined;
 }
}, Cesium.ScreenSpaceEventType.LEFT_CLICK);
/** ScreenSpaceEventType
 * This enumerated type is for classifying mouse events: 
 * down, up, click, double click, move and move while a 
 * button is held down.
 * この列挙型は、マウスイベントを分類するためのものです:ダウ
 * ン、アップ、クリック、ダブルクリック、移動、ボタンを押して
 * いる間に移動です。
 * ScreenSpaceEventType.LEFT_CLICK()
 * Represents a mouse left click event. 
 * マウスの左クリックイベントを表します。
 */
function clearFeatures() {
 vectorSource.clear();
 /** clear(opt_fast)
  * Remove all features from the source.
  * ソースからすべてのフィーチャを削除します。
  * (ol3 API)
  */
 total = document.getElementById('total').innerHTML = 0;
}
Chromium では表示できないので、Iceweasel(Firefox)のアドレスバーに

http://localhost/~user/ol3cesiumproj/public_html/11-ol3cesium18.html

と入力して表示します。

OL3-Cesium 11 - ol3cesium synthetic vector layer example 1

OL3-Cesium Examples
http://openlayers.org/ol3-cesium/examples/

の例をみていきます。

11 - ol3cesium synthetic vector layer example
「ol3cesium synthetic vector layer example (synthvectors.html)」を参考に地図を表示してみます。

11-1 HTML ファイルの作成
1 NetBeans を起動します。


2 「プロジェクト」ペインでツリーを ol3cesiumproj -> サイト・ルート -> js -> libs -> ol3-cesium-v1.8 -> examples とクリックして展開し synthvectors.html をダブルクリックして開きます。synthvectors.js もダブルクリックして開きます。


3 「新規ファイル」ボタンをクリックします。

4 ステップ「1.ファイル・タイプを選択」の「カテゴリ」で「HTML5」、「ファイルタイプ」で「HTMLファイル」を選択して「次>」ボタンをクリックします。


5 「new HTML ファイル」ダイアログで「ファイル名」を「11-ol3cesium18」と入力して「終了」ボタンをクリックします。


保存フォルダを変更するときは、「フォルダ」右の「参照」ボタンをクリックして「フォルダを参照」で「ol3cesiumproj-サイト・ルート」をクリックして選択し「フォルダを選択」ボタンをクリックします。


6 「synthvectors.html」の内容をコピーして「11-ol3cesium17.html」に貼り付け、修正します。

7 同じように、「新規ファイル」ボタンをクリックし、ステップ「1.ファイル・タイプを選択」の「カテゴリ」で「HTML5」、「ファイルタイプ」で「JavaScriptファイル」をクリックして選択し「次>」ボタンをクリック。「ファイル名」を「11-ol3cesium18」と入力して「終了」ボタンをクリック。「synthvectors.js」の内容をコピーして貼り付け、修正します。


「index.html」
<html>
 <head>
  <title>TODO supply a title</title>
  <meta charset="UTF-8">
  <meta name="viewport" content="width=device-width, initial-scale=1.0">
 </head>
 <body>
  <div>TODO write content</div>
  <div><a href="./3-ol3cesium18.html">3-ol3cesium18.html</a></div>
  <div><a href="./4-ol3cesium18.html">4-ol3cesium18.html</a></div>
  <div><a href="./5-ol3cesium18.html">5-ol3cesium18.html</a></div>
  <div><a href="./6-ol3cesium18.html">6-ol3cesium18.html</a></div>
  <div><a href="./7-ol3cesium18.html">7-ol3cesium18.html</a></div>
  <div><a href="./8-ol3cesium18.html">8-ol3cesium18.html</a></div>
  <div><a href="./9-ol3cesium18.html">9-ol3cesium18.html</a></div>
  <div><a href="./10-ol3cesium18.html">10-ol3cesium18.html</a></div>
  <div><a href="./11-ol3cesium18.html">11-ol3cesium18.html</a></div>
 </body>
</html>


「11-ol3cesium18.html」
<?xml version='1.0' encoding='UTF-8'?>
<!DOCTYPE HTML>
<html xmlns="http://www.w3.org/1999/xhtml" xml:lang="en" lang="en">
 <head>
  <meta http-equiv="Content-Type" content="text/html; charset=utf-8" />
  <meta name="robots" content="index, all" />
  <title>ol3cesium synthetic vector layer example</title>
  <!-- ディレクトリ修正
  <link rel="stylesheet" href="../ol3/css/ol.css" type="text/css">
  -->
  <link rel="stylesheet" href="./js/libs/ol3-cesium-v1.8/ol3/css/ol.css" type="text/css">
 </head>
 <body>
  <div id="map2d" style="width:600px;height:400px;float:left;"></div>
  <div>
   <input type="button" value="Add 1k Features" onclick="javascript:addFeatures()" />
   <span id="total"></span>
  </div>
  <div id="created"></div>
  <div id="added"></div>
  <input type="button" value="Clear" onclick="javascript:clearFeatures()" />
  <!-- ディレクトリ修正
  <script src="../ol3/ol-debug.js"></script>
  <script src="../Cesium/Cesium.js"></script>
  <script src="../ol3cesium.js"></script>
  -->
  <script src="./js/libs/ol3-cesium-v1.8/ol3/ol-debug.js"></script>
  <script src="./js/libs/ol3-cesium-v1.8/Cesium/Cesium.js"></script>
  <script src="./js/libs/ol3-cesium-v1.8/ol3cesium.js"></script>
  <!-- <script src="synthvectors.js"></script> -->
  <script src="11-ol3cesium18.js"></script>
 </body>
</html>

OL3-Cesium 10 - ol3cesium exported methods example 2

10-2 JavaScript ファイルの作成
「exports.js(10-ol3cesium18.js)」は、マップを表示するための JavaScript ファイルです。

OL3-Cesium API は、現在、すべて実験的(experimental)なものです。

「10-ol3cesium18.js」
var ol2d = new ol.Map({
 layers: [
  new ol.layer.Tile({
  /** ol.layer.Tile 
   * For layer sources that provide pre-rendered, tiled 
   * images in grids that are organized by zoom levels for 
   * specific resolutions. 
   * プリレンダリング(事前描画)を提供するレイヤソースのための、
   * 特定の解像度でのズームレベルによって編成されているグリッドの
   * タイルイメージ。(ol3 API)
   */
   source: new ol.source.OSM()
   /** ol.source.OSM 
    * Layer source for the OpenStreetMap tile server.
    * OpenStreetMap タイルサーバのレイヤソース。(ol3 API)
    */
  })
 ],
 target: 'map',
 view: new ol.View({
  center: ol.proj.transform([25, 20], 'EPSG:4326', 'EPSG:3857'),
  /** ol.proj.transform(coordinate, source, destination)
   * Transforms a coordinate from source projection to 
   * destination projection. This returns a new coordinate 
   * (and does not modify the original).
   * ソース投影から変換先投影に座標変換します。これは、新しい座標
   * を返します(オリジナルを変更しません)。(ol3 API)
   */
  zoom: 3
 })
});
var ol3d = new olcs.OLCesium({map: ol2d});
/** new olcs.OLCesium(options)
 * map: The OpenLayers map we want to show on a Cesium scene.
 * Cesium シーンで表示したい OpenLayers マップ。
 * (OL3-Cesium API)
 */
var scene = ol3d.getCesiumScene();
/** getCesiumScene()
 * (OL3-Cesium API に説明がありませんでした。)
 */
var terrainProvider = new Cesium.CesiumTerrainProvider({
/** new CesiumTerrainProvider(options)
 * A TerrainProvider that access terrain data in a Cesium 
 * terrain format. The format is described on the Cesium 
 * wiki. 
 * セシウム地形(Cesium terrain)フォーマットの地形(terrain)
 * データにアクセスする TerrainProvider。フォーマットは、セシウ
 * ムウィキに記載されています。
 * (Cesium refdoc)
 */
 // url : '//cesiumjs.org/stk-terrain/tilesets/world/tiles'
 // 2015.10.2 変更
 url : '//assets.agi.com/stk-terrain/world'
 /** url
  * The URL of the Cesium terrain server.
  * セシウム地形(Cesium terrain)サーバの URL。
  * (Cesium refdoc)
  */
});
scene.terrainProvider = terrainProvider;
ol3d.setEnabled(true);
/** setEnabled(enable)
 * Enables/disables the Cesium. This modifies the visibility 
 * style of the container element.
 * セシウムを有効または無効にします。これは、コンテナ要素の可視
 * 性スタイルを変更します。
 * (OL3-Cesium API)
 */
var camera = ol3d.getCamera();
/** getCamera()
 * (OL3-Cesium API に説明がありませんでした。)
 */
var infoDiv = document.getElementById('infoDiv');
var printInfo = function() {
 infoDiv.innerHTML = 
  'Center: ' + camera.getCenter() + '<br />' +
  /** getCenter()
   * Shortcut for ol.View.getCenter().
   * ol.View.getCenter() のショートカット。
   * (OL3-Cesium API)
   */
  'Distance: ' + camera.getDistance() + '<br />' +
  /** getDistance()
   * Returns: Distance in meters. 
   * (OL3-Cesium API)
   */
  'Heading: ' + camera.getHeading() + '<br />' +
  /** getHeading()
   * Returns: Heading in radians.
   * (OL3-Cesium API)
   */
  'Tilt: ' + camera.getTilt() + '<br />' +
  /** getTilt()
   * Returns: Tilt in radians. 
   * (OL3-Cesium API)
   */
  '<i>Position:</i> ' + camera.getPosition() + '<br />' +
  /** getPosition()
   * Calculates position under the camera.
   * camera のもとで位置を計算します。
   * Returns: Same projection as the ol.View.  
   * (OL3-Cesium API)
   */
  '<i>Altitude:</i> ' + camera.getAltitude() + '<br />';
  /** getAltitude()
   * Returns: Altitude in meters.  
   * (OL3-Cesium API)
   */
};
setInterval(printInfo, 100);
/** WindowTimers.setInterval()
 * Calls a function or executes a code snippet repeatedly, 
 * with a fixed time delay between each call to that 
 * function. Returns an intervalID.
 * 関数を呼び出すか、各呼び出しとその関数の間に一定の時間遅延で、
 * 繰り返しコードスニペットを実行します。 intervalID を返します。
 * (MDN[https://developer.mozilla.org/en-US/docs/Web/API/
 * WindowTimers/setInterval])
 */
Chromium では表示できないので、Iceweasel(Firefox)のアドレスバーに

http://localhost/~user/ol3cesiumproj/public_html/10-ol3cesium18.html

と入力して表示します。

OL3-Cesium 10 - ol3cesium exported methods example 1

OL3-Cesium Examples
http://openlayers.org/ol3-cesium/examples/

の例をみていきます。

10 - ol3cesium exported methods example
「ol3cesium exported methods example (exports.html)」を参考に地図を表示してみます。

10-1 HTML ファイルの作成
1 NetBeans を起動します。


2 「プロジェクト」ペインでツリーを ol3cesiumproj -> サイト・ルート -> js -> libs -> ol3-cesium-v1.8 -> examples とクリックして展開し exports.html をダブルクリックして開きます。exports.js もダブルクリックして開きます。


3 「新規ファイル」ボタンをクリックします。

4 ステップ「1.ファイル・タイプを選択」の「カテゴリ」で「HTML5」、「ファイルタイプ」で「HTMLファイル」を選択して「次>」ボタンをクリックします。


5 「new HTML ファイル」ダイアログで「ファイル名」を「10-ol3cesium18」と入力して「終了」ボタンをクリックします。


保存フォルダを変更するときは、「フォルダ」右の「参照」ボタンをクリックして「フォルダを参照」で「ol3cesiumproj-サイト・ルート」をクリックして選択し「フォルダを選択」ボタンをクリックします。


6 「exports.html」の内容をコピーして「10-ol3cesium18.html」に貼り付け、修正します。

7 同じように、「新規ファイル」ボタンをクリックし、ステップ「1.ファイル・タイプを選択」の「カテゴリ」で「HTML5」、「ファイルタイプ」で「JavaScriptファイル」をクリックして選択し「次>」ボタンをクリック。「ファイル名」を「10-ol3cesium18」と入力して「終了」ボタンをクリック。「exports.js」の内容をコピーして貼り付け、修正します。


「index.html」
<html>
 <head>
  <title>TODO supply a title</title>
  <meta charset="UTF-8">
  <meta name="viewport" content="width=device-width, initial-scale=1.0">
 </head>
 <body>
  <div>TODO write content</div>
  <div><a href="./3-ol3cesium18.html">3-ol3cesium18.html</a></div>
  <div><a href="./4-ol3cesium18.html">4-ol3cesium18.html</a></div>
  <div><a href="./5-ol3cesium18.html">5-ol3cesium18.html</a></div>
  <div><a href="./6-ol3cesium18.html">6-ol3cesium18.html</a></div>
  <div><a href="./7-ol3cesium18.html">7-ol3cesium18.html</a></div>
  <div><a href="./8-ol3cesium18.html">8-ol3cesium18.html</a></div>
  <div><a href="./9-ol3cesium18.html">9-ol3cesium18.html</a></div>
  <div><a href="./10-ol3cesium18.html">10-ol3cesium18.html</a></div>
 </body>
</html>


「10-ol3cesium18.html」
<?xml version='1.0' encoding='UTF-8'?>
<!DOCTYPE HTML>
<html xmlns="http://www.w3.org/1999/xhtml" xml:lang="en" lang="en">
 <head>
  <meta http-equiv="Content-Type" content="text/html; charset=utf-8" />
  <meta name="robots" content="index, all" />
  <title>ol3cesium exported methods example</title>
  <!-- ディレクトリ修正
  <link rel="stylesheet" href="../ol3/css/ol.css" type="text/css">
  -->
  <link rel="stylesheet" href="./js/libs/ol3-cesium-v1.8/ol3/css/ol.css" type="text/css">
 </head>
 <body>
  <div id="map" style="width:600px;height:400px;float:left;"></div>
  <div id="infoDiv"></div>
  <input type="button" value="Enable/disable" onclick="javascript:ol3d.setEnabled(!ol3d.getEnabled())" />
  <br />
  <input type="button" value="setHeading(Math.PI / 6)" onclick="javascript:camera.setHeading(Math.PI / 6)" />
  <input type="button" value="setTilt(Math.PI / 8)" onclick="javascript:camera.setTilt(Math.PI / 8)" />
  <input type="button" value="setDistance(10 000 000)" onclick="javascript:camera.setDistance(10000000)" />
  <input type="button" value="setAltitude(10 000 000)" onclick="javascript:camera.setAltitude(10000000)" />
  <br />
  <input type="button" value="lookAt([35, 40])" onclick="javascript:camera.lookAt(ol.proj.transform([35, 40], 'EPSG:4326', 'EPSG:3857'))" />
  <input type="button" value="setCenter([40, 45])" onclick="javascript:camera.setCenter(ol.proj.transform([40, 45], 'EPSG:4326', 'EPSG:3857'))" />
  <input type="button" value="setPosition([45, 50])" onclick="javascript:camera.setPosition(ol.proj.transform([45, 50], 'EPSG:4326', 'EPSG:3857'))" />
  <!-- ディレクトリ修正
  <script src="../ol3/ol-debug.js"></script>
  <script src="../Cesium/Cesium.js"></script>
  <script src="../ol3cesium.js"></script>
  -->
  <script src="./js/libs/ol3-cesium-v1.8/ol3/ol-debug.js"></script>
  <script src="./js/libs/ol3-cesium-v1.8/Cesium/Cesium.js"></script>
  <script src="./js/libs/ol3-cesium-v1.8/ol3cesium.js"></script>
  <!-- <script src="exports.js"></script> -->
  <script src="10-ol3cesium18.js"></script>
 </body>
</html>