http://docs.geoserver.org/2.0.x/en/user/gettingstarted/index.html
の「Adding a PostGIS Table」
をクリックします。
Adding a PostGIS Table ページ
http://docs.geoserver.org/2.0.x/en/user/gettingstarted/postgis-quickstart/index.html
既に使用している PostGIS のデータを追加するので、「Getting Started」省略します。
「Create a new data store」
最初のステップは、PostGIS データベース "tokyo" の data store を作成します。
data store は GeoServer にデータベースの接続の方法を教えます。
0 SeoServer を起動します。
user@debian:~$ $GEOSERVER_HOME/bin/startup.sh
1 Web ブラウザのアドレス欄に 「http://localhost:8080/geoserver」と入力し実行します。
1a ログインします。
username: admin
password: geoserver
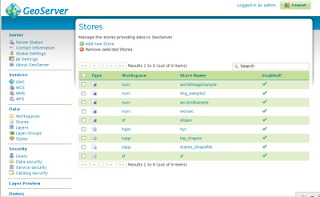
2 左側の欄の「Data」の「Stores」をクリックします。
2a 「Add new Store」をクリックします。
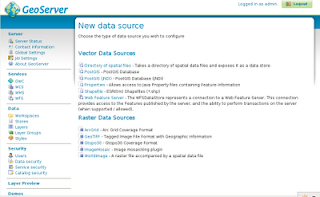
3 「PostGIS」をクリックします。
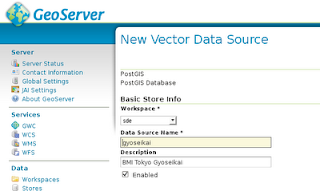
4 Workspace の初期設定は変えずに、Basic Store Info の Name と Description を入力します。
Workspace: sde (変更なし)
Data Source Name: Tokyo
Description: Land Numerical Info. Tokyo (説明、任意です)
Enabled: チェックする(変更なし)
5 PostGIS データベースの Connection Parameters を指定します。
dbtype: postgis (変更なし)
host: localhost (変更なし)
port: 5432 (変更なし)
database: tokyo
schema: public (変更なし)
user: user (gyoseikai テーブルに接続できるユーザ)
password: ●●●●●●● (user がテーブルに接続するときのパスワード)
Namespace: http://geoserver.sf.net(固定)
max connections: 10 (変更なし、任意です)
min connections: 1 (変更なし、任意です)
fetch size: 1000 (変更なし、任意です)
Connection timeout: 20 (変更なし、任意です)
validate connection: チェックする
Primary key metadata table: (空、変更なし、任意です)
Loose bbox: チェックする(変更なし)
preparedStatements: チェッしない(変更なし)
Max open prepared statements: 50 (変更なし、任意です)
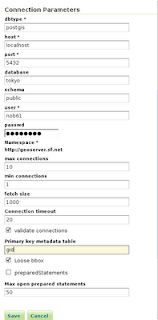
6 「Save」ボタンをクリックします。
追加されたレイヤ一覧が表示されます。
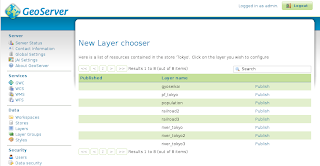
「Layer Configration」
0 「Create a new data store」から続けて操作しても OK です。
1 左側の欄の「Data」の「Layers」をクリックします。
2 「Add a new resource」をクリックします。
3 「New Layer chooser」の「Add a layer from」ドロップダウンから「sde:Tokyo」を選択します。
4 Tokyo store のリソース(レイヤ)のリストが表示されます。
「gyoseikai」の「Publish」をクリックします。
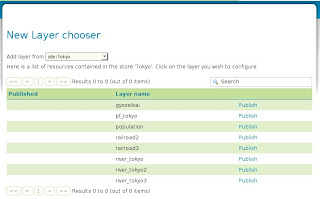
5 選択したレイヤのリソースと編集した情報の設定をします。
「Basic Resource Info」を入力します。
Name: gyoseikai (変更なし)
Title: Gyoseikai (最初の文字を大文字に変更 任意)
Abstract: Land Numerical Info. Tokyo Gyoseikai (任意)
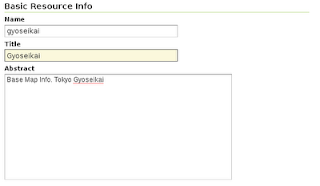
「Keywords」を入力します。
Current Keywords: (追加したキーワードが表示されます)
New Keyword: gyoseikai, tokyo (1つずつ入力して「追加」ボタンをクリック)

「Metadata links」は変更しません。
「Coordinate Reference Systems」を入力します。
Native SRS: 空(変更なし)
Declared SRS: EPSG:4326 (「Find」ボタンをクリックして「4326」を検索して表示された「4326」をクリック)
SRS handling: Force declared (変更しない)

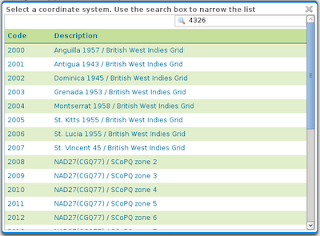


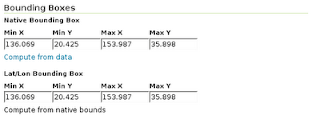
6 「Bounding Boxes」を入力します。
Native Bounding Box: (「Compute from data」をクリック -以下の値が入力されました)
Min X: 136.069
Min Y: 20.425
Max X: 153.987
Max Y: 35.898
Lat/Lon Bounding Box: (「Compute from native bounds」をクリック -以下の値が入力されました)
Min X: 136.069
Min Y: 20.425
Max X: 153.987
Max Y: 35.898
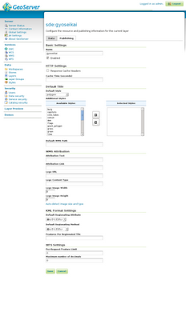
7 ページ上部の「Publishing」タブをクリックします。
8 「Default Title」の「Default Style」が「polygon」になっていることを確認します。
(他は変更しません。)
9 ページ下部の「Save」ボタンをクリックします。
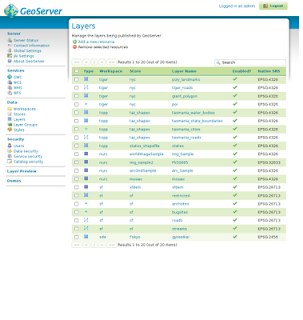
「Layer」ページの一番下に「gyoseikai」が追加されます。
「Preview the Layer」
1 左側の欄の「Layer Preview」をクリックし、「gyoseikai」を検索します。
2 Common Formats 列の「OpenLayers」をクリックします。
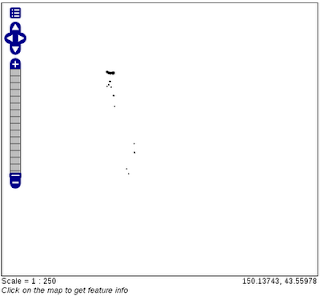
3 成功すれば、OpenLayers Map がポリゴンで表示されます。
範囲が諸島部まで入っていました。


0 件のコメント:
コメントを投稿